DaVinci Resolve Tutorial For Beginners
For a while, Adobe Premiere Pro and Apple’s Final Cut Pro were the most common NLEs (non-linear editors) on the market. But, an unlikely video editing software has come out of the woodwork in the last few years, establishing itself as a heavy hitter in the industry.
DaVinci Resolve started out as merely an advanced color grading application but was reworked after Blackmagic Design bought DaVinci Resolve back in 2009. DaVinci Resolve has since become one of the most capable editing applications on the market for professional video creators and amateurs alike
This beginner’s tutorial to DaVinci Resolve will go over everything you need to know about how to edit video with the platform. Those using DaVinci Resolve 17 and DaVinci Resolve 18 will be able to follow along without a problem. We’ll go over a slew of different editing techniques and workflows for both Mac and Windows devices.
Note: Resolve is great at a lot of things but it isn't a comprehensive tool when it comes to captioning and transcribing your videos. For that, you'll need Simon Says, and our handy Resolve extension that runs natively in the platform.
Understanding the editing tools in DaVinci Resolve
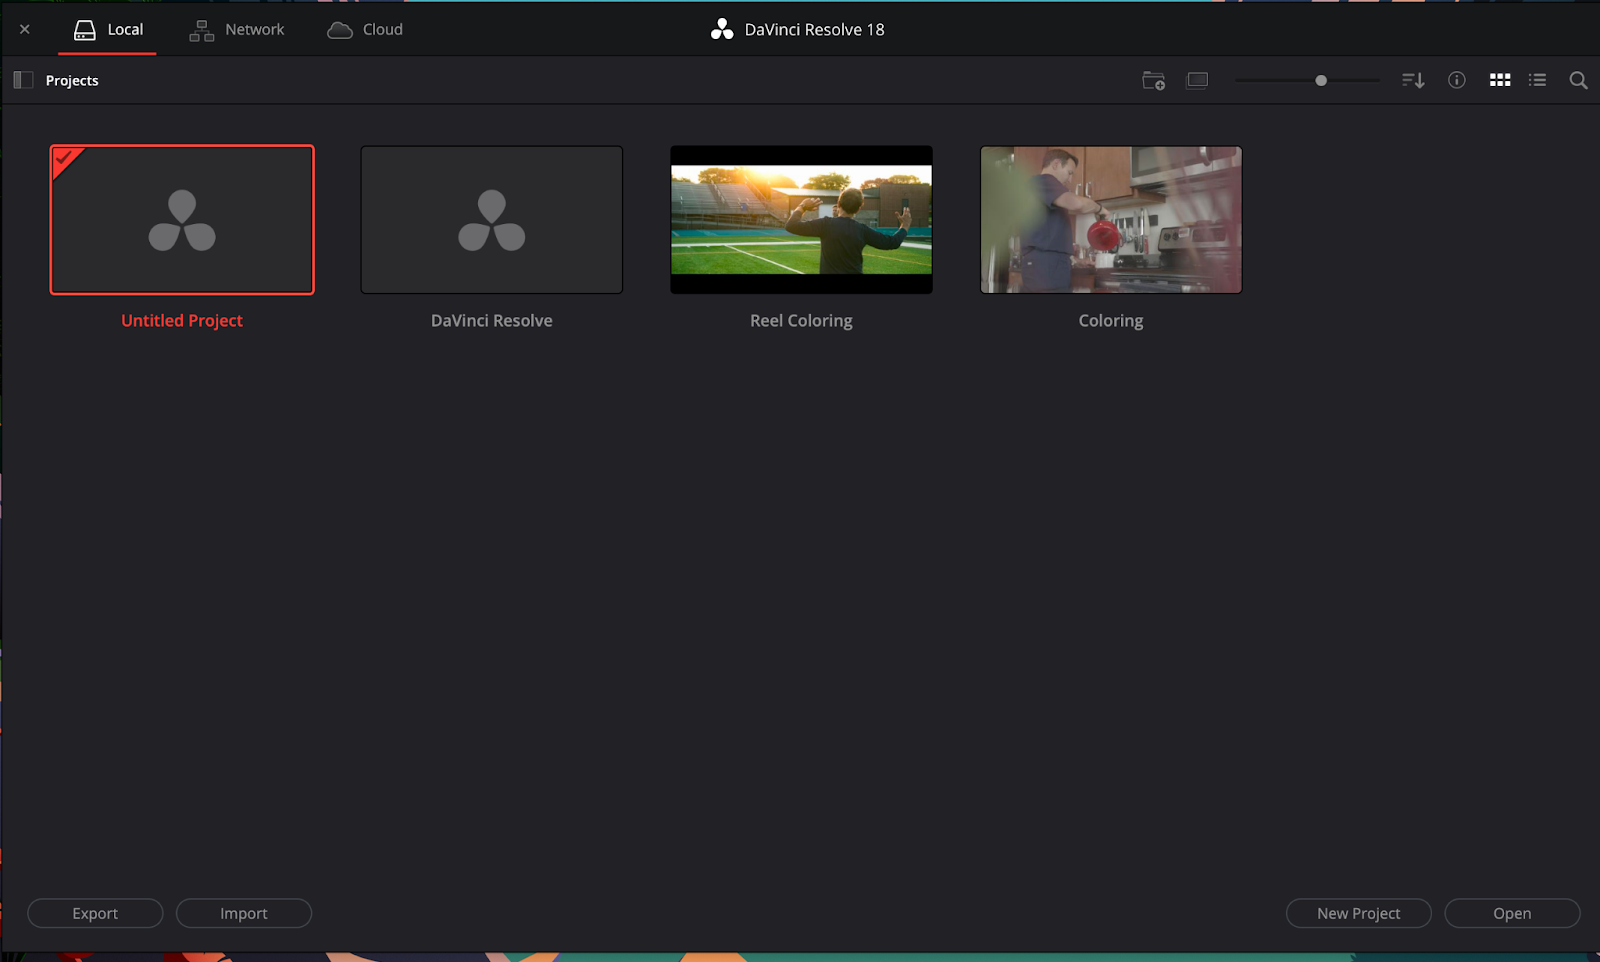
DaVinci Resolve might seem complicated at first, but the interface is quite simple once you get accustomed to everything. Upon opening DaVinci Resolve, you’ll be greeted by a pop-up window allowing you to create a new project or open pre-existing ones.
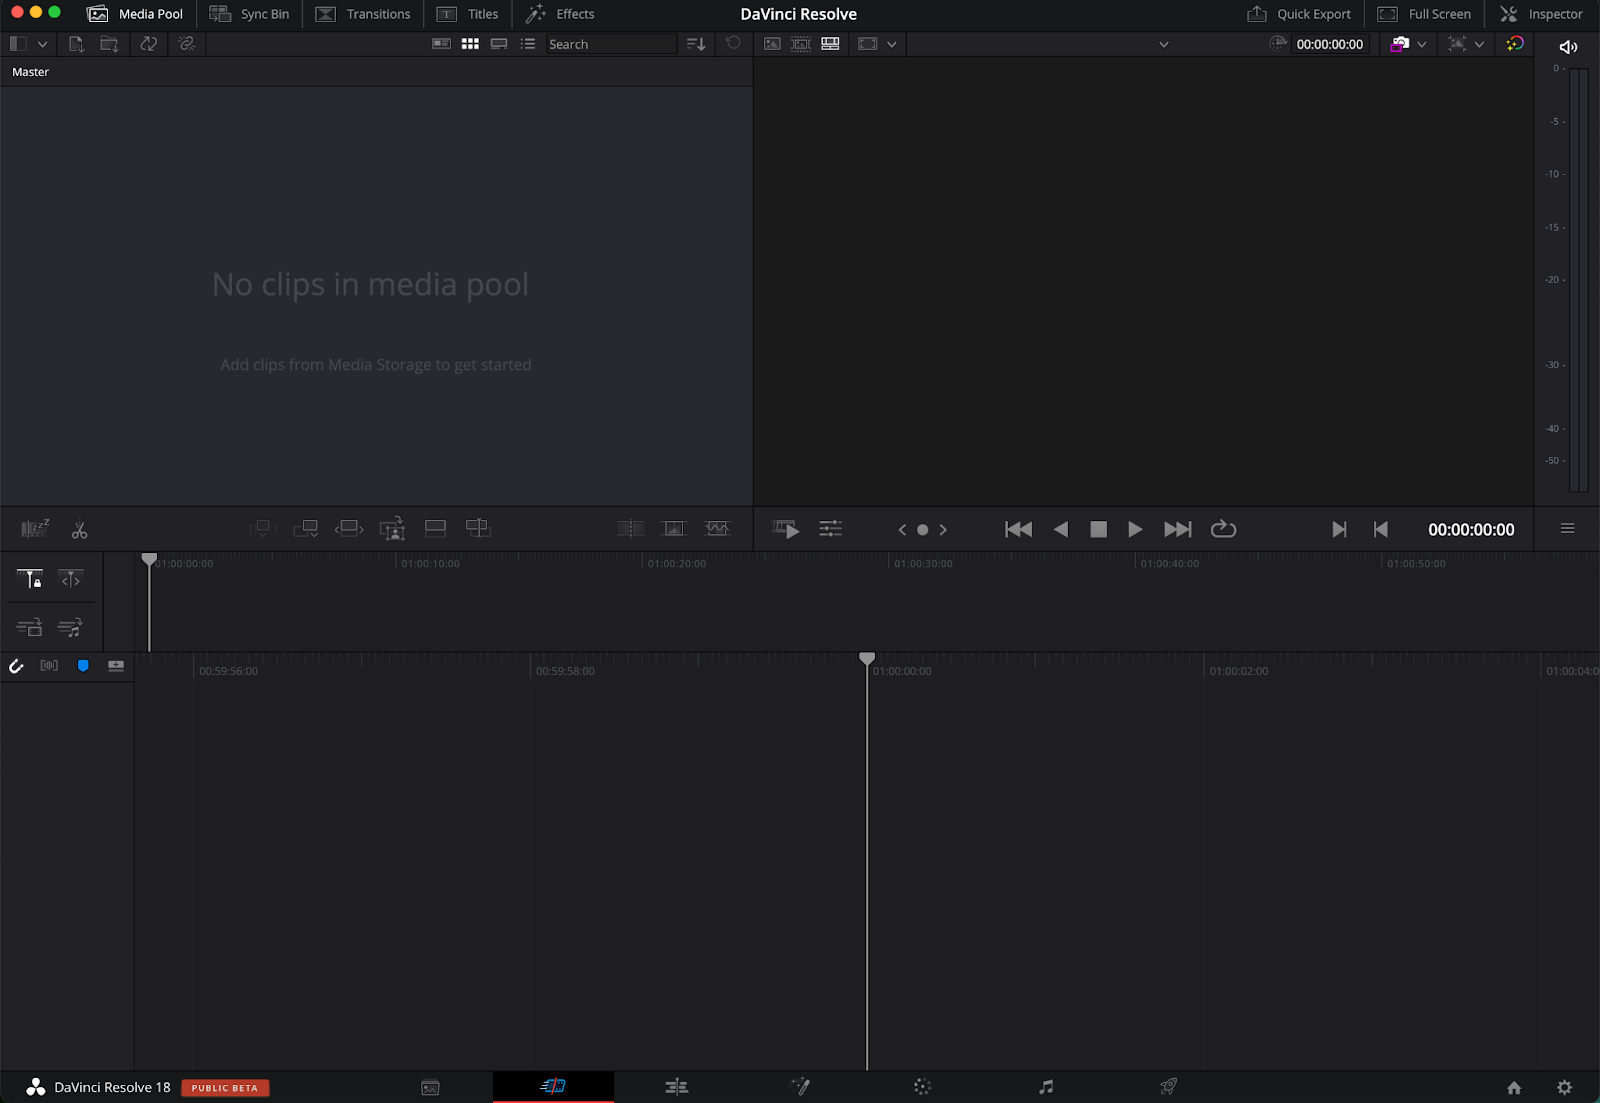
Once you create a new project, an empty DaVinci Resolve window will open with 7 different workstations that are all available to you at the bottom of the screen. These pages will be how you navigate Resolve.
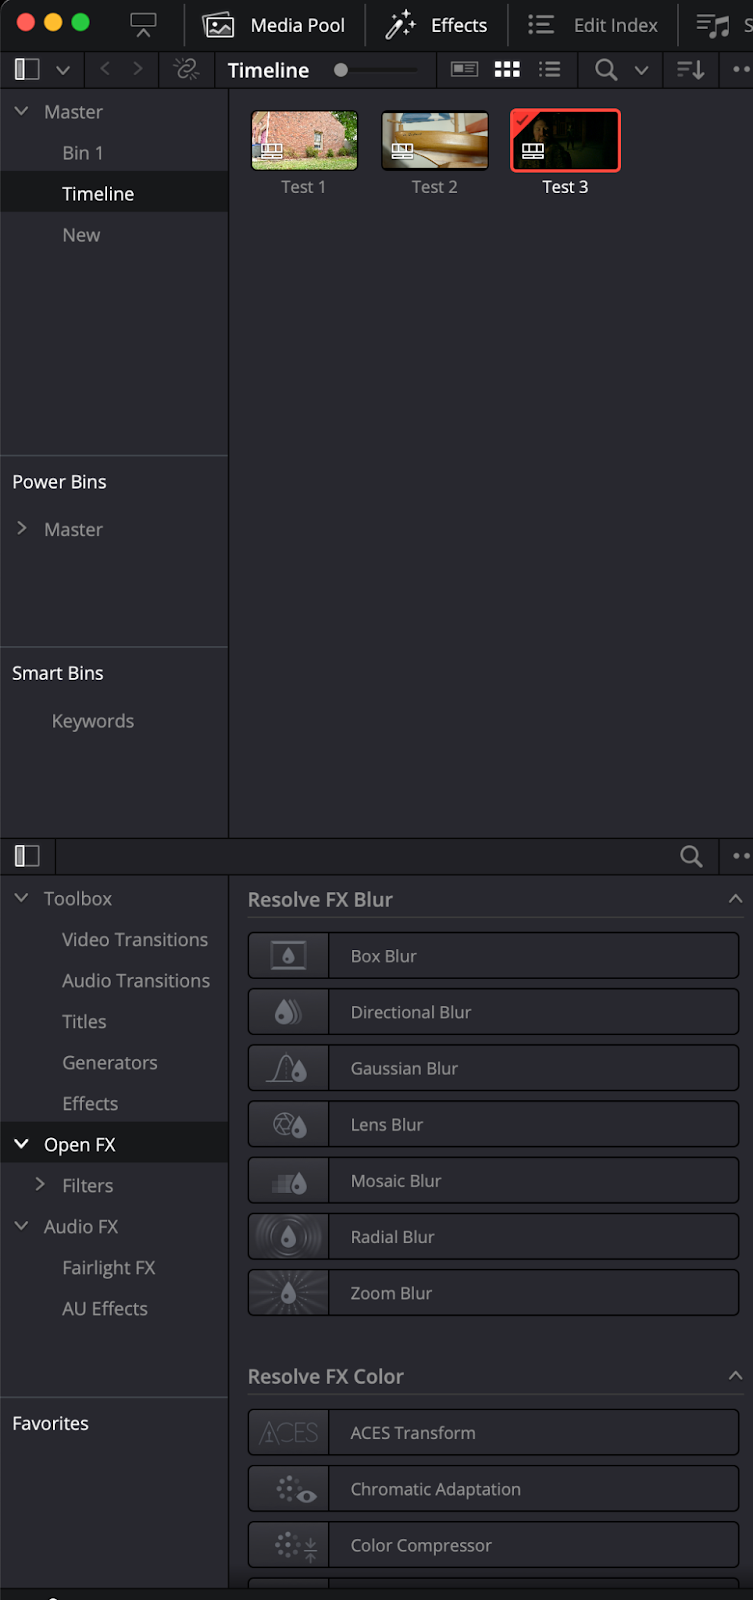
Media Page: The Media Page is what opens up by default in DaVinci Resolve and lets you import footage and create new bins and timelines with ease.

Cut Page: Inside the Cut Page is a large timeline editor for you to work in. This workspace is great for video editors creating a first, rough edit of their creation. It’s also handy for scrubbing through footage and picking out the best bits of B-roll.
Edit Page: The Edit Page is the swiss army knife of DaVinci Resolve pages and is where most editors will be spending their time. It has easy access to scaling options, transitions, the effects library, and a simple way to access video clips.

Fusion Page: Inside the Fusion Page is an incredibly advanced visual effects editor. There are a slew of compositing and plugin options as well as ways to create stunning motion graphics. The Fusion page uses a node editor which has a steep learning curve that can pay off greatly once you know how to use it.

Color Page: The Color Page is DaVinci Resolve’s bread and butter and is a colorist's dream. Inside the Color Page are a slew of amazing coloring tools for color correction and color grading, including things such as LUT presets.

Fairlight Page: The Fairlight Page is great for those working with a plethora of audio files. Audio monitors are easily accessible at the top, with a large timeline at the bottom to work audio files into.

Deliver Page: Finally, there’s the Deliver Page which lets you export your video creation either to your computer or to social media platforms.
It’s best to experiment and figure out which workspace fits your needs best. You can also customize your workspace and create saved layouts.
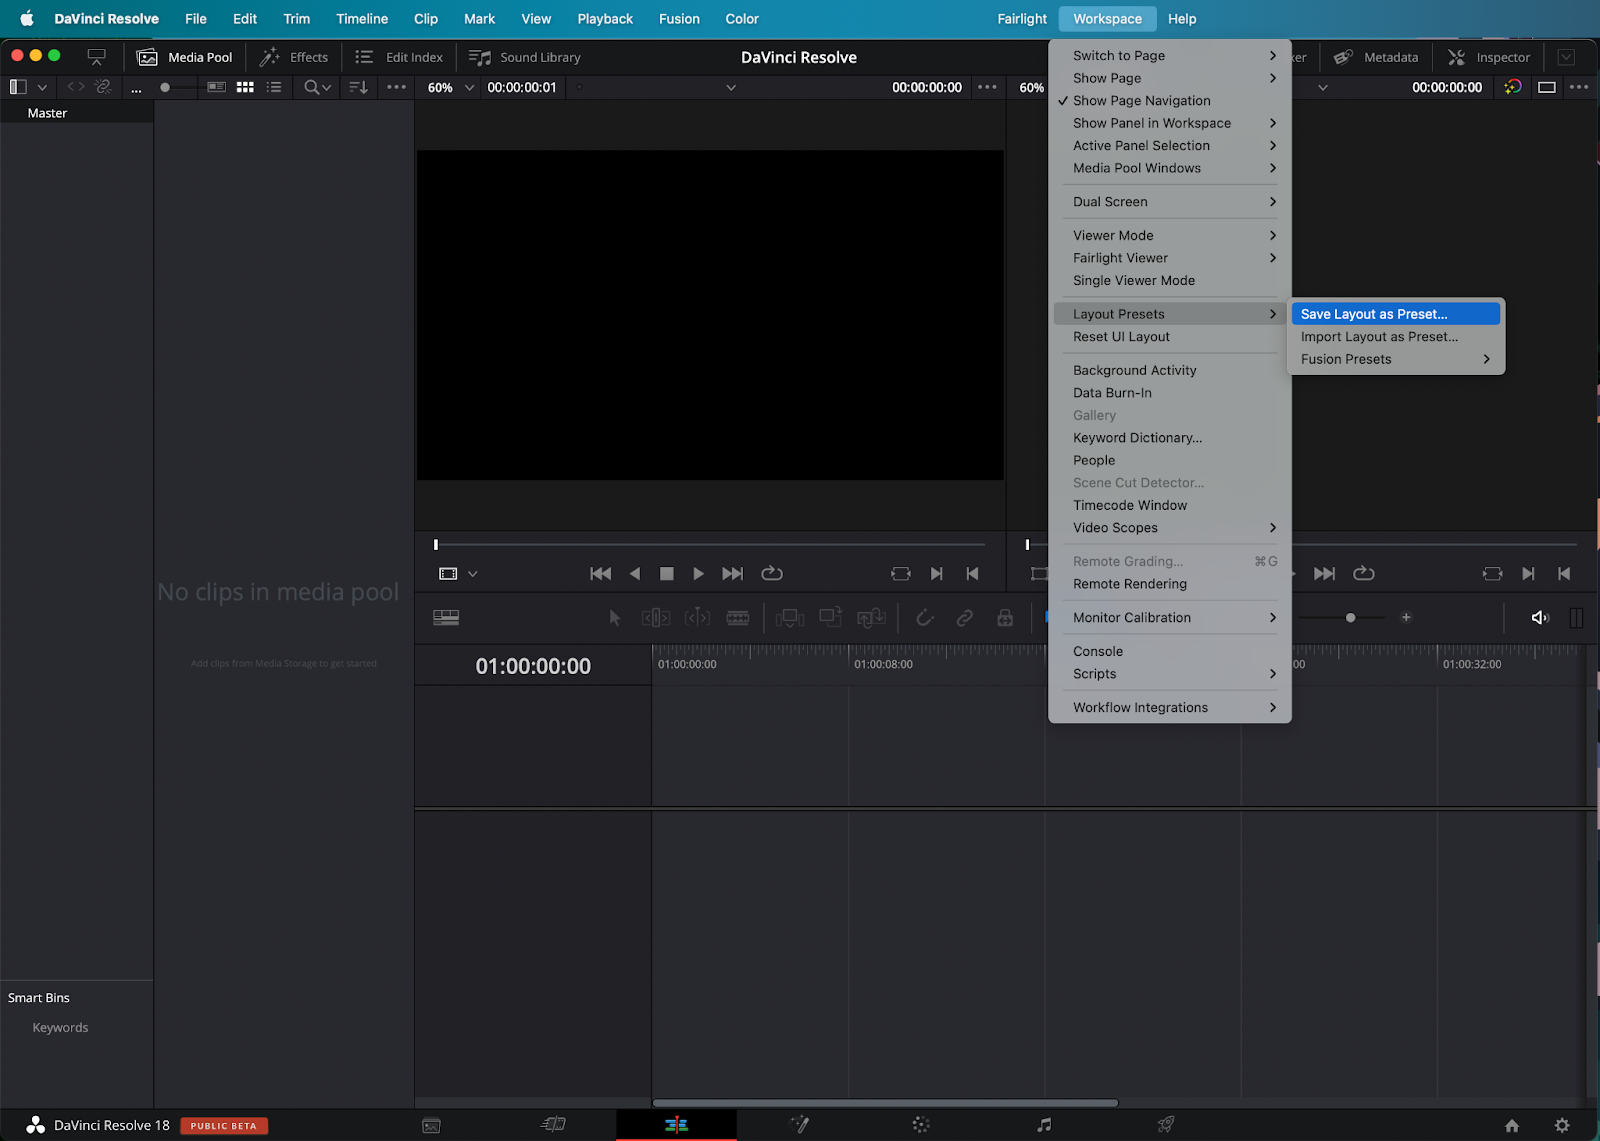
Another great thing that you can do when it comes to customization is a customized keyboard layout.
We have a detailed post showing everything you’ll need to know about keyboard customization and keyboard shortcuts in DaVinci Resolve.
How to create a new project
As stated earlier, you have the option to create a new DaVinci Resolve project immediately upon opening the software. Creating a new project in DaVinci Resolve can also be done by going to File > New Project.

How to import media
Of course, you’ll need to import media to start creating content. Importing video clips is as easy as going to File > Import > Media or by clicking ⌘I on Mac or CTRL + I on Windows. You can also drag and drop footage from your finder window directly into your media pool.
Doing this inside of the Media Page will give you access to all of your footage metadata once you click on it.

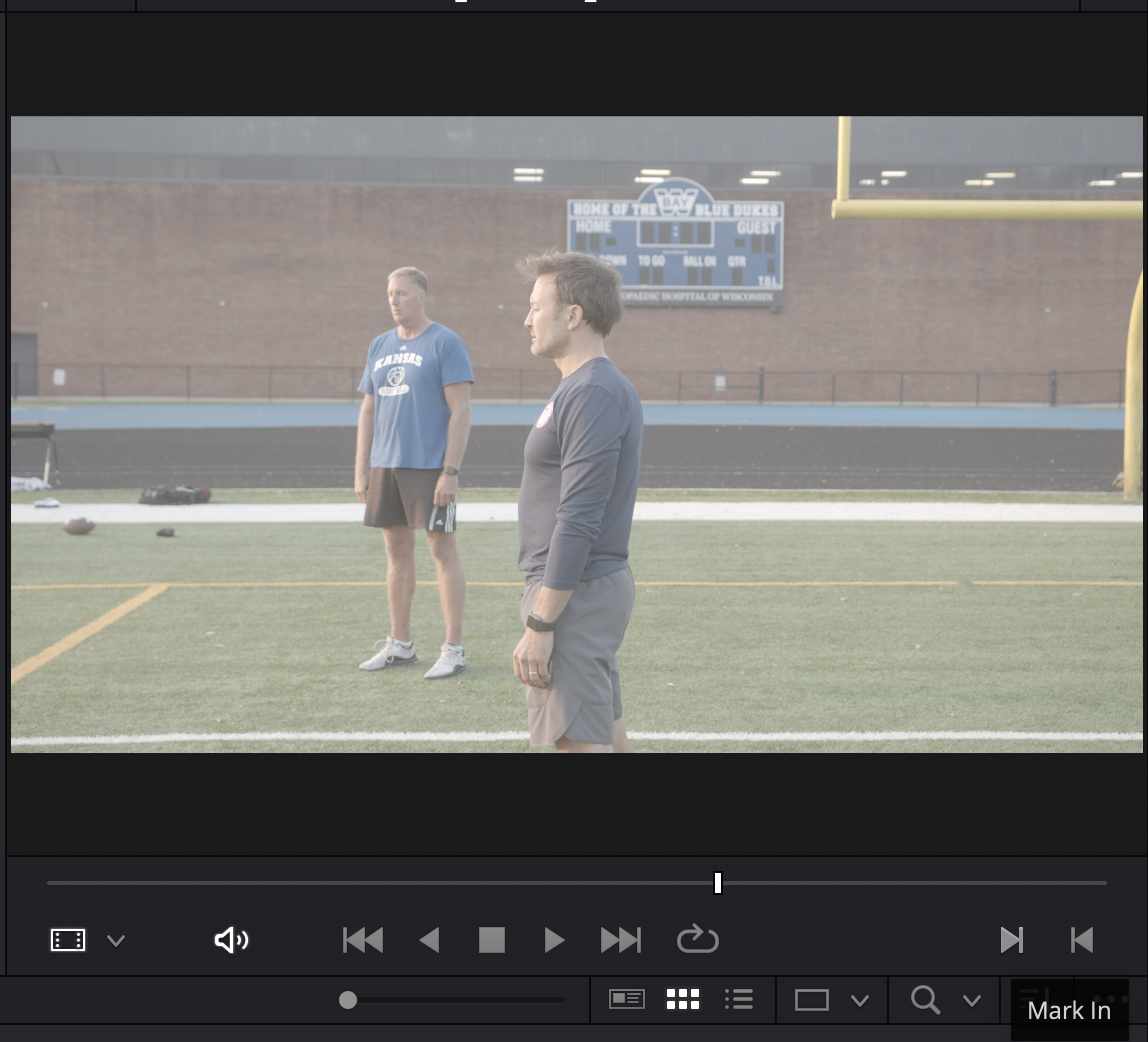
You can also mark in and mark out in specific areas by clicking the mark in and mark out arrows underneath the playback window. Marking in and out is handy to select particular points in your footage. This is a handy way to add B-roll as well.
Working in the timeline
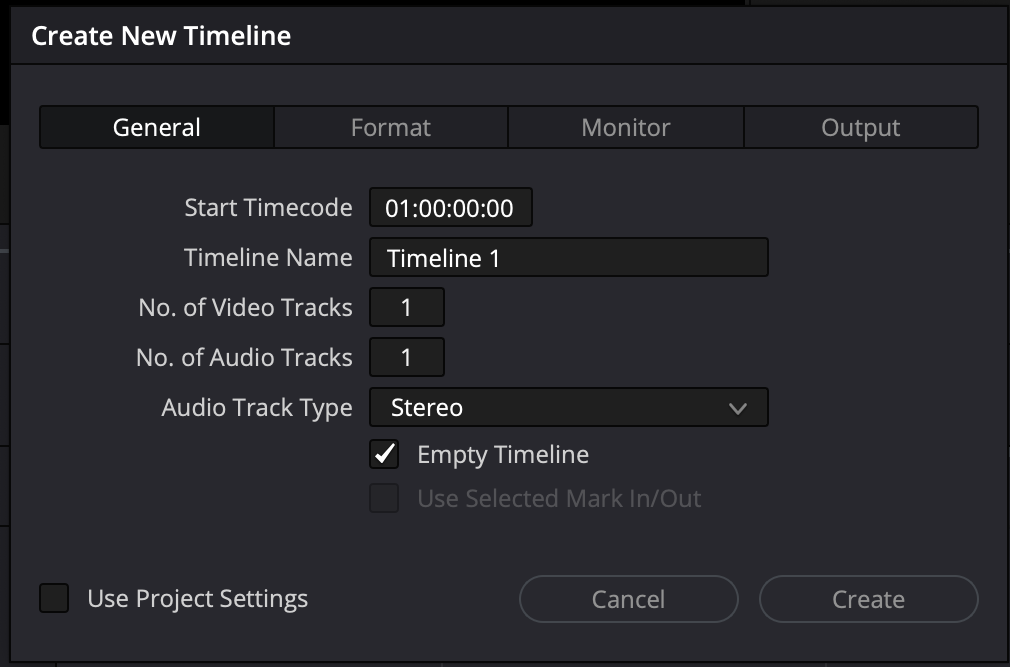
Now where do you put your footage? All editing is done in a thing known as a timeline. To create a new timeline, you’ll want to right-click inside the media pool and go to Timelines > Create New Timeline (or ⌘N on Mac and CTRL + N on Windows). You can also go to File > New Timeline.
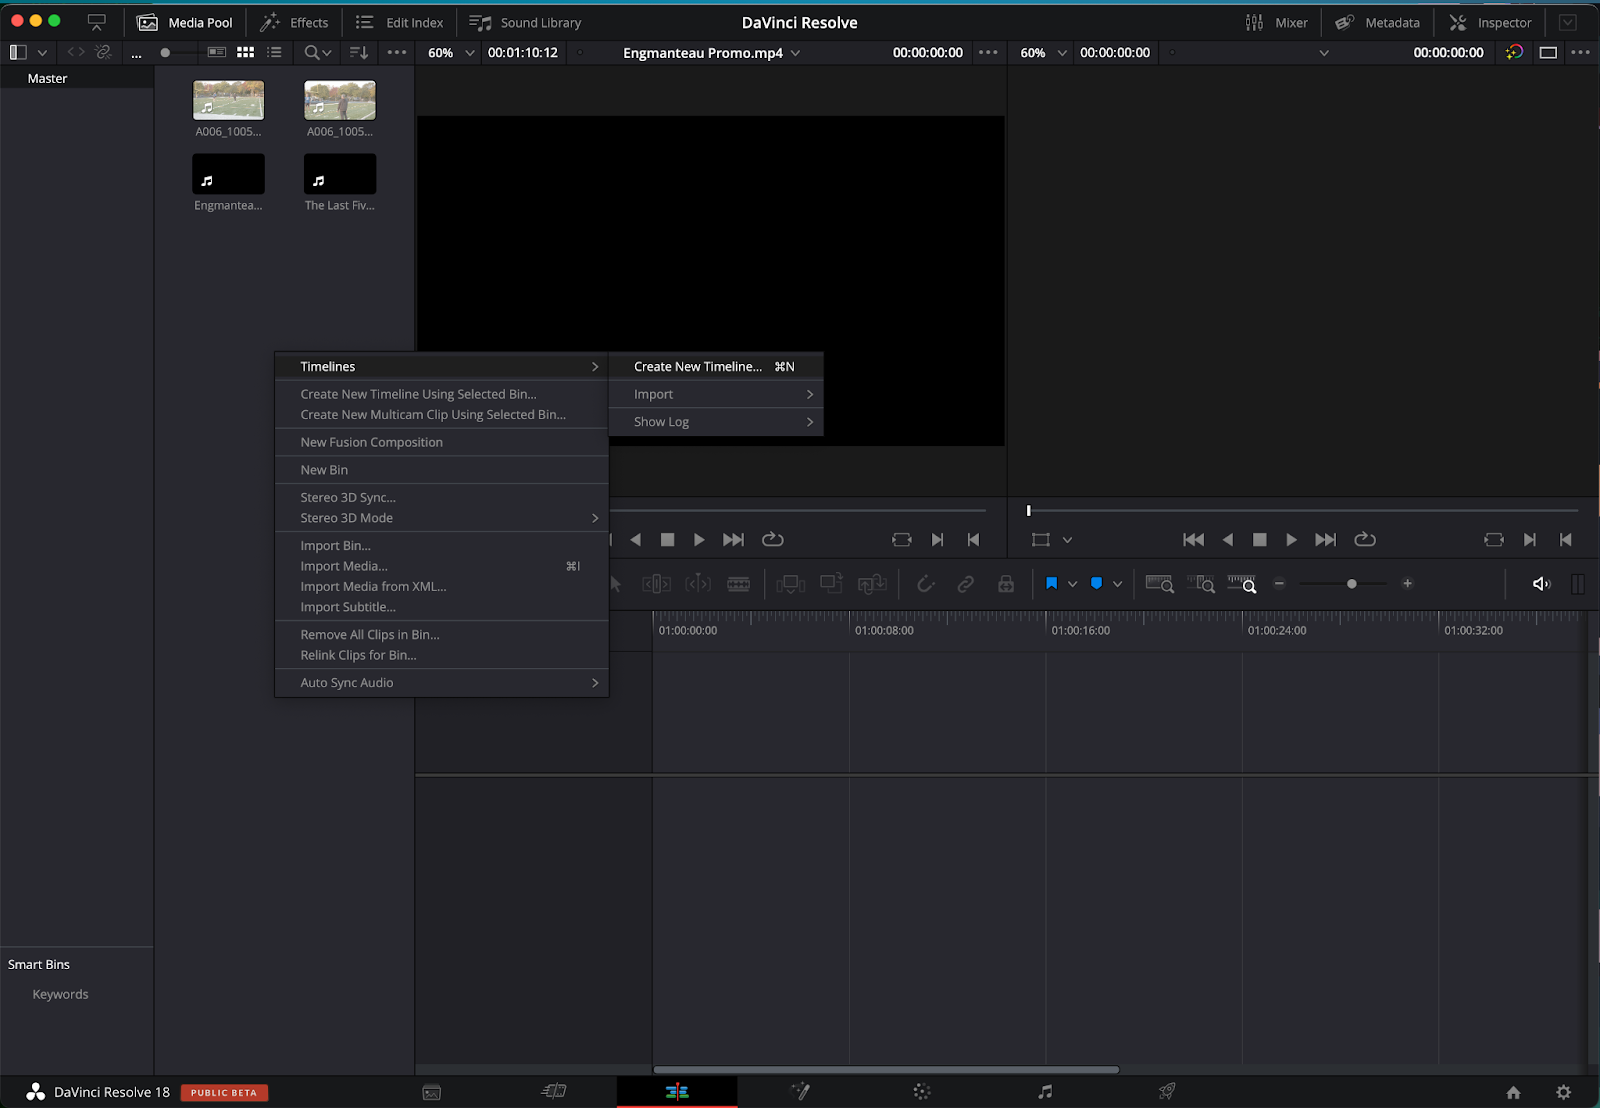
Once this is selected, a pop-up window will appear allowing you to choose your timeline settings. By default, the timeline will be set to whatever your video project settings are. You can change your project settings by clicking on the gear icon in the lower right hand corner of the screen, adjusting things such as frame rate and resolution.
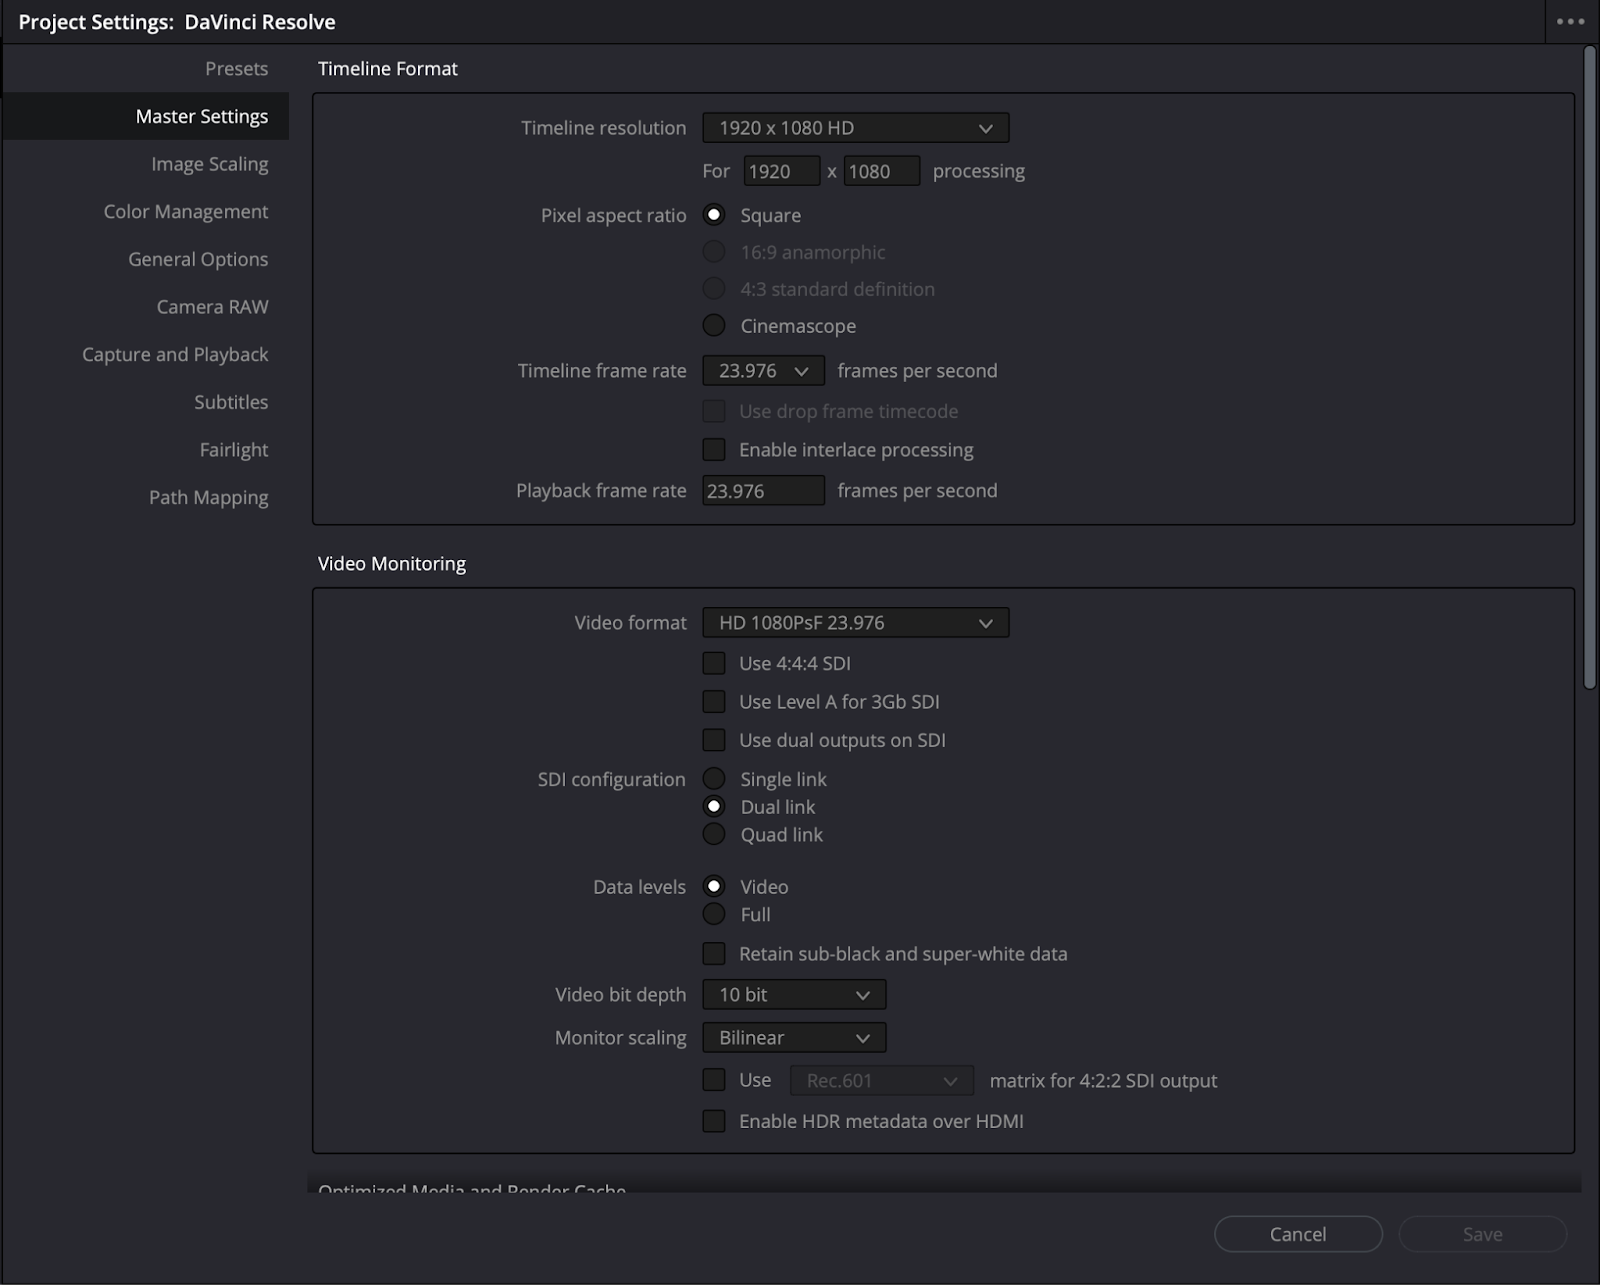
If you want your timeline to be different than your project settings though, you’ll want to deselect the Use Project Settings checkbox. Doing this will let you change the format options of your timeline.
Once your timeline is created, it’ll automatically be put into the media pool. You can create new bins (or folders) by right-clicking in the media pool and clicking on New Bin.
Creating new bins allows for more organization within the media pool since you can throw things such as footage, timelines, and audio inside of there.

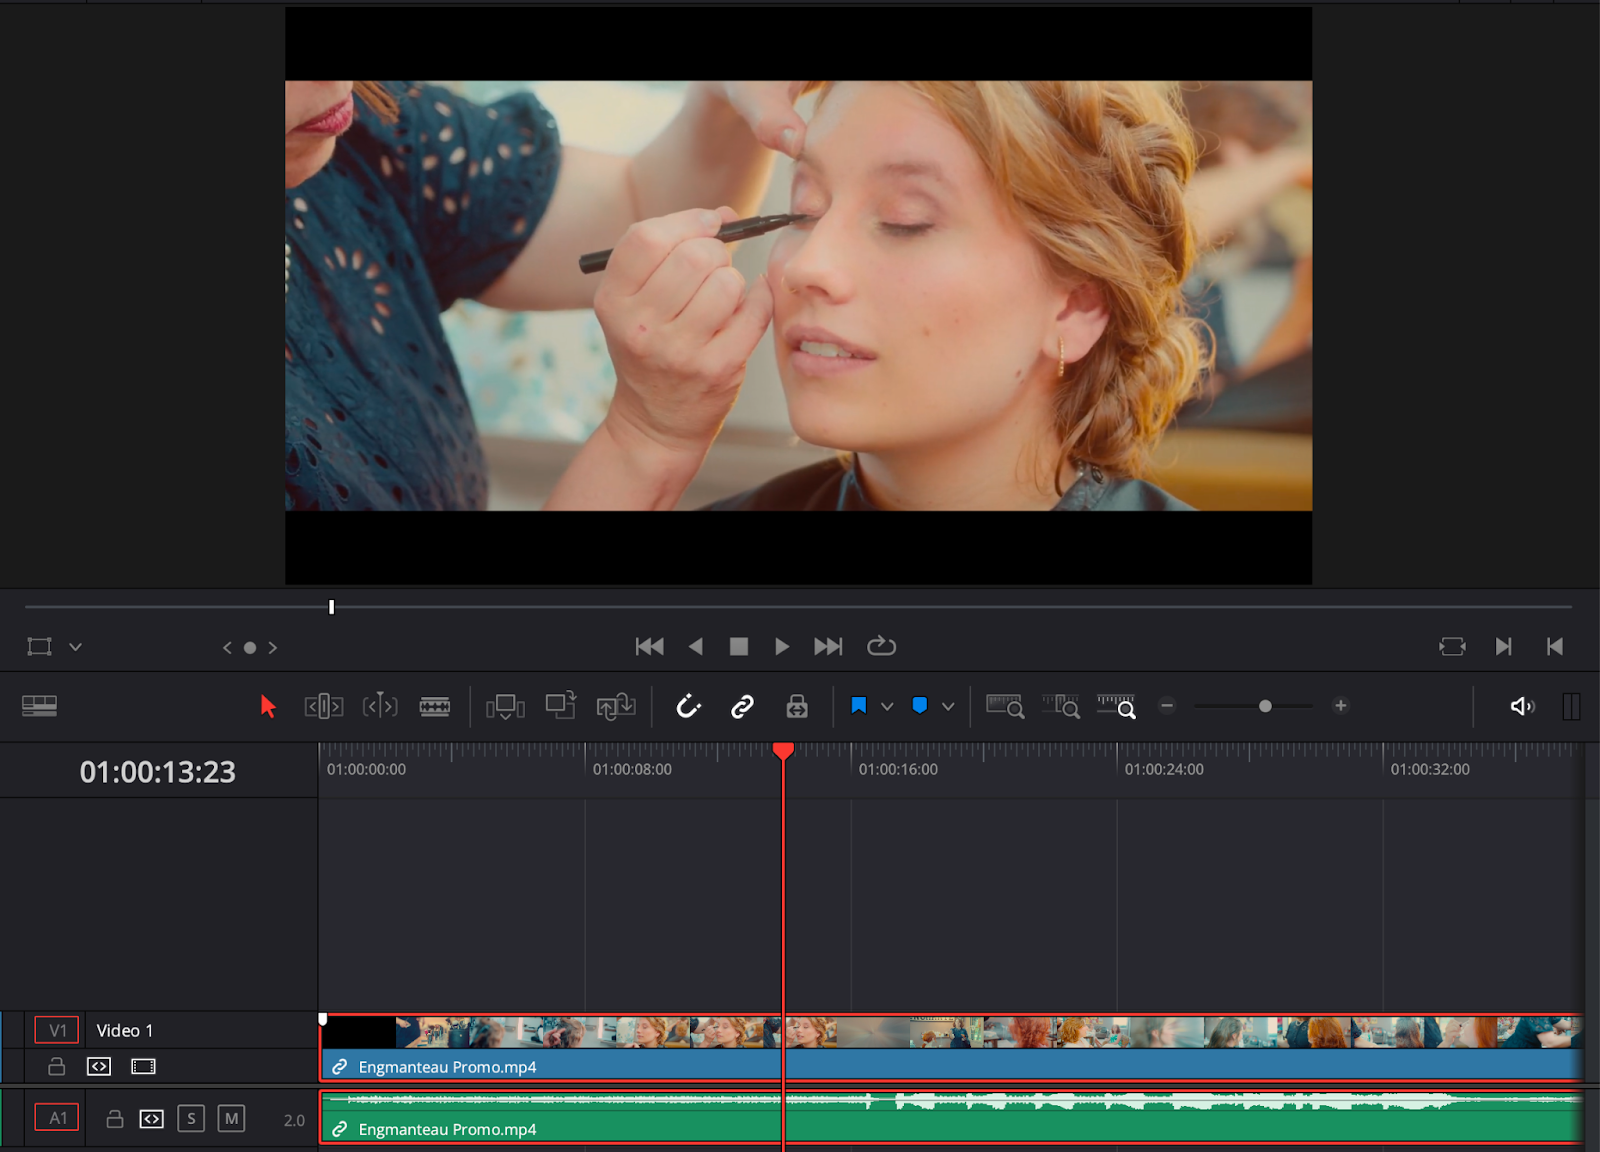
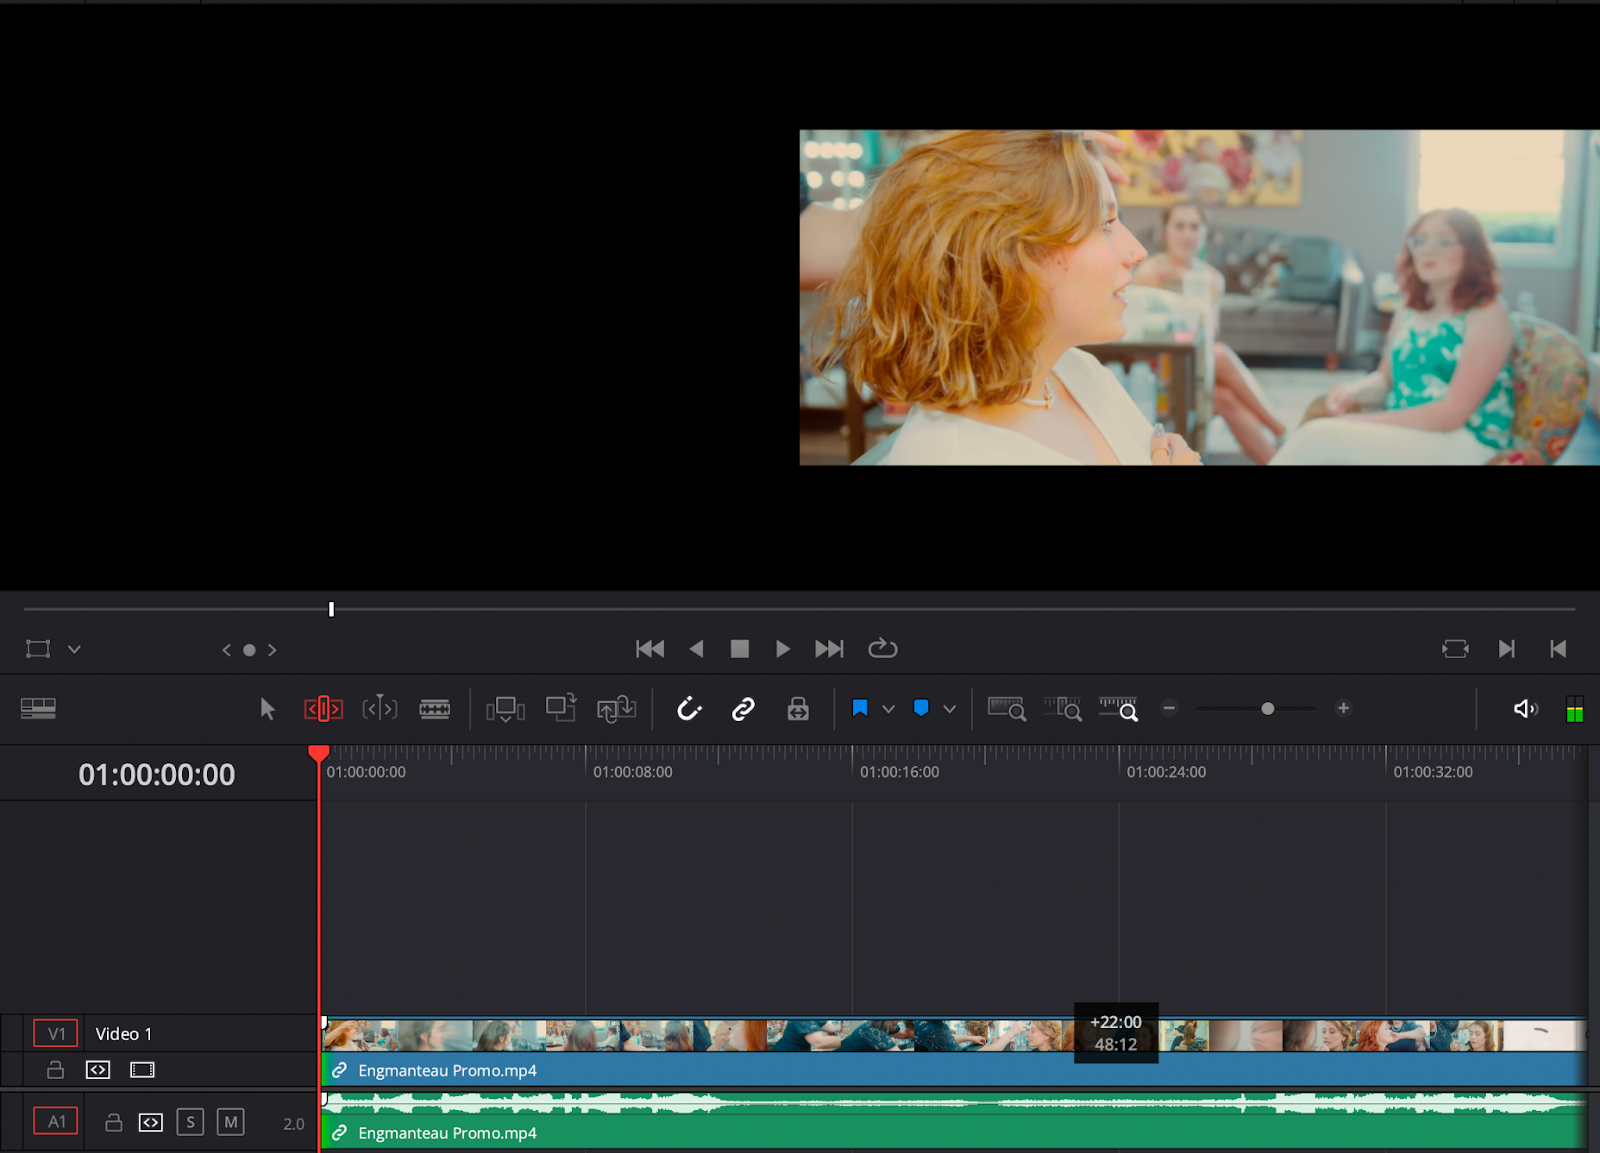
After your timeline is created, you can put footage inside of it by dragging and dropping it from your media pool. On the top of the timeline are editing tools that you can use to manipulate your footage.
- Selection Mode (Hotkey “A”) - lets you drag footage around the timeline. You can shorten or lengthen your clip by pulling on the very end of it (indicated by a white marker).
- Trim Mode (Hotkey “T”) - trims your clip without interfering with your timeline or the clips around it.
- Dynamic Trim MOde (Hotkey “W”) - trims or moves your clip without interfearing with your timeline or other clips around it AND lets you trim clips while editing.
- Blade Tool (Hotkey “B”) - lets you create cuts inside of your footage. A line will appear on your footage indicating where a cut has been made.

How to add audio and music
Audio and music are added in a similar way to footage. Like before, importing audio and music clips is as easy as going to File > Import > Media or by clicking ⌘I on Mac or CTRL + I on Windows. You can also drag and drop audio from your finder window directly into your media pool.
Editing audio is a breeze in the Fairlight Page. In the Fairlight Page, you have quick and easy access to your audio effects and mixers.
How to add effects and transitions
Adding transitions in DaVinci Resolve is similar to adding video effects. Like video effects, transitions can be created manually or through the use of templates. Most users will be going the template route when it comes to transitions.
In DaVinci Resolve, transitions can be accessed by clicking the magic wand icon (Effects) in the upper left-hand corner. This opens a small window at the bottom of the screen containing video transitions, audio transitions for sound effects, motion graphics, and open FX.
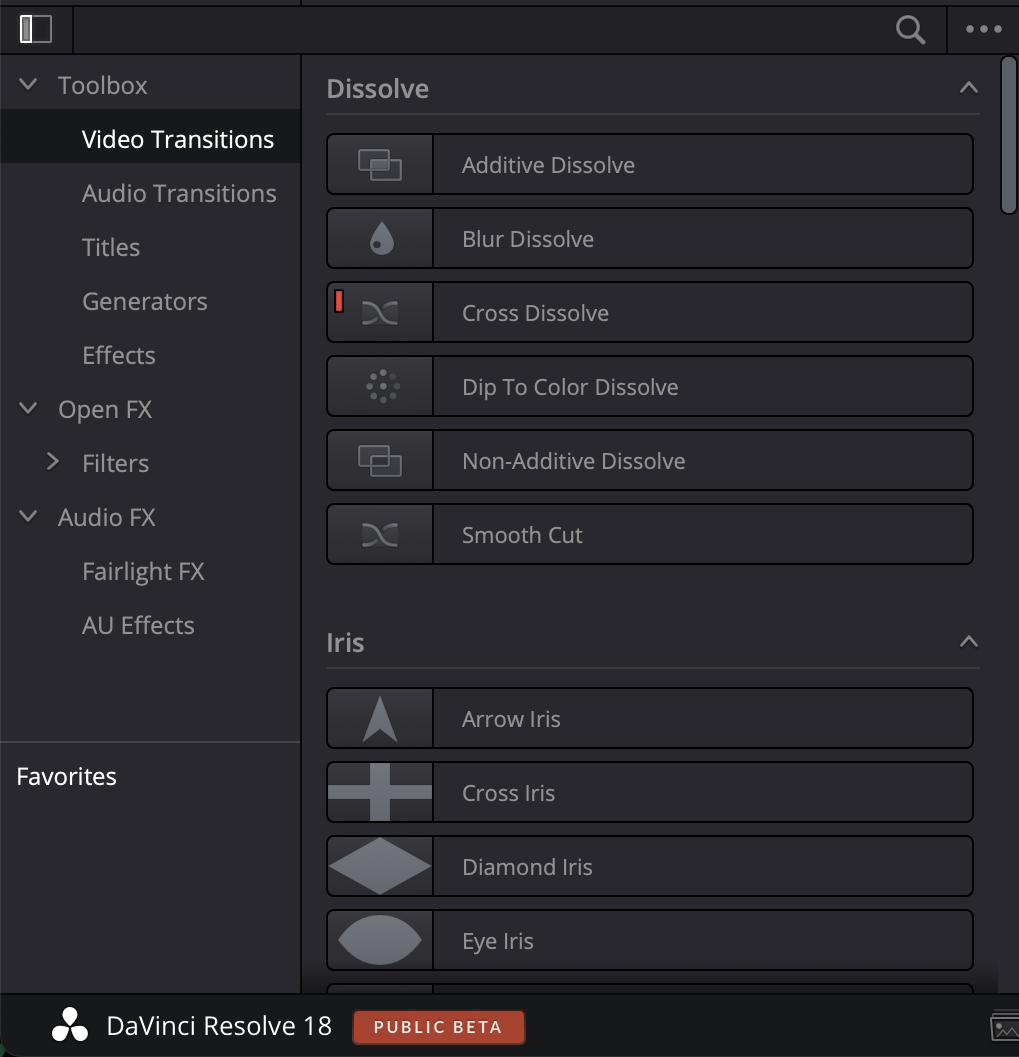
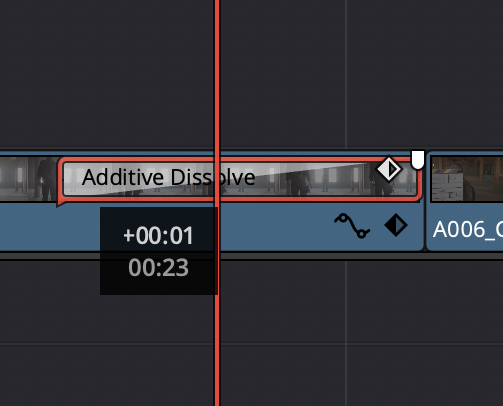
To apply a transition, all you need to do is drag and drop your desired effect on top of the footage in your timeline. Right-clicking on transitions will allow you to add them to your favorites as well which is incredibly handy if there are certain transitions that you regularly use in video editing. You can also resize the transition by scaling the white transition box that appears on top of the footage.
We have a previous post detailing everything you’ll need to know about effects and transitions in DaVinci Resolve.
How to color grade and color correct
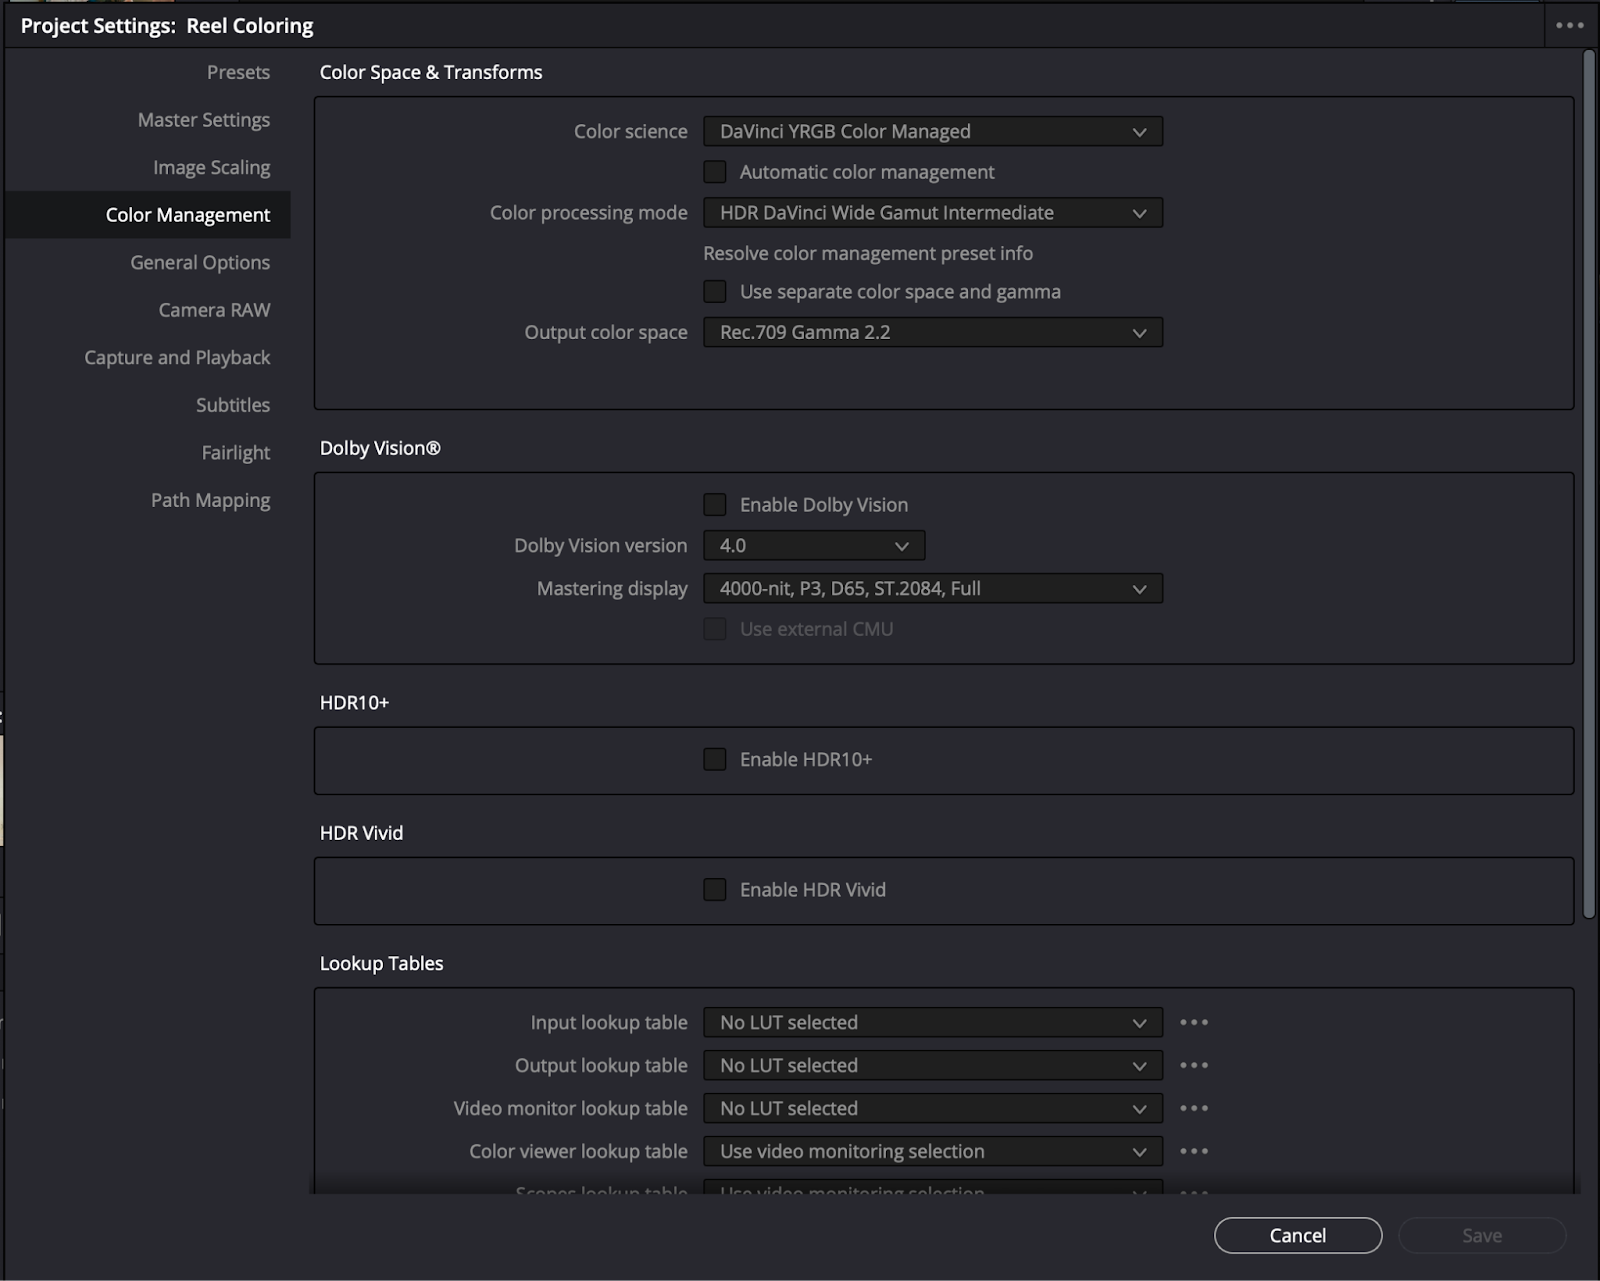
Within the Color page, you’ll find everything needed to color your image. Before starting with your grade, you’ll want to go into Project Settings. This can be accessed by clicking on the gear icon in the bottom right-hand corner. From here, you’ll want to go into the Color Management tab so that you can adjust your color space settings.
Color spaces are how DaVinci Resolve processes the color of your footage. The main things to focus on for beginners are Color Science, Color Processing Mode, and Output Color Space. For those new to DaVinci, it’s best to leave these settings as their default.
Resolve uses what is known as a Node Editor for coloring. This is an area where DaVinci Resolve is quite different when compared to traditional NLEs. Nodes are wonderful because of the amount of control they offer video editors. They’re great for colorists though and allow different effects to be connected to one another very precisely in almost a web-like shape (or node tree).

Creating a new node is as simple as right-clicking inside the node editor and going down to Add Node. You can assign different effects and colors to these nodes, allowing for an incredibly fast and intuitive workflow.
At the bottom of the screen are all of the wonderful color tools that DaVinci Resolve has to offer. There’s:
- Camera Raw
- Color Match
- Color Wheels
- HDR Grade
- RGB Mixer
- Motion Effects
- Curves
- Color Warper
- Qualifier
- Window
- Tracker
- Magic Mask
- Blur
- Key
- Sizing
- 3D
Each of these bottom windows is represented by an icon. Let’s go over Curves first. Curves give you much more control over a lot of basic coloring features. For example, the RGB Curve is used to adjust the contrast of your image.
A simple “S curve” will boost the highlights and darken the shadows. You can create a curve by clicking on the line in the middle of the color graph. A dot will form that you can drag around. Right-clicking this dot will reset everything back to normal.

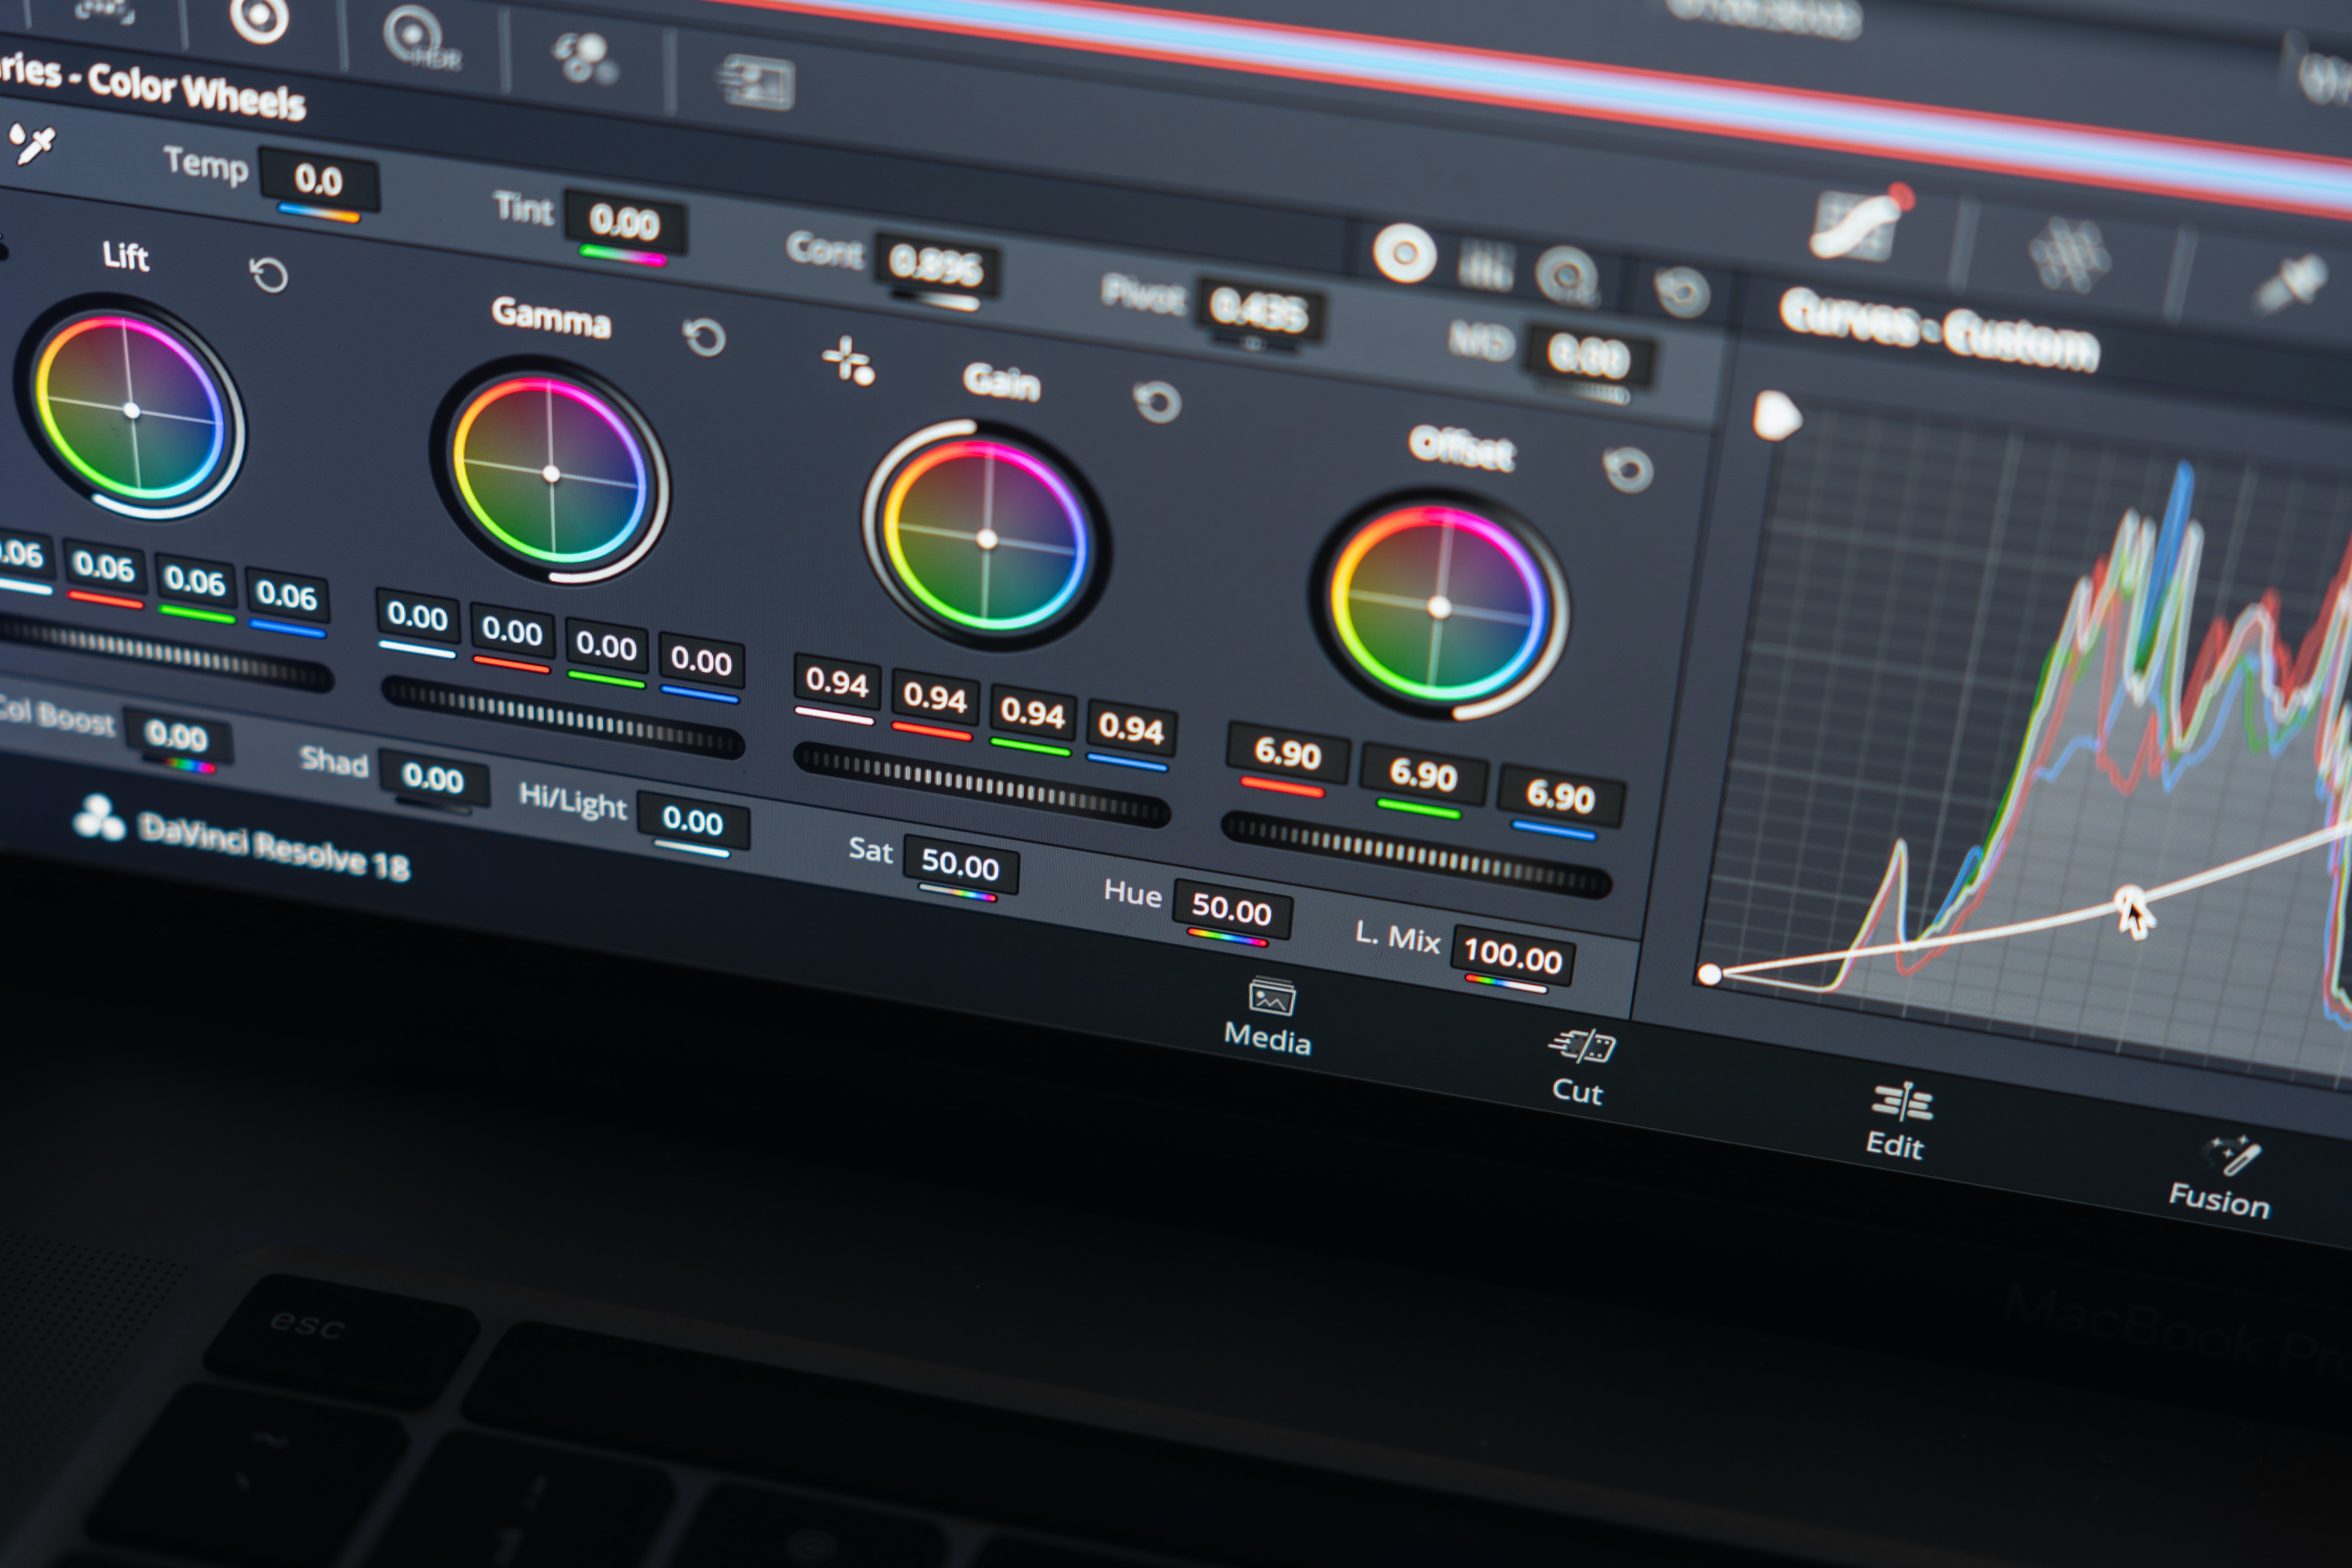
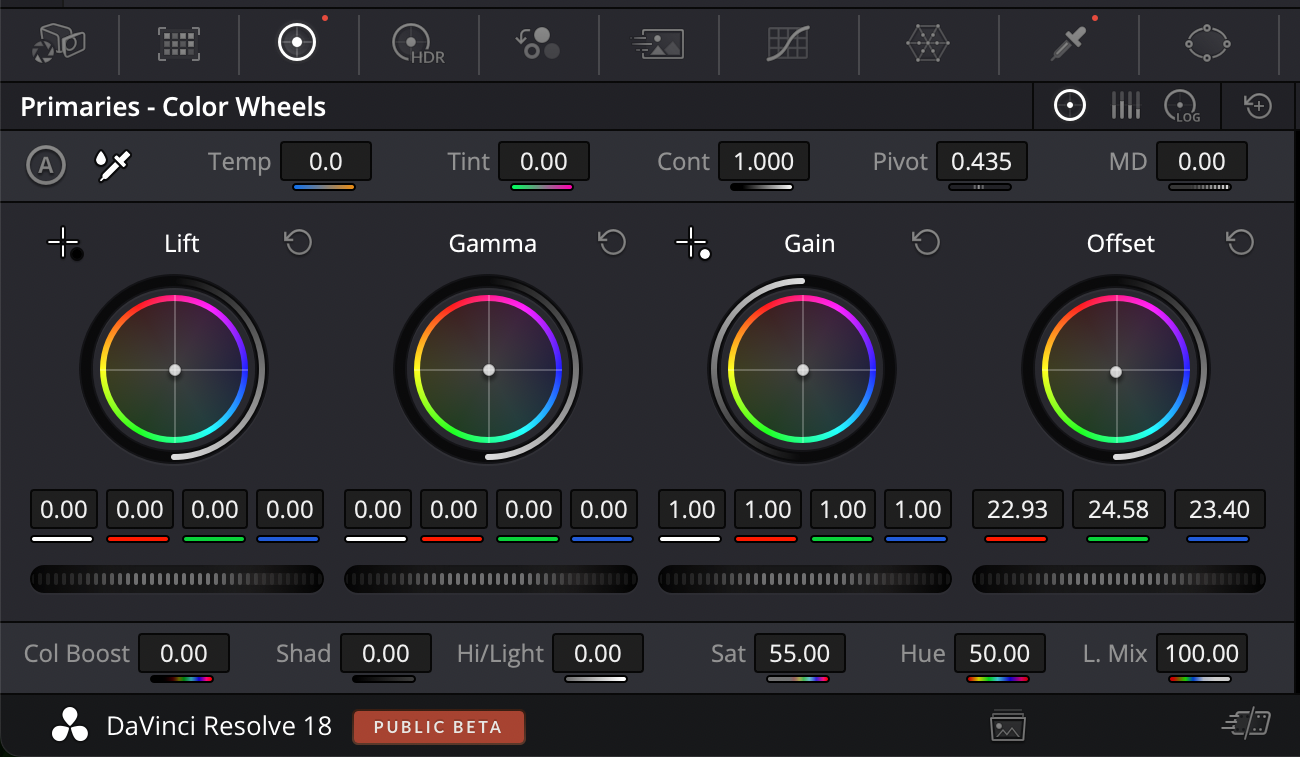
Primary Wheel
The primary wheels can be accessed by going over to color wheels. Color Wheels are the main way DaVinci Resolve users are going to color their images. They’re very similar to curves but in wheel form. The Gain Wheel adjusts the intensity of your highlights, the Lift Wheel will adjust the intensity of your shadows, and the Gamma Wheel will adjust the intensity of your mid-tones (which is pretty much everything in between your highlights and shadows).
There’s also the Offset Wheel which adjusts your entire image. You’re also able to shift the color of your shadows, highlights, and midtones by pushing the white dot in the middle of the wheels toward a certain color.
Scopes
The Scopes panel is located on the lower right-hand side of DaVinci Resolve and can be used as a reference to see how over or underexposed your image is. There are so many reasons to be using scopes while coloring.
Our eyes can only do so much and are far from accurate when viewing colors. Your monitor also may not be entirely accurate, requiring you to rely on scopes for complete color accuracy. Clicking on the drop-down menu at the top of the scopes page will let you display a few different kinds of scopes that all have various use cases.

How to add text and titles
To add text in DaVinci Resolve, go to the Effects library in the top left-hand corner. This will open up a small pop-up window in the lower left-hand corner.

Creating text can be done by clicking on Title and going down to Text. Dragging and dropping this text icon into your timeline will create a basic text layer.

You can edit text and change things such as the font, color, size, and position of your text by going to the video tab on the top right-hand side of the screen. You’ll also have options for more visual effects such as drop shadow and background color.
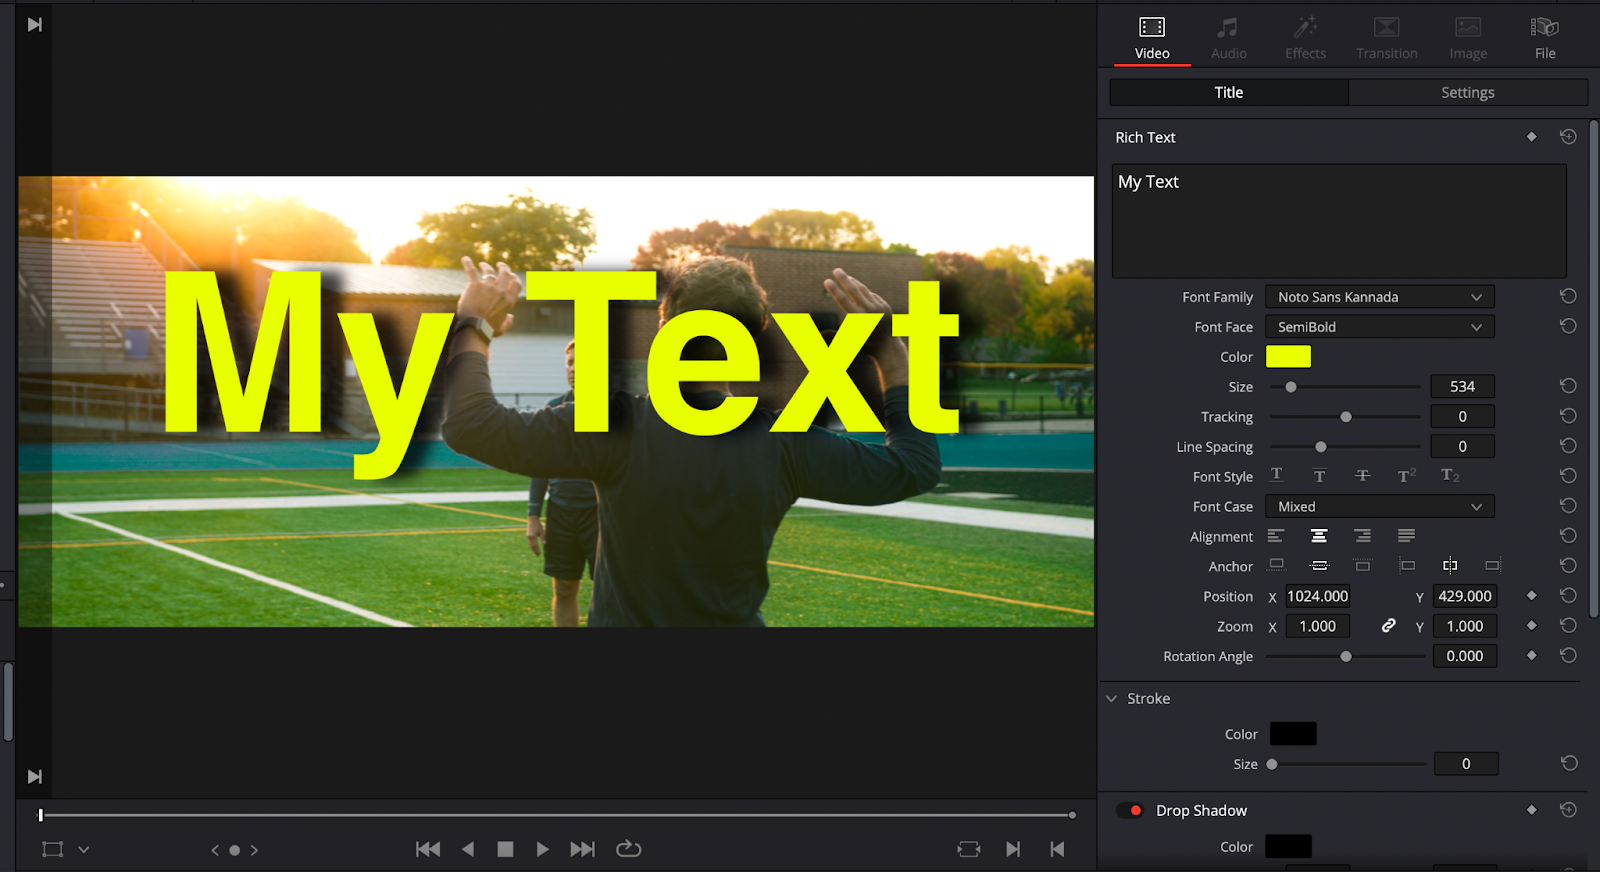
If you want, you can also utilize keyframes in the video tab which allows you to animate text. Keyframes can be added by clicking the diamond icon next to any of the effects.

Check out our post on adding text in Resolve to learn more.
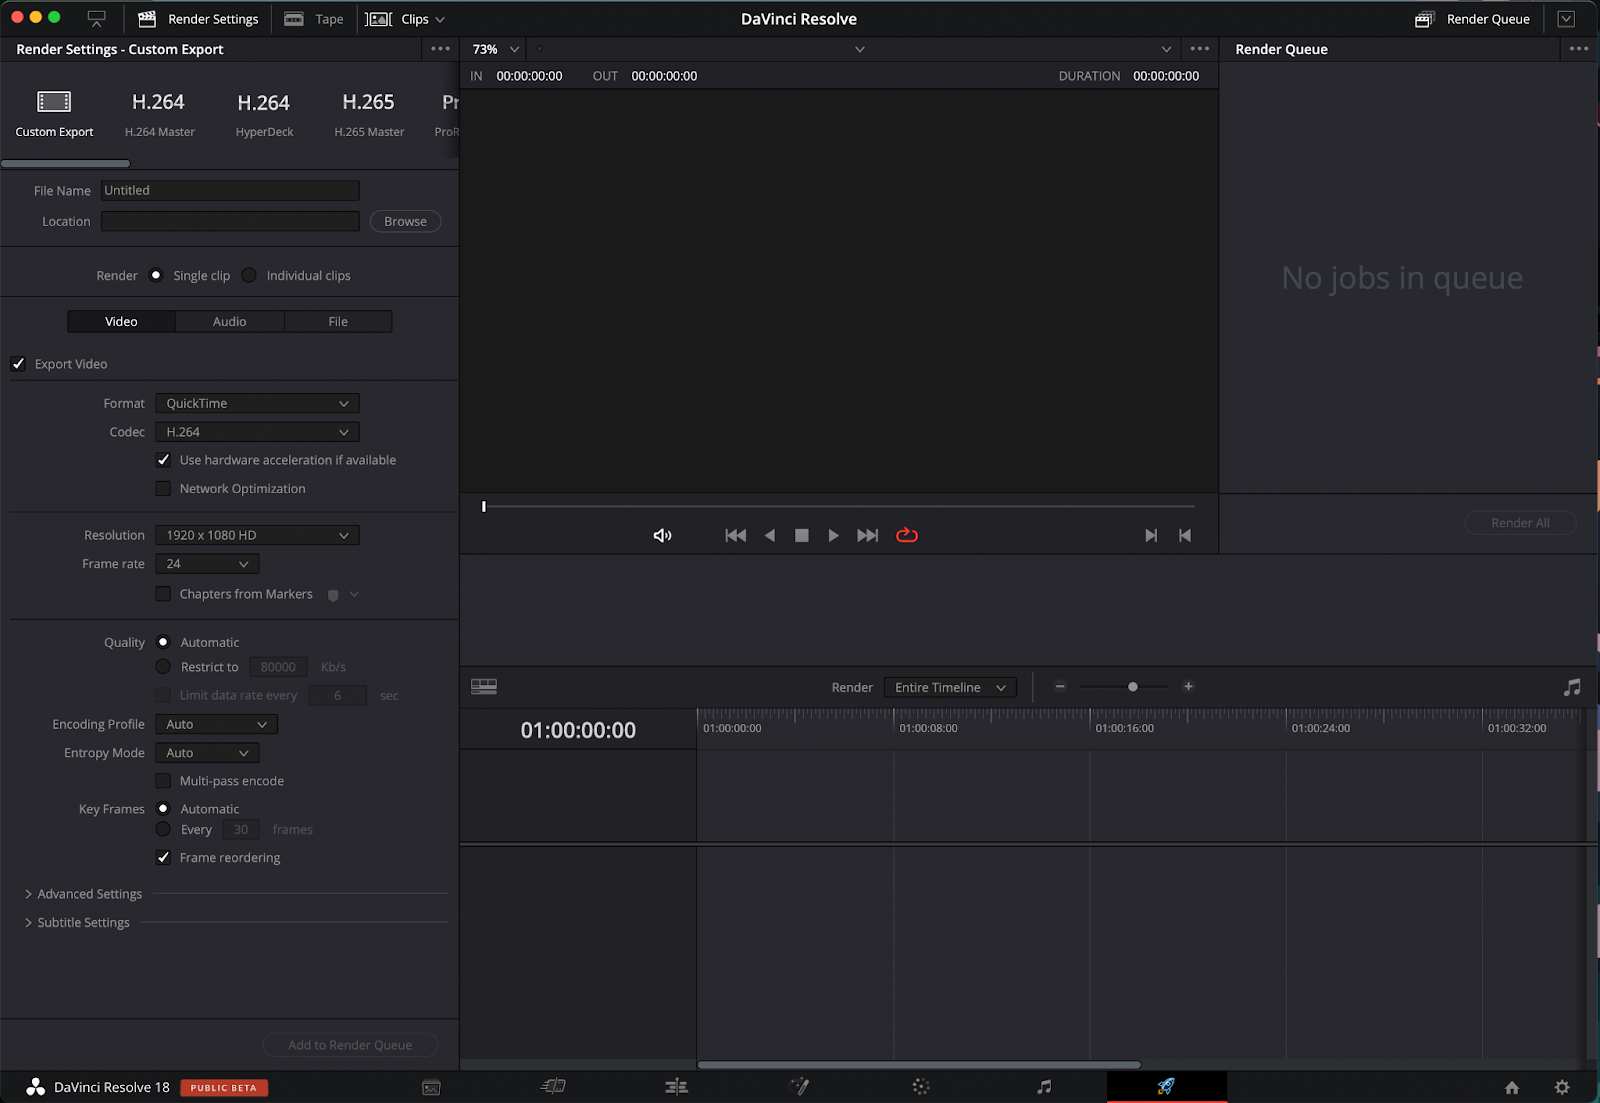
How to export in DaVinci Resolve
The first thing you’ll want to do is to make sure their project is loaded in Resolve and that all of their clips, transitions, subtitles, and any other small details are in order. You’ll also want to check the project settings tab located on the bottom right of the screen (the gear icon) to make sure everything is correct.
After everything in the project is finalized, it’s time to go to the delivery tab. By default, the delivery tab is set to custom export, but there’s an entire tab you can scroll through containing numerous different presets.
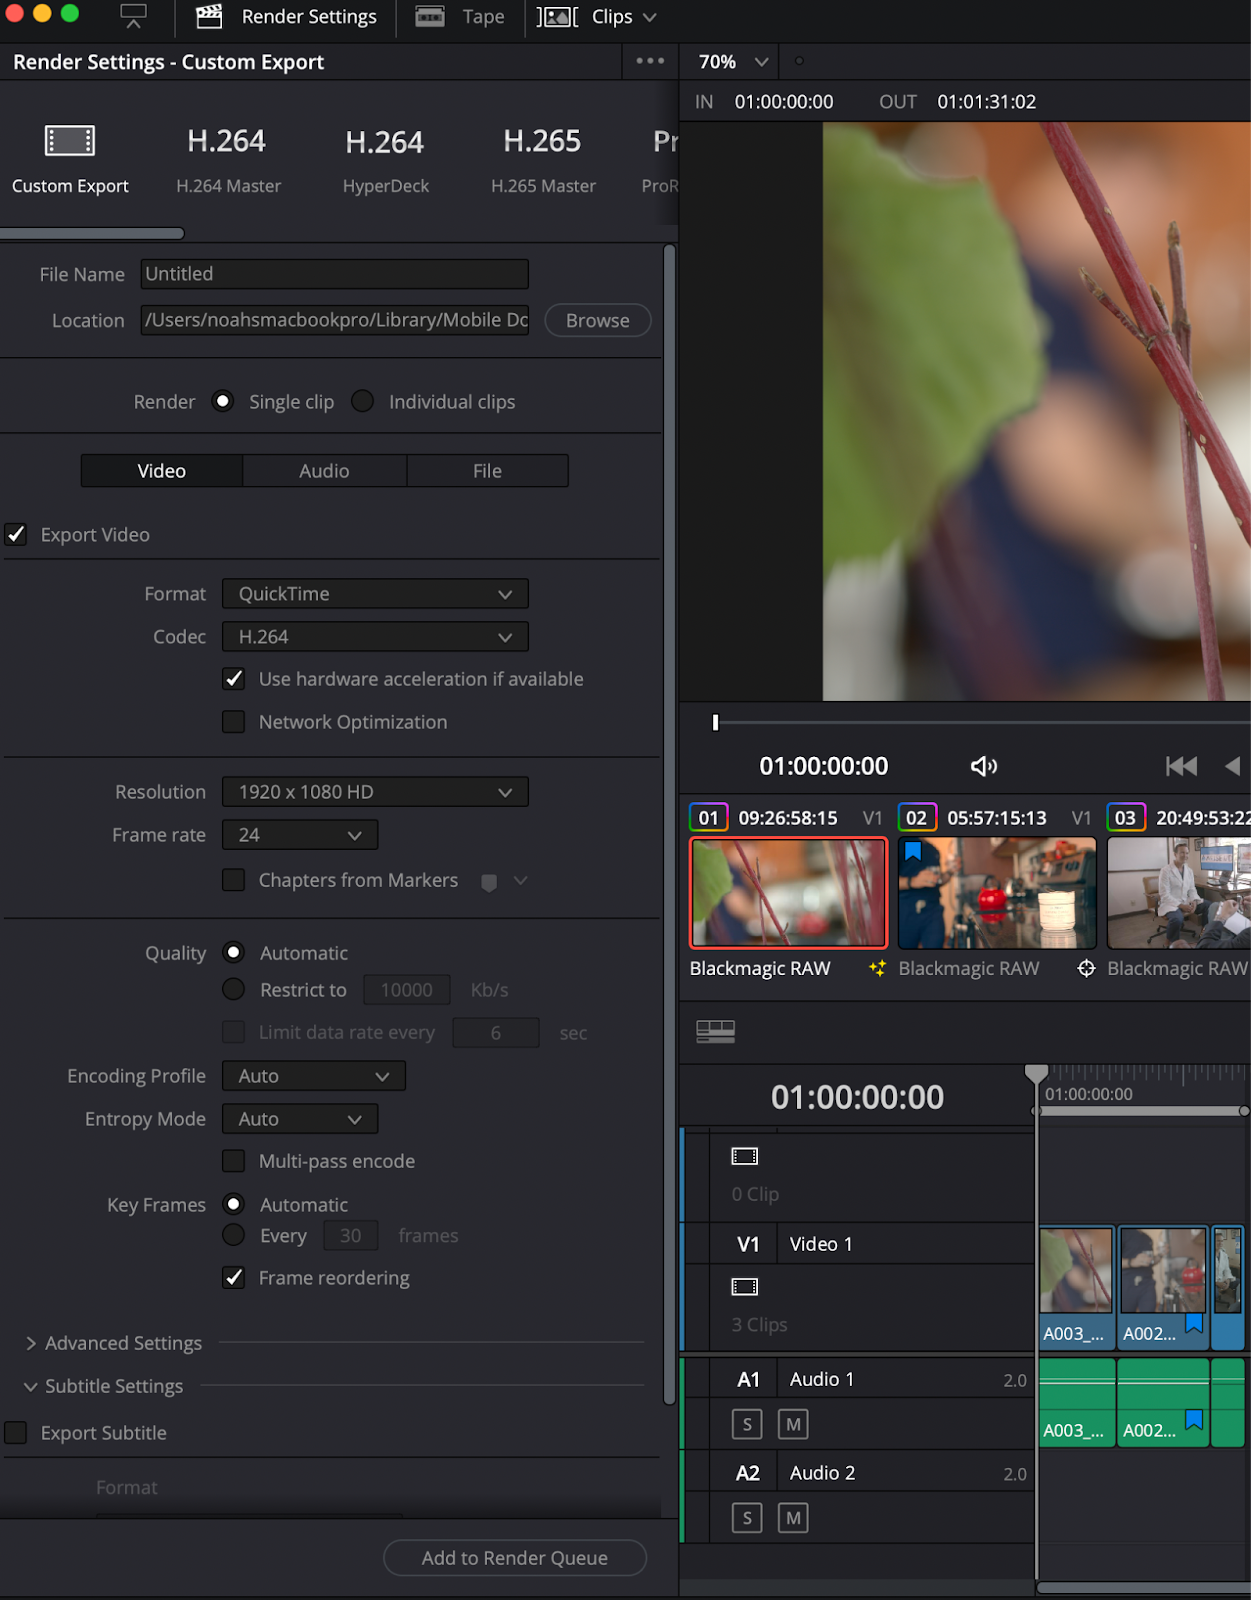
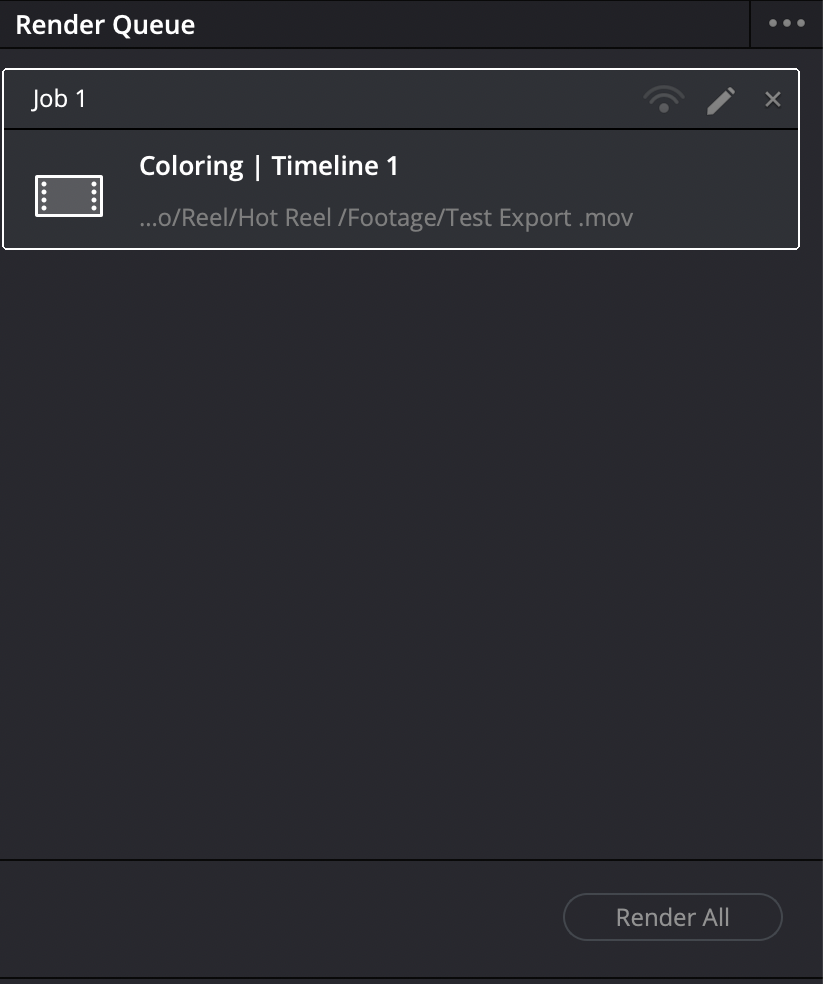
Once you’re 100% positive all of the settings are to their liking, you’ll want to go to the bottom of the export tab and click on add to render queue. This will add the file to the right-hand side of the screen under a tab called render queue.
For a more in-depth look at exporting in DaVinci Resolve, there’s an article that you can read here on Simon Says detailing everything you’ll need to know about coloring.
Conclusion
DaVinci Resolve is an incredible free software that’s perfect for both professionals and beginners. You can’t go wrong going with DaVinci Resolve Studio or the free version of DaVinci Resolve.
With this guide, you now have everything you need to get started with DaVinci Resolve. When you’re ready to take your creations to the next level, check out the Simon Says extension for Resolve. The software allows you to transcribe, caption, and translate videos in a seamless manner directly in Resolve.
.jpg)