How to Add Text in DaVinci Resolve
The advent of social media has made video creation more important than ever before. As small of a detail as it may seemingly be, text is one of the most important tools in a video editors toolbelt, especially for those posting to social media platforms.
Statistics show that 85 percent of Facebook users watch videos on mute, and that 69% of people view videos in public places with zero sound at all. Youtube videos, Tiktok content, and Instagram reels all tend to be watched with little to no sound. This is a massive number, leading to an increased demand for subtitles and motion graphics.
Available for both Mac and Windows devices, DaVinci Resolve offers a lot when it comes to creating beautiful text and subtitles. In this post, we’ll go over how to add text in DaVinci Resolve 16, DaVinci Resolve 17, and DaVinci Resolve 18.
This guide will also show you how you can use Simon Says’ transcription and captioning software to seamlessly work with text directly in DaVinci Resolve.
Why use text in DaVinci Resolve
Text is a great tool to get information across to your audience. It can be used in tutorials to emphasize a point to your viewers, to grab audiences’ attention at the start of the video, or simply to get as much information out on screen as possible.
Text can range from simple title screens or credits to complex motion graphics with slick animation and colorful fonts. The text you use will entirely depend on the type of content you’re looking at creating.
A filmmaker, for instance, is most likely going to use text sparingly in DaVinci Resolve. Text might only be used for the opening title and credits, barring a few exceptions. There are definitely areas where filmmakers can use text creatively. UI Huds, for instance, in films such as Iron Man use text for informational purposes.
Commercial and social media creators are more likely to use text in order to enhance the content seen on screen. The text style in these scenarios tends to be more boisterous and flashy. Text in advertisements can be used for lower thirds, letting viewers know the person’s name and occupation when they appear on the screen. Videos for platforms like TikTok and Instagram may also use flashy subtitle text to draw people in.
Adding text to videos in Resolve
Adding text in DaVinci Resolve is incredibly simple for beginners, with plenty of advanced options for more technical users. Everything you need can be found by clicking on the Edit page at the bottom of the screen.
There’s also the media page, the cut page, the color page, the fairlight page, and the deliver page. These various pages offer different tools such as color grading and motion graphics.
However, the Edit page is the main one to focus on though, and is where most of the key editing features can be found in DaVinci Resolve.

To add text, go to the Effects library in the top left-hand corner. This will open up a small pop-up window in the lower left-hand corner.
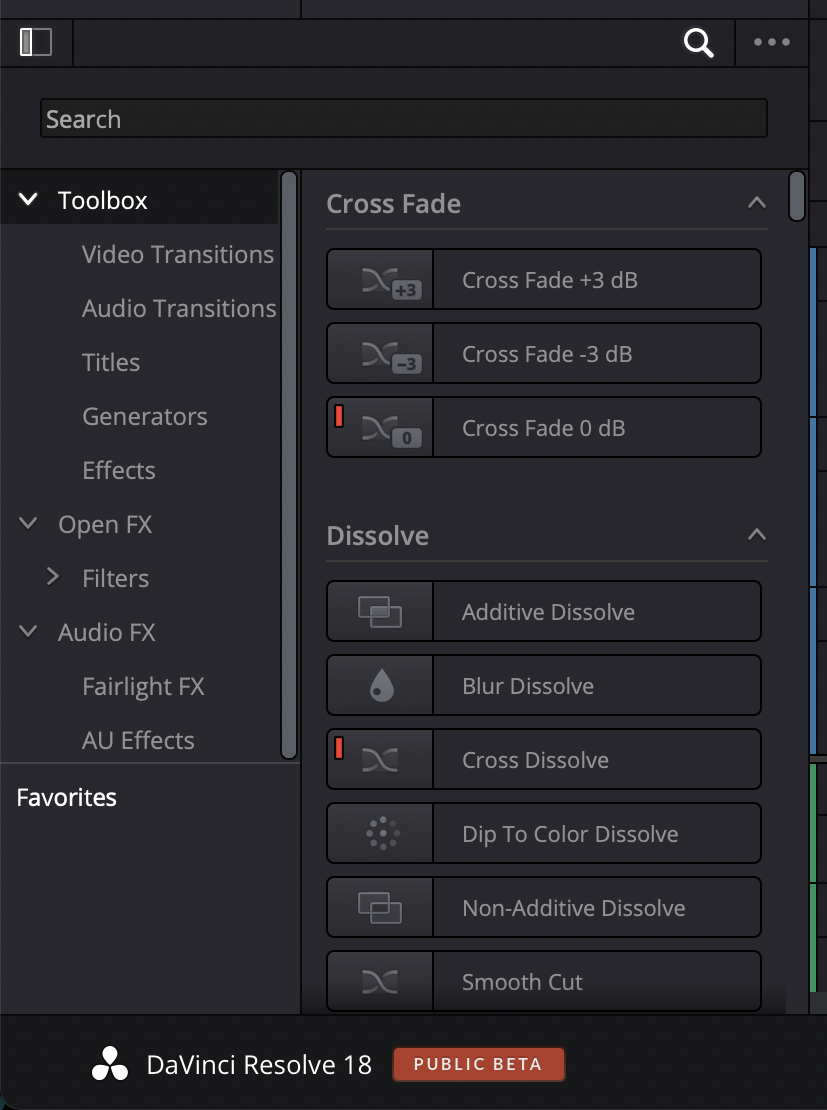
The effects toolbox contains a series of transitions, presets, and text titles. Creating text can be done by clicking on Title and going down to Text. Dragging and dropping this text icon into your timeline will create a basic text layer.
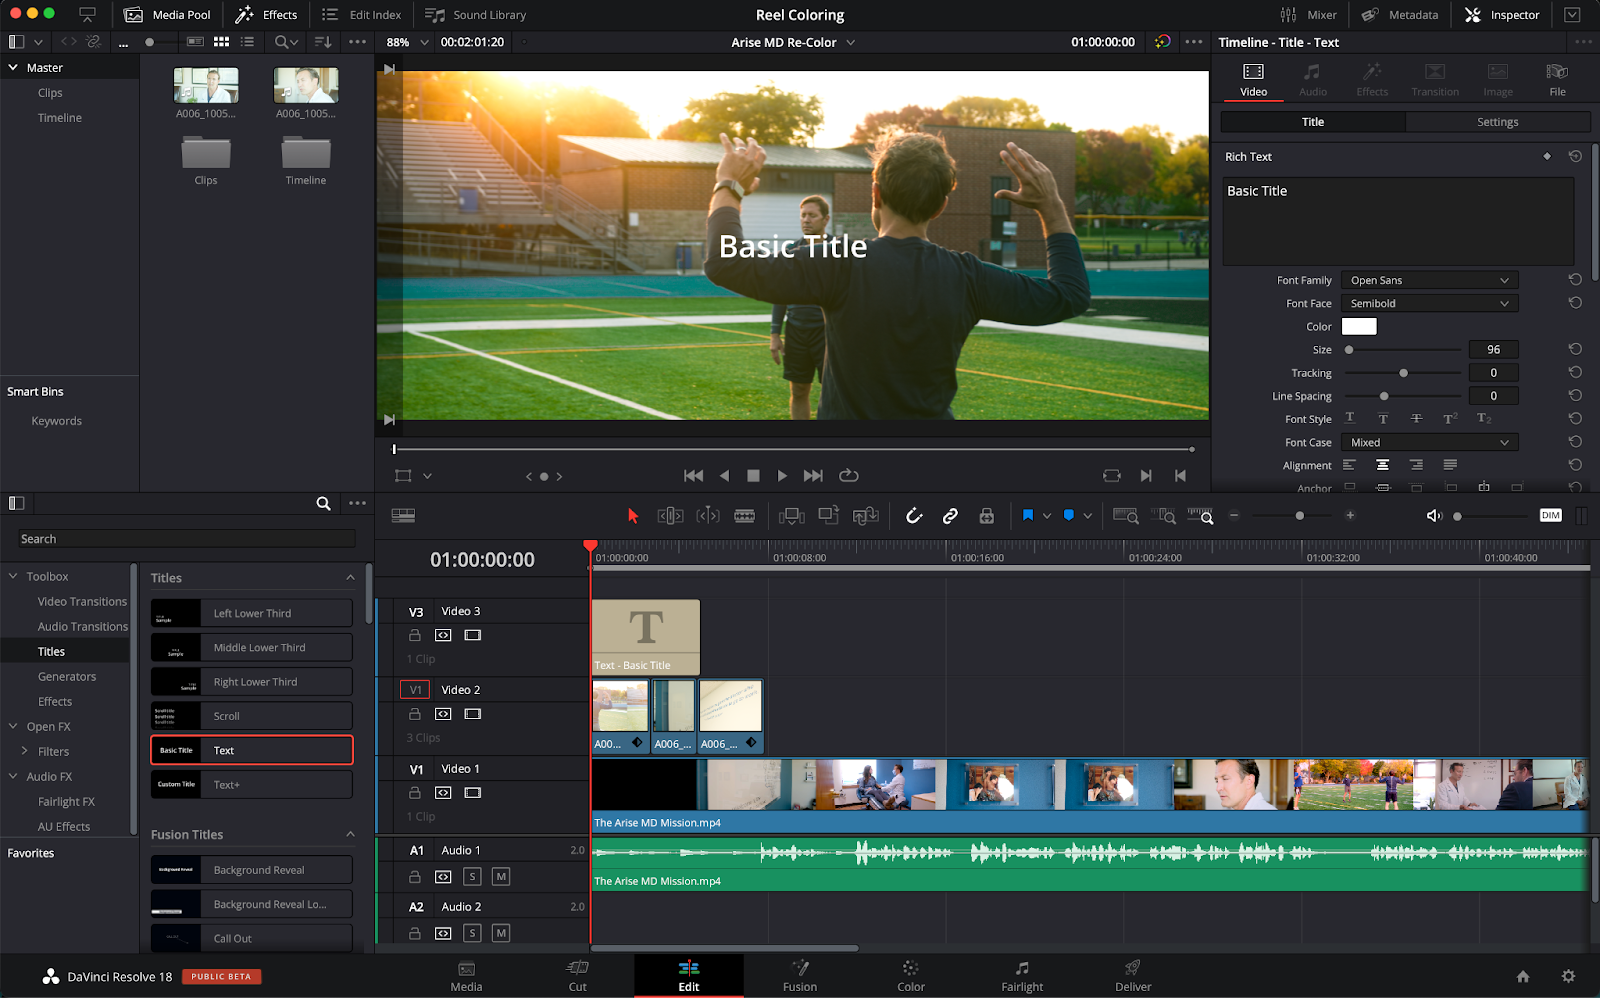
You can edit text and change things such as the font, color, size, and position of your text by going to the video tab on the top right-hand side of the screen. You’ll also have options for more visual effects such as drop shadow and background color.

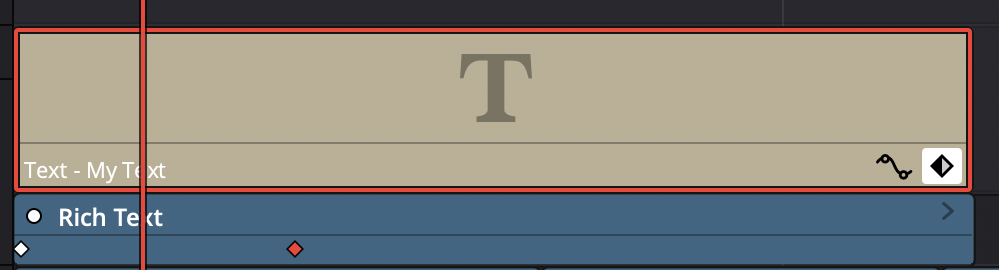
If you want, you can also utilize keyframes in the video tab which allows you to animate text. Keyframes can be added by clicking the diamond icon next to any of the effects.
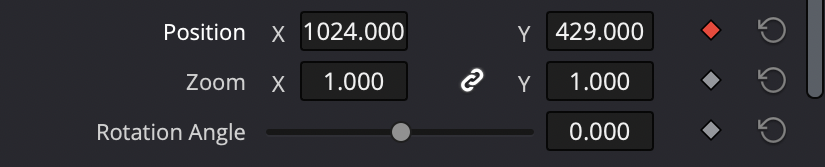
To animate the motion of the text, click the diamond icon next to Position. Moving the playhead forward a bit and then moving the positioning of the text will give you a text animation upon playback.
You can do the same thing for pretty much every text option including things such as zoom and rotation angle. To view the keyframes, you’ll want to go down to the timeline and click on the diamond icon on your text.
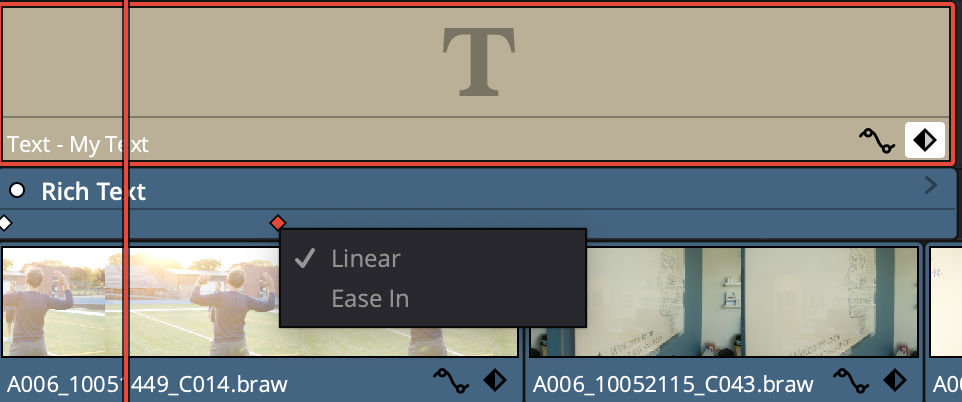
If you right-click on the keyframes inside of the text layer, you’ll be able to set that specific keyframe to Linear or Ease-in.
Adding Text Using Fusion
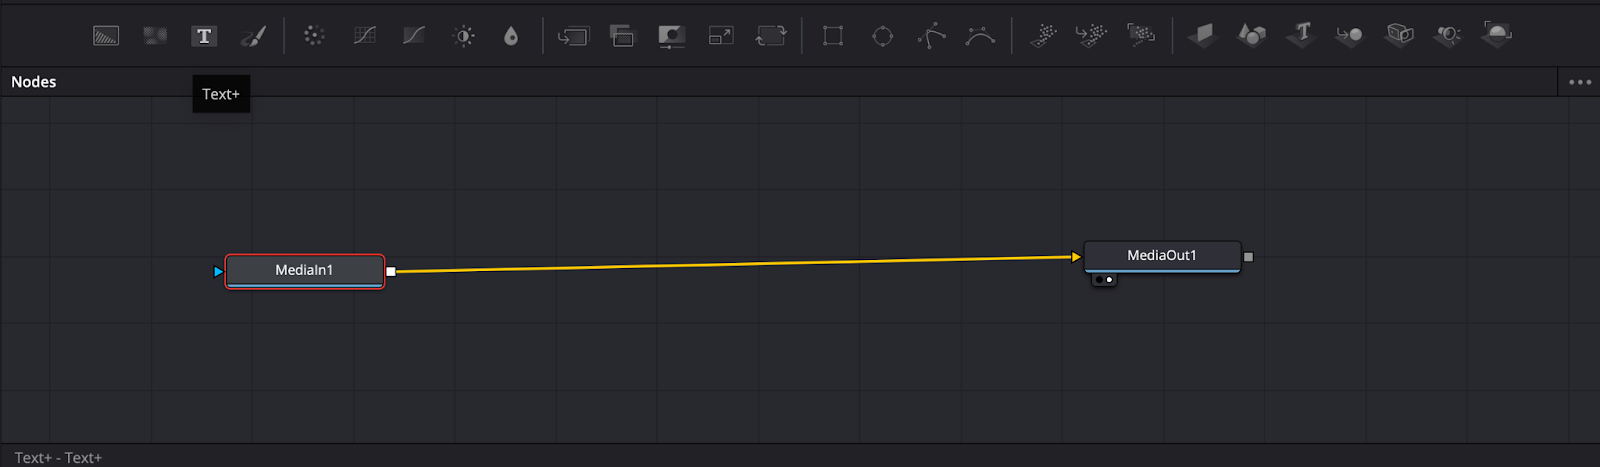
More advanced users can also add text from the Fusion page, allowing for even more advanced customization. Fusion uses a node-based workflow which may look confusing for those starting out but gives you much more control over your effects.
You can add Text + or 3D Text by clicking on the icons at the lower hand of the Fusion screen. Clicking on either of these will bring up a text box containing similar text options to those on the Edit page. The Fusion Text allows for much more keyframe options though such as Line Spacing and Tracking.
The great thing is that you don’t need to always go into Fusion to access some of these effects. If you go back to the Edit tab and then go to Effects, you can add Text + straight from the Effects library. Drag it right into the timeline as you would for the traditional text effect.

How to add effects to text in DaVinci Resolve
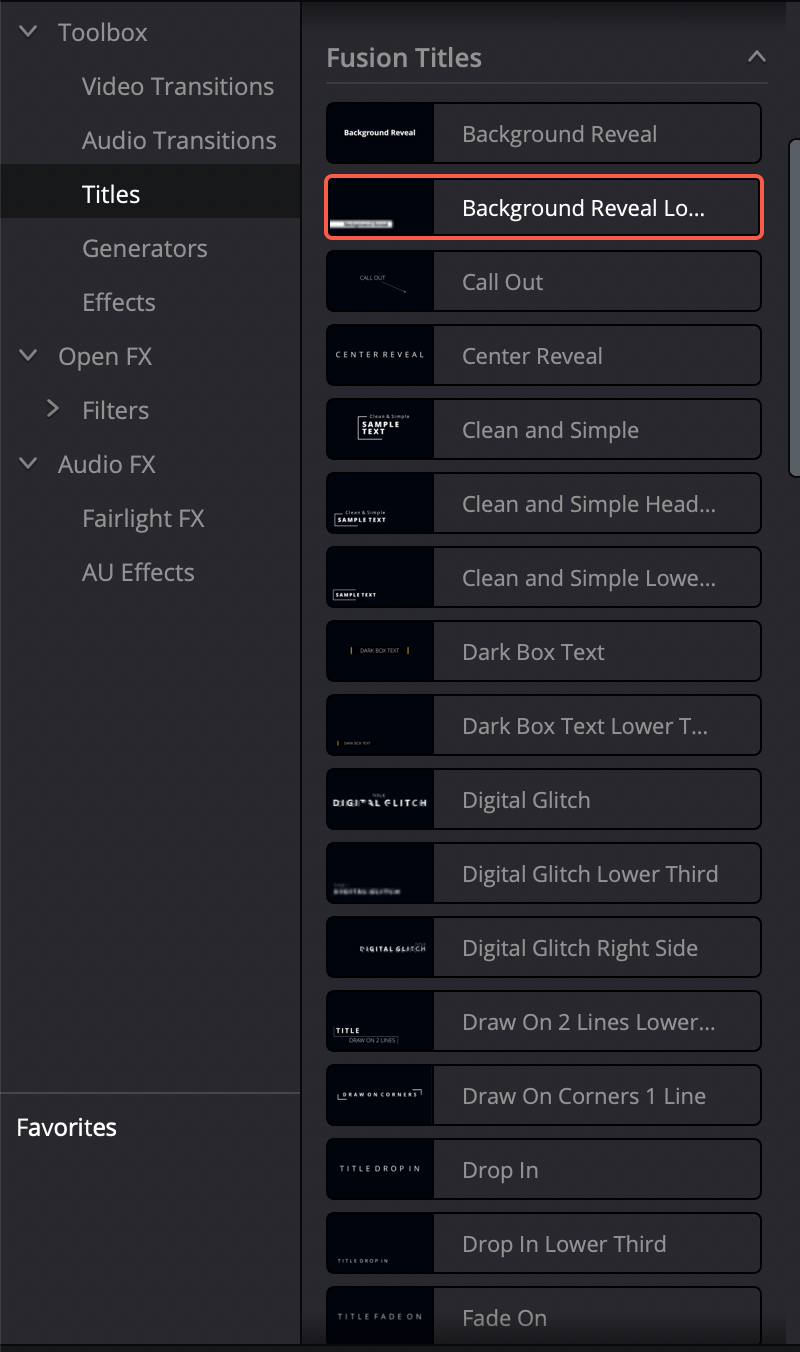
The effects library also offers a wide array of animated text. The Fusion Titles section gives you a slew of presets to play around with. Most of these options are animated as well.
You can also add effects to the text layer as you would any other clip in your timeline by going to either Video Transitions or by going to Effects.
An alternative for adding text in DaVinci Resolve
Today, there are billions of hours of video content, all of it more readily available to the public than ever. While this is amazing for consumers, it can be a double-edged sword for video creators. More videos floating around means that each video a creator produces really has to stand out. Everything from the shooting to the editing to the presentation has to be perfect and meticulously crafted.
This includes subtitles and closed captioning as well. In the age of social media, closed captioning and subtitles have become more critical than ever for video content creators. As we mentioned earlier, many viewers will consume content on these platforms without any audio.
As such, video editors must find new ways to convey the message of your content. Subtitles and captions allow you to do this, but implementing them often comes at the cost of an efficient editing workflow. This is where Simon Says comes in.
With Simon Says, you can add captions and subtitles to footage natively within DaVinci Resolve in 100 languages - all with the click of a button. To say this can significantly improve your video editing workflow is an understatement. Teams can go from spending hours adding subtitles to just minutes.
Simon Says can also translate the transcripts you generate in Resolve to any of the supported languages. Plus, the app is lightweight so you don’t have to worry about it hindering the performance of Resolve.