

How to Export Video From DaVinci Resolve
The key to any successful video is a phenomenal edit. A great edit doesn’t mean anything though if no one can see the final product. Exporting content might be one of the most overlooked elements in the video editing process.
A lot can go wrong with an export, and something as simple as a mislabeled export setting can leave the video looking completely different than the one seen in the timeline.
Luckily, there is an abundance of non-linear editors readily available to help creatives export their content. A lot of this editing software can get incredibly pricey though, with some costing hundreds of dollars a year. The great thing is, for those not wanting to break the bank editing and exporting, there is DaVinci Resolve.
Blackmagic’s DaVinci Resolve is a powerful, free editing software perfect for exporting all types of content. This beginner’s tutorial will go over the fundamentals of exporting in DaVinci Resolve 17 and DaVinci Resolve 18 to ensure that all video content comes out looking excellent.
DaVinci Resolve export options
Those who are used to exporting in programs such as Adobe Premiere Pro, Final Cut Pro, and Avid might be a little bit put off by Davinci Resolve’s interface at first glance.
There are two main types of exports to consider when using DaVinci Resolve: the file export and then the deliver tab exports.
File export:
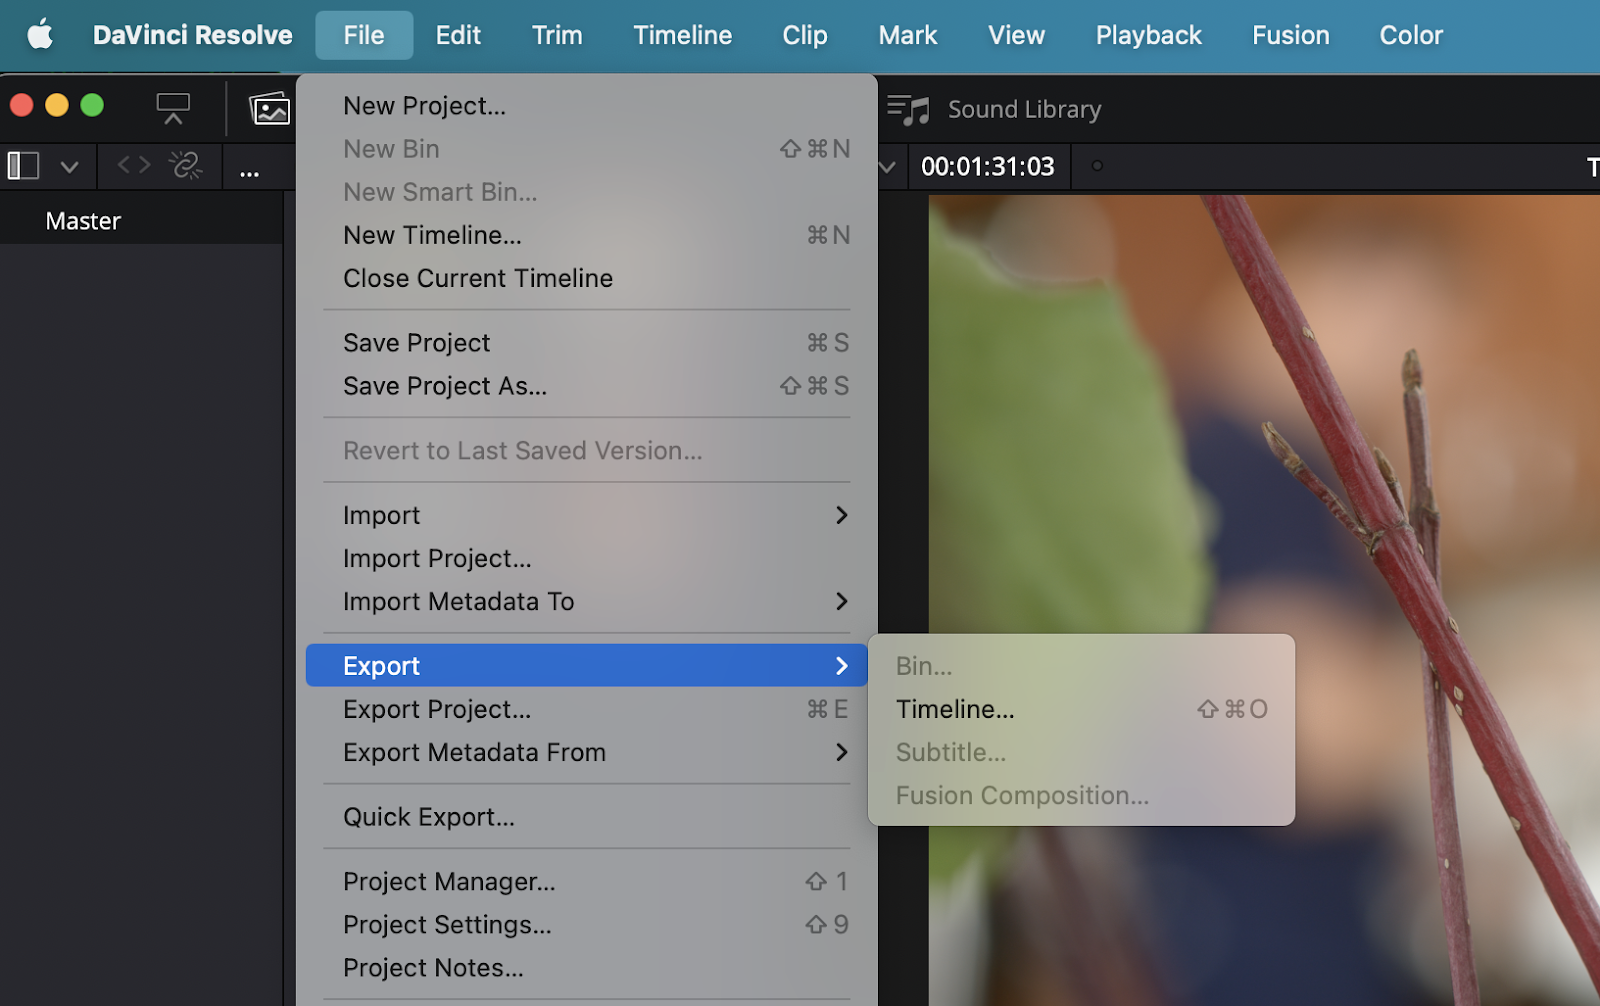
Those unfamiliar with DaVinci Resolve might instinctually click “file” and then go to export on the drop-down menu to try and render out their timeline. In DaVinci Resolve though, this is how to export the data within the timeline.
The export drop-down menu provides the user with 4 different options: Bin, Timeline, Subtitles, and Fusion Composition. Exporting files this way is great for group work and video editing across multiple video editors.
Bin export:
Bin exporting is perfect for those who use power bins. Unlike regular bins, power bins are consistent throughout every project. This is useful for those who have things like giant stock music, video, and graphic libraries they use consistently throughout every project.
Exporting these bins is perfect for keeping file organization intact throughout multiple projects.
Timeline Export:
Timeline exports are great for those who are working across multiple video editing platforms. Some video editors have a workflow using DaVinci Resolve simply as a color grading software (it’s a really powerful one) and programs like Adobe Premiere Pro, Final Cut Pro, and Avid as the main editor.
A timeline export is perfect for this type of workflow. There are a variety of file types to choose from too depending on what editing software the video editor is planning on bringing the project into. It’s important that the video editor checks which file extension works best with their editing software of choice before making the export.
Subtitle export:
A subtitle export is great for editors who want a separate file containing just the subtitles for the video and nothing else. There are options available to change the file extension as well from .srt to .vtt.
Since creating and transcribing subtitles can often be a daunting task for video editors, there are a lot of tools out there to make this process much simpler.
Simon Says is a great software designed specifically for this purpose, allowing the user to easily transcribe and add captions to their videos in DaVinci Resolve.
Fusion composition export
A fusion composition export is wonderful for saving and sharing clips made in DaVinci Resolve’s advanced graphic and special effects software called Fusion. If there are multiple editors working on a project, this is a great way to share those Fusion files with those editors.
Export project
Beneath the file drop-down menu, there is also an option for exporting the entire DaVinci Resolve project. This allows the video editor to save the DaVinci Resolve project wherever they want on their mac or PC as a drp (DaVinci Resolve project) file.
Delivery Tab exports:
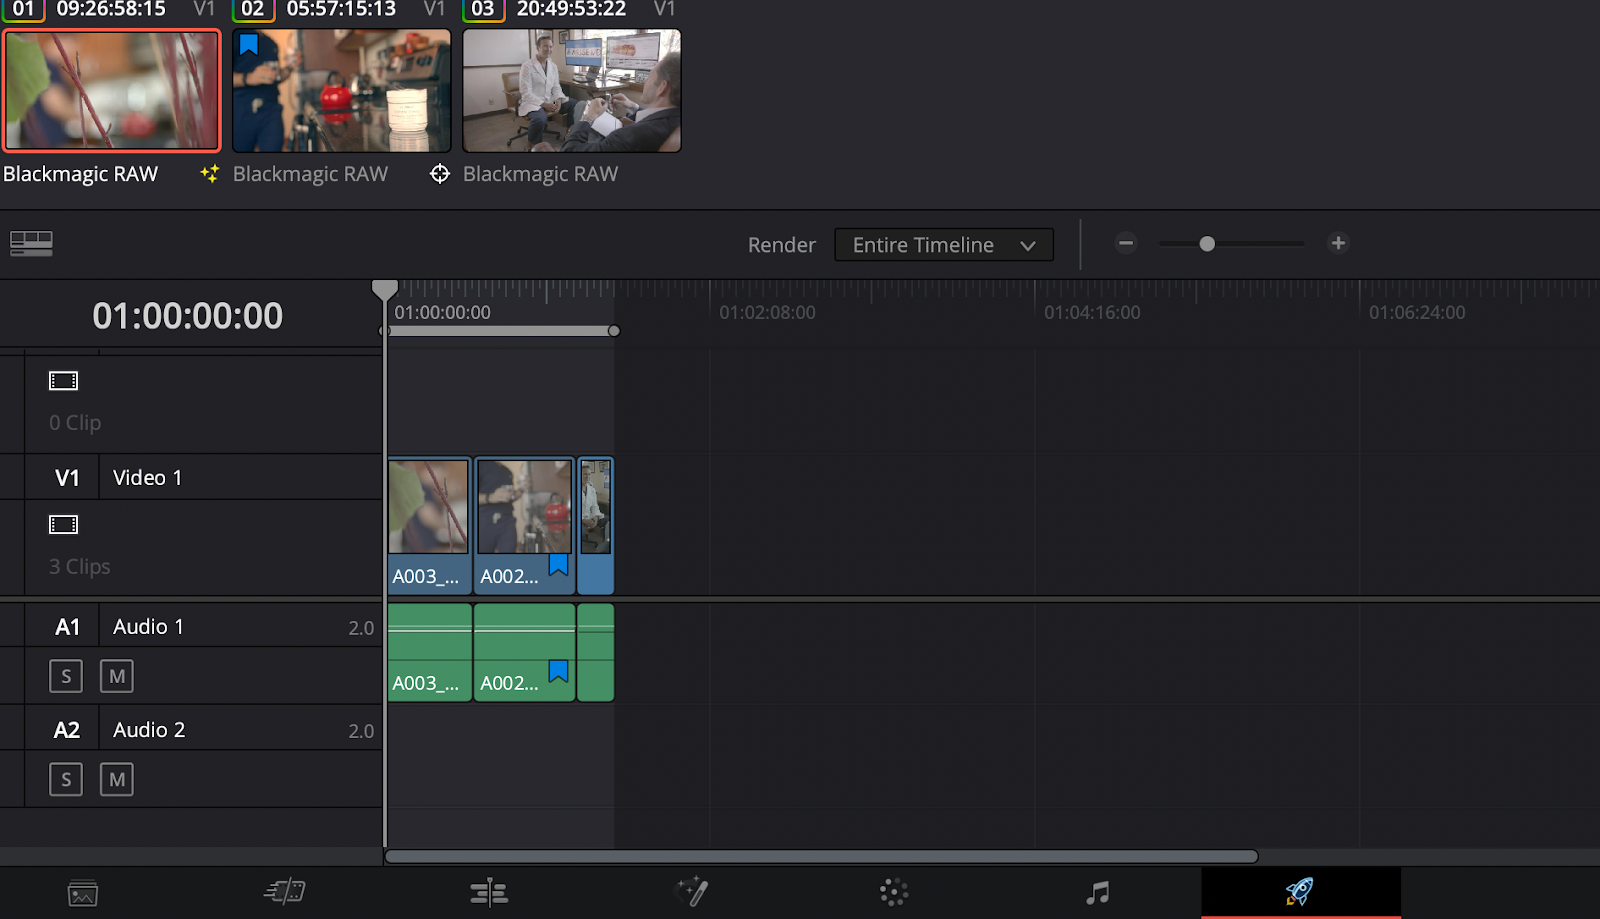
The conventional way to export a video in DaVinci is through the delivery tab which is shaped like a rocket ship and located towards the bottom right of the screen. Here, all of the codec, bitrate, and render settings are readily available.
How to export from DaVinci Resolve
Exporting in any video editing software can seem like such a daunting task. There are so many options to choose from, and the slightest export mistake can lead to poor-quality videos. Luckily, DaVinci Resolve makes this process extremely easy, with an option to upload straight to social media platforms like YouTube, Vimeo, and Twitter.
Step 1: Load Project in DaVinci Resolve
The first thing any editor is going to want to do is to make sure their project is loaded in Resolve and that all of their clips, transitions, subtitles, and any other small details are in order. They’ll also want to check the project settings tab located on the bottom right of the screen (the gear icon) to make sure everything is correct.
There’s nothing worse than finishing an exporting only to realize that a clip towards the end wasn’t colored properly.

Step 2: Open and customize output settings
After everything in the project is finalized, it’s time to go to the delivery tab. By default, the delivery tab is set to custom export, but there’s an entire tab the editor can scroll through containing numerous different presets.
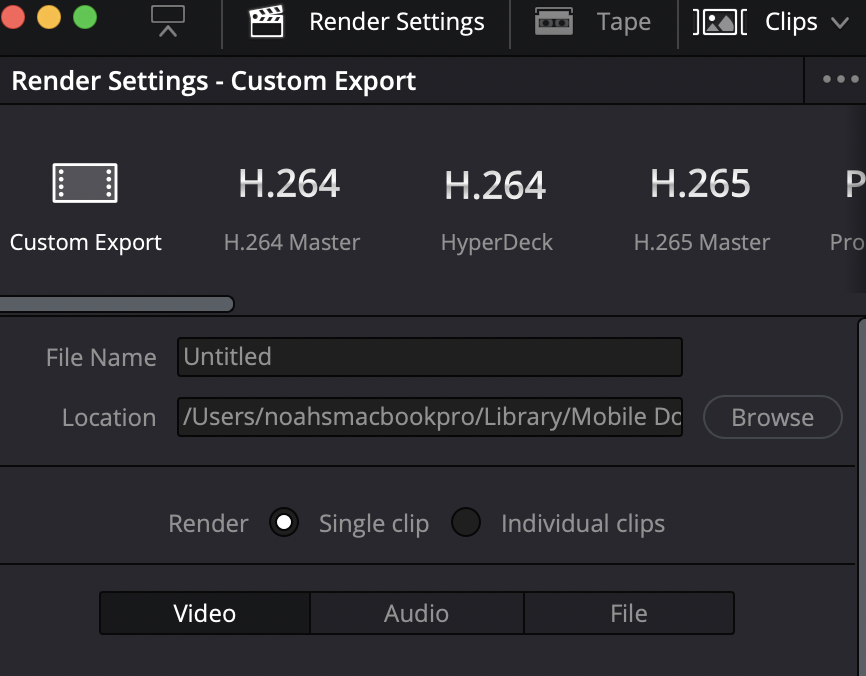
Custom export:
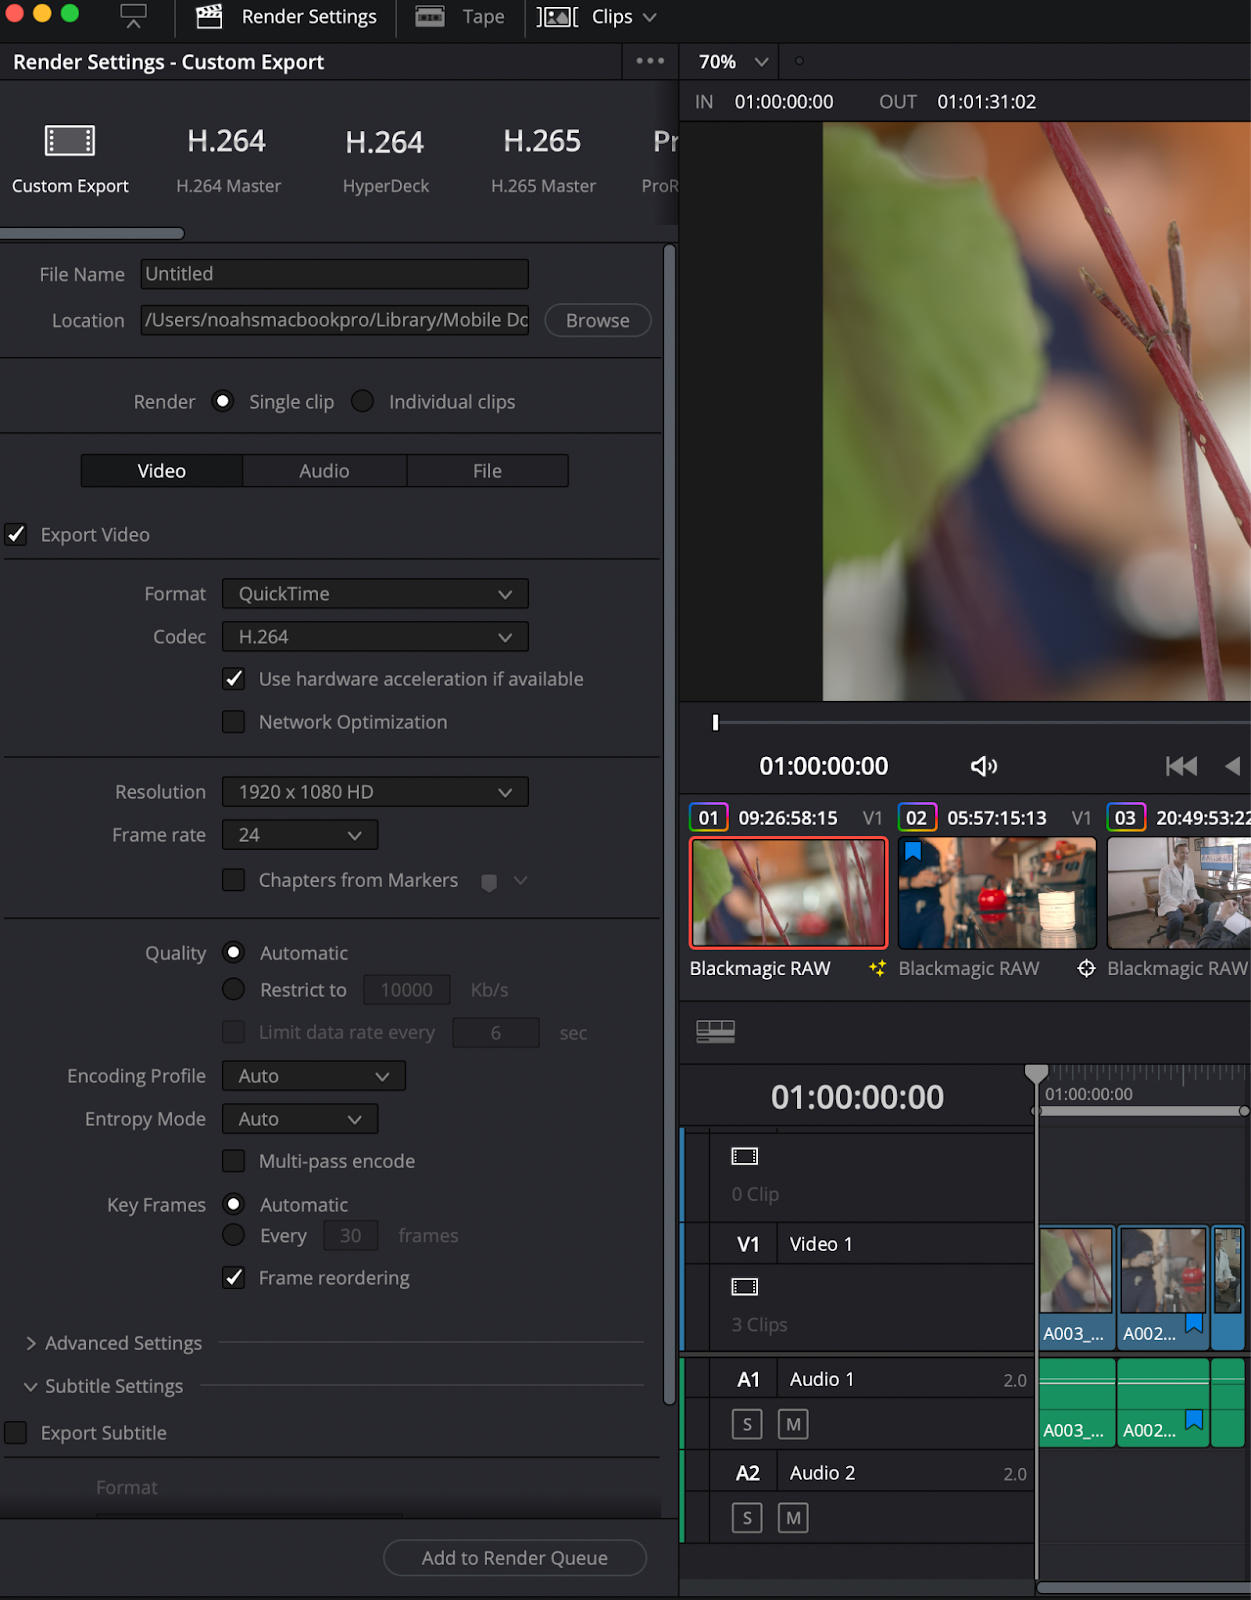
The first two items at the top of the custom export panel are: file name and file location. File name is what the user decides to call their project whereas file location determines where the project will go on that user’s mac or PC.
Next, the user will be asked if they would like to render a single clip or an individual clip. A single clip export will put the entire timeline into one file whereas an individual clip export will export every video file in the timeline into their own separate files. This is great for exporting proxies or converting every clip into a single file type.
Below these two options are three rectangles labeled: Video, Audio, and File. Clicking on “video” will display all of the export settings pertaining to video, clicking audio will display all exporting settings pertaining to audio, and clicking on “file” will allow the user to play around with the naming conventions for the timeline.
If the user clicks on “file” while under the individual clip settings, they’ll be able to keep the source name the same for each of the individually exported clips (another great tool for proxies).
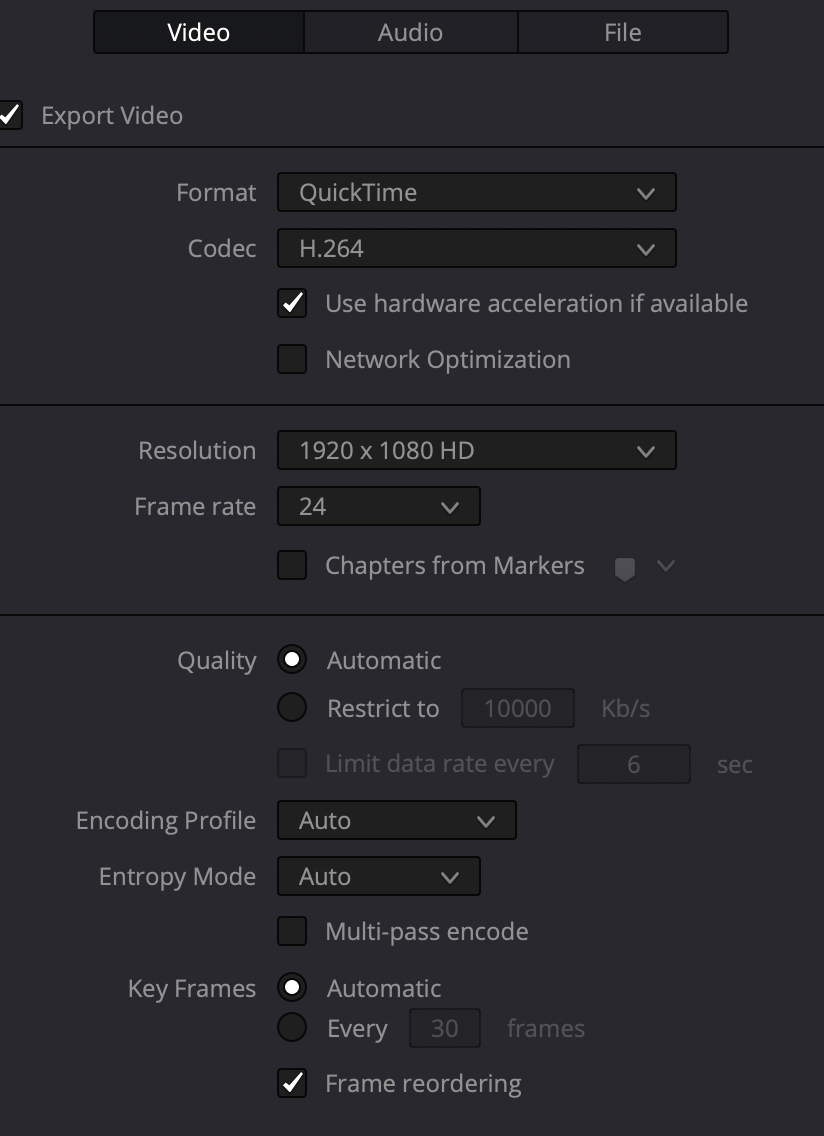
Under the video tab, the user will be presented with settings for: format, codec, resolution, frame rate, quality, encoding profile, entropy mode, and keyframes. The important two to focus on are the format and codec settings.
The format setting uses something called containers. The two most common containers are MPEG-4 (MP4) and QuickTime Movie (MOV). By default, DaVinci Resolve has the format set to MP4. MP4 video has two different codec options: H.264 and H.265. When an MP4 file is exported, it’ll contain the file extension .mp4.
MP4 is great for streaming and transferring videos since the size of the files is, generally, much smaller than QuickTime. QuickTime provides has much more codecs though. Quicktime not only contains H.264 and H.265 as codec options but also: Apple ProRes, DNxHD, DNxHR, GoPro CineForm, and much more.
The two most common codecs in this QuickTime are H.265 and Apple ProRes. There are many types of Apple ProRes to choose from, and editors will pick different types depending on their export needs. Apple ProRes files can get extremely large though, so it’s only really recommended for professional use. For web-based content, H.264 and H.265 work just fine.
The only other setting that most editors need to worry about is the quality setting (which is only seen if H.265 and H.264 is selected). This changes the bit rate of the export. By default, it’s set to automatic, but clicking restrict to allows the user to change the bit rate. This is useful if the file size of the final export needs to be lowered for whatever reason.

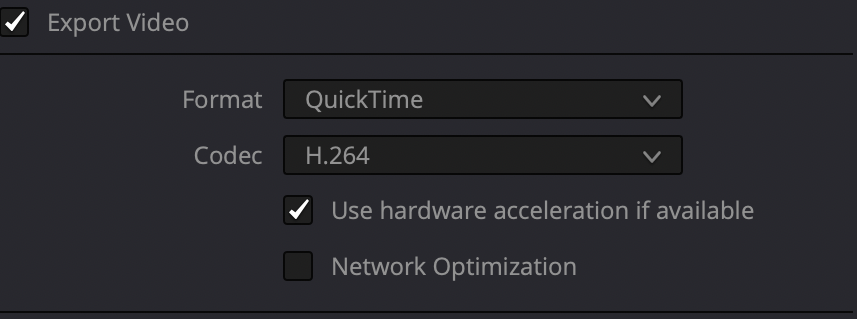
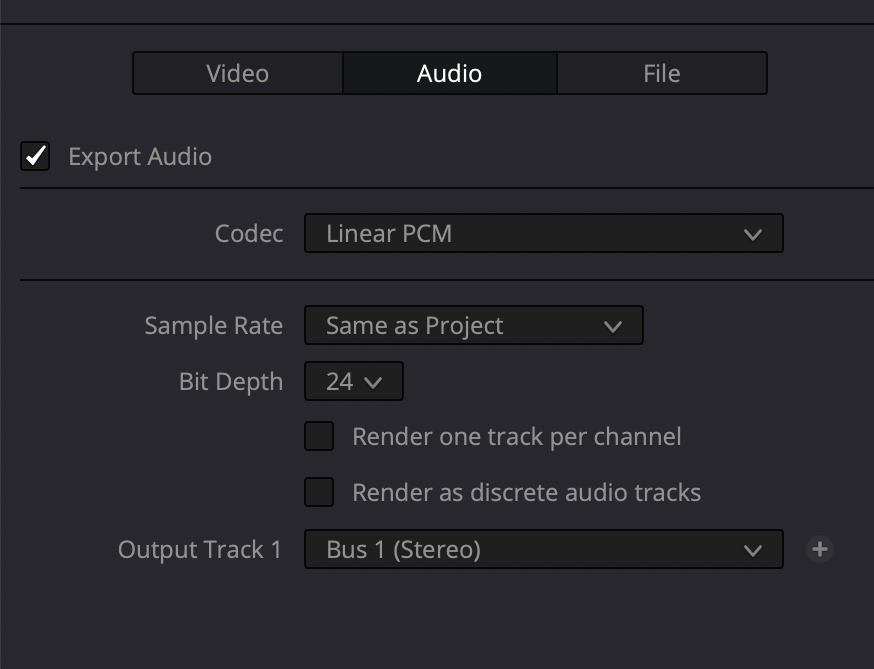
If needed, there are also ways to do audio-only exports. To export audio only, the video editor needs to make sure the checkmark next to export video is unchecked. Then, they’ll want to go over to the audio tab and chose the audio codec that best fits their needs.
Step 3: Render in DaVinci Resolve
Once the video editor is 100% positive all of the settings are to their liking, they’ll want to go to the bottom of the export tab and click on add to render queue. This will add the file to the right-hand side of the screen under a tab called render queue.
Step 4: Save and Export DaVinci Resolve 17
Before exporting, it’s best practice to save the project file beforehand. Once the project is saved, they’ll click the render all button at the bottom of the tab. This will start rendering the timeline to the destination the user picked.

How to use DaVinci Resolve Quick Export
Davinci Resolve’s Quick Export is a great way to quickly get videos to the web. The Quick Export settings are located directly to the left of the custom Export Button. There are presents for H.264, H.265, and even Apple ProRes. There are also presets for YouTube, Vimeo, Twitter, and Dropbox that upload the video straight to their respective platform.
Exporting from DaVinci Resolve to YouTube
YouTube is the most common platform for uploading videos. There is over 720,000 hours worth of video uploaded each day. DaVinci Resolve makes it easier than ever to keep subscribers entertained by easily allowing DaVinci Resolve users to upload directly to YouTube.
First, it’s required to sign into Youtube. This can be done by going into preferences (located on the top left) and clicking internet preferences.
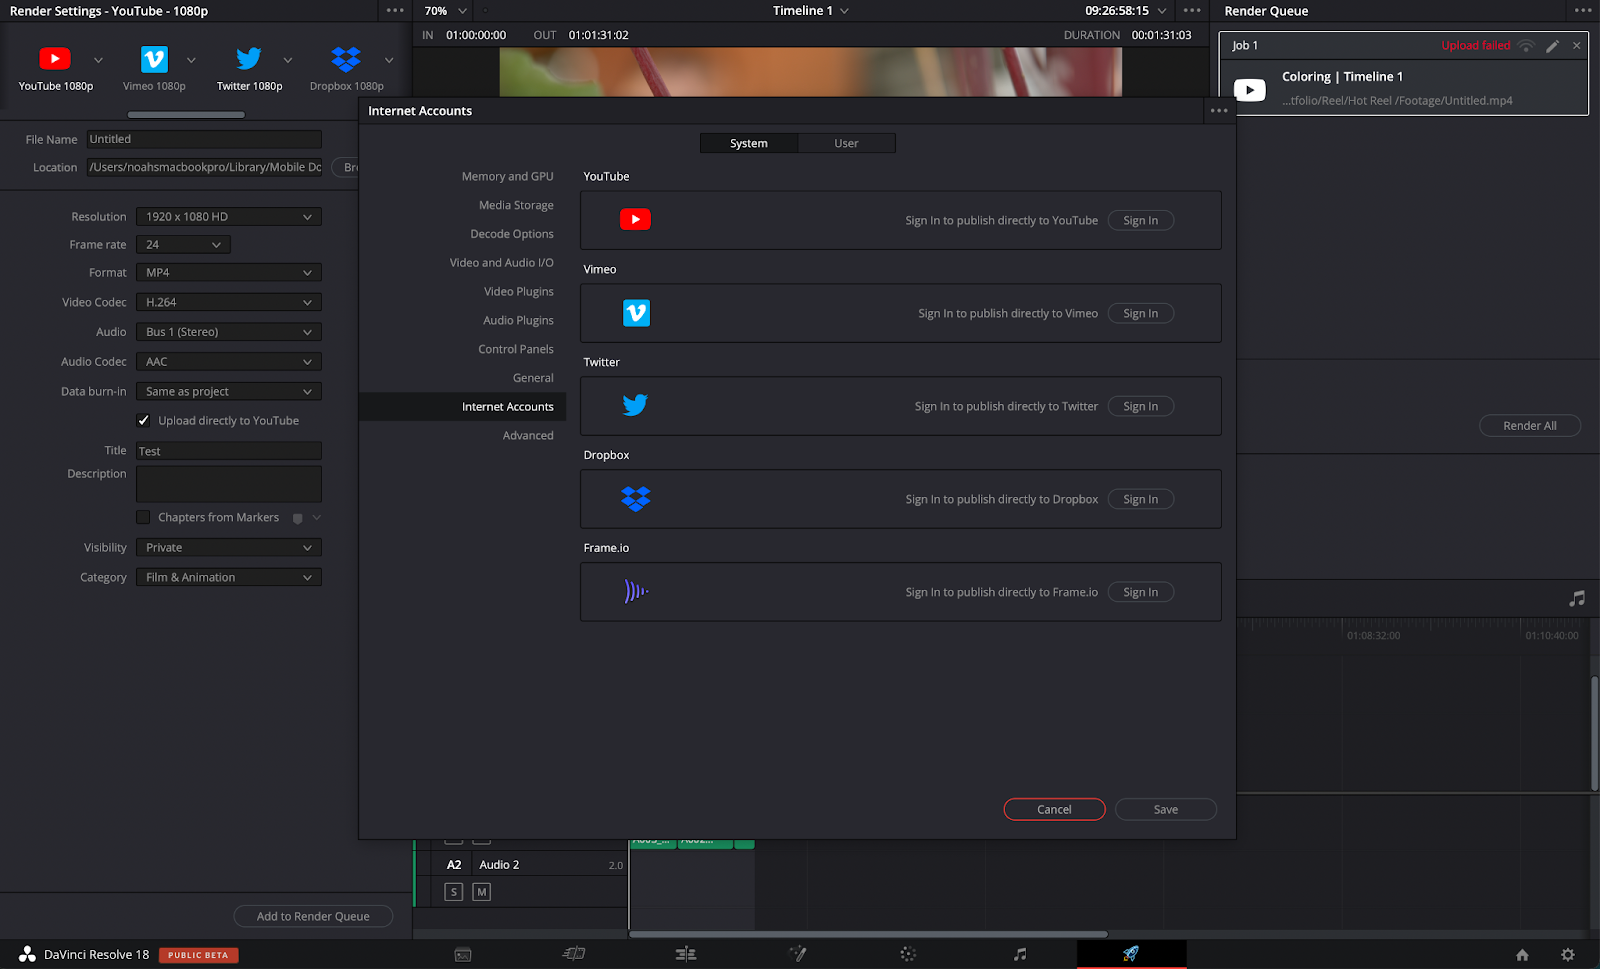
Click on the YouTube button in the Quick Export tab and then hit the button labeled upload directly to YouTube. This then allows the user to choose a title, description and even chose visibility and category. Once everything is in place, clicking the render all button will upload the video directly to YouTube.
Final thoughts
DaVinci Resolve is an incredible free software that’s perfect for both professionals and beginners. Exporting videos is such an important step in the video creation process and one that can often get overlooked.
Video editing can also be a daunting and tiring task at times. Because of that, it’s important to try and make the process as easy as possible. Programs such as Simon Says are great and affordable ways to add an extra layer of ease and professionalism to videos.


.jpg)
