Share Destination to caption and title FCPX projects
Learn how to use Simon Says share destination for FCP to get AI-generated captions, subtitles, titles, and translations for FCP projects/timelines/sequences (in up to 100 languages).
Simon Says has added share destination support so you can easily caption, title, and subtitle your Final Cut Pro X project.
You can also use share destination to get ranges for clips, such as compound and sync clips: learn how.
Simon Says has supported just dragging the FCPX project to the Simon Says FCPX extension but because of complex project structures, the FCPXML can get incredibly complex with numerous permutations. It isn't as reliable and thus we have added Simon Says as an FCPX share destination.
Share destination, on the other hand, first exports out an FCPX project to a video file and then Simon Says takes over and transcribes and translates it. Then you can roundtrip back to FCPX by dragging the Titles or Captions icon.
Share Destination is most reliable and we recommend using it by default.
First: install Simon Says share destination (instructions here).
How to use FCPX Share Destination to caption, subtitle and translate your FCPX Projects.
1. Once you've successfully installed Simon Says share destination: Open the Simon Says application from the "Applications" folder. Open Final Cut Pro X and select your FCPX project that you want to caption and title. (You can also use share destination to get ranges for clips, see here.)
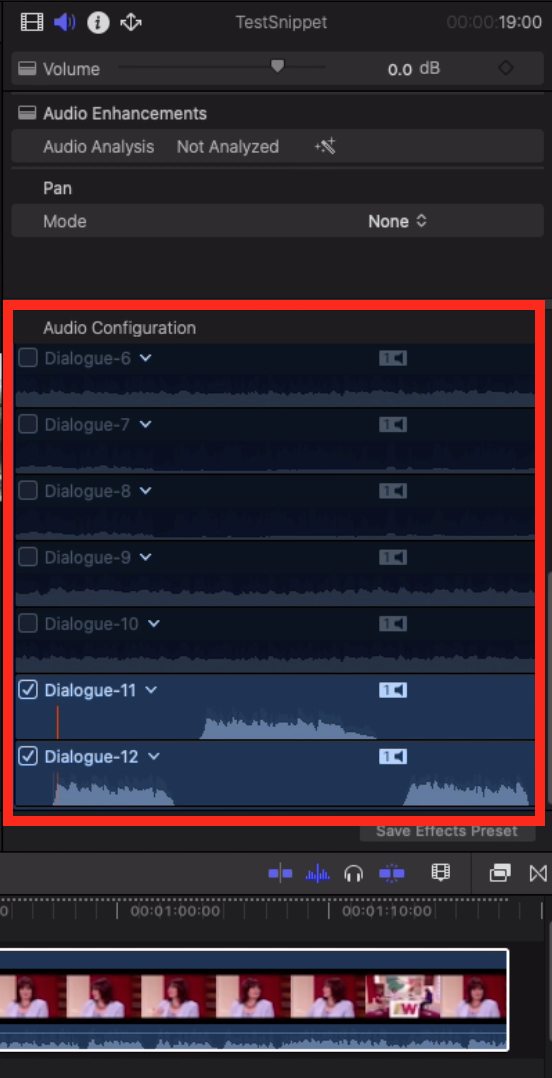
2. Select only the relevant audio channels that contain dialogue and disable all others such as music and sound effects. This will improve the AI accuracy.
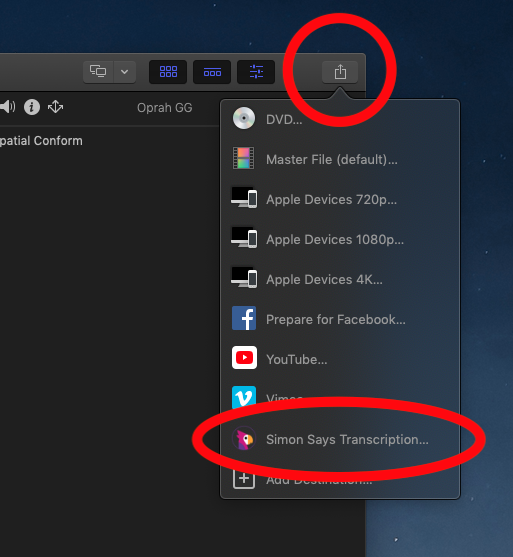
3. Click the share destination icon in FCPX. This icon looks like an export icon and is in the upper right of FCPX. Click it and then choose "Simon Says Transcription".
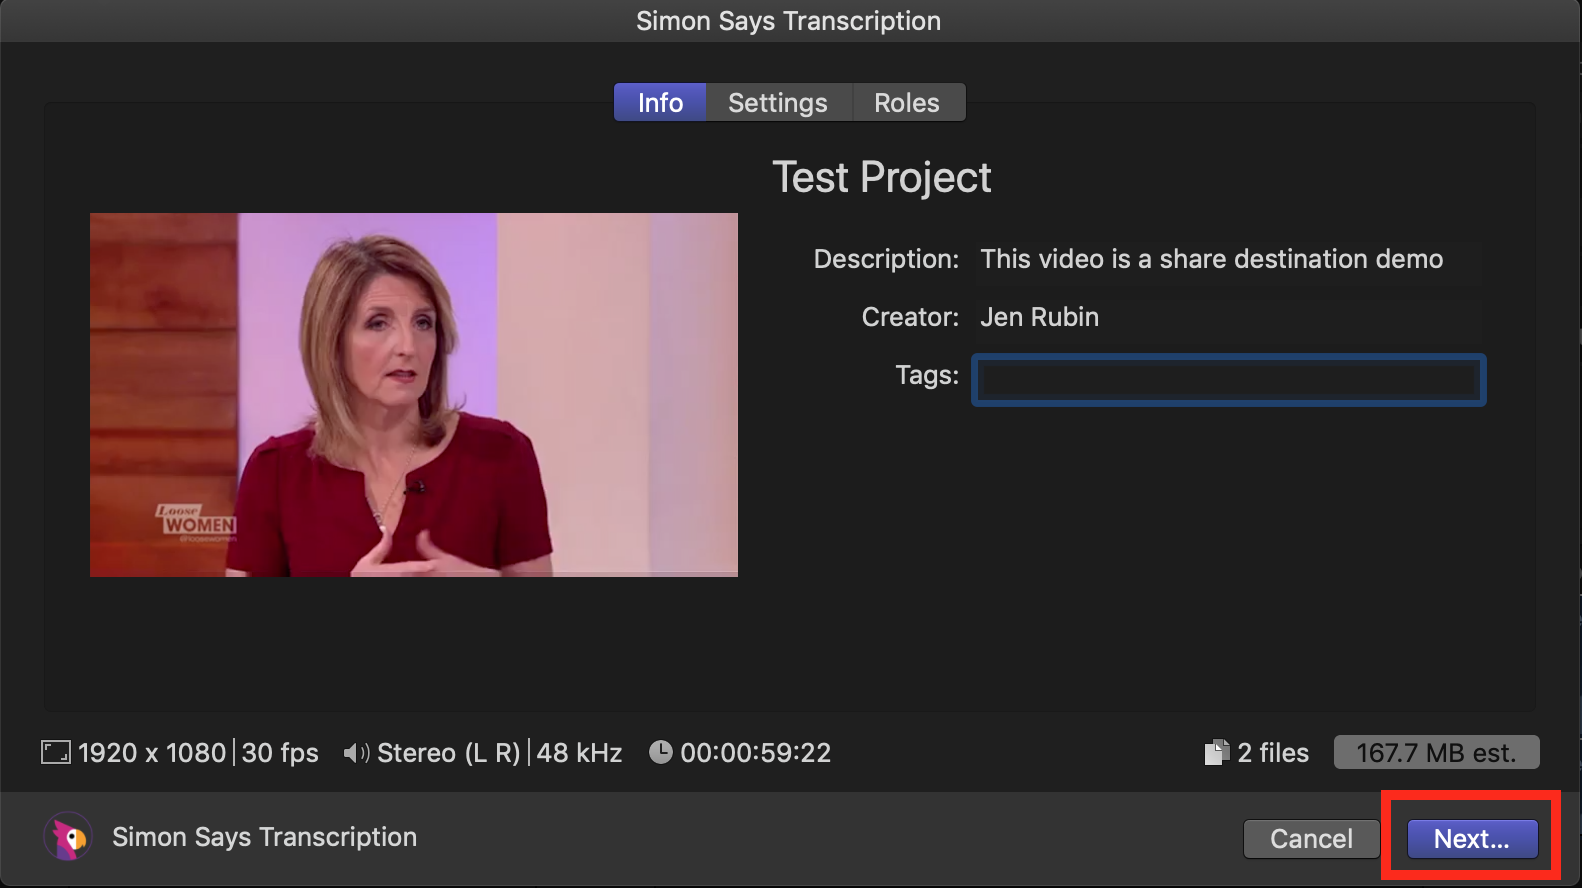
4. Click Next.
FCPX will render the export and you can see the progress in the background tasks window. Once complete, FCPX will send this file to the Simon Says application (not the Simon Says FCPX extension) which should be open.
5. Click Transcribe when ready. Pay or use credit. Cost is based on the duration of your project.
6. Once Simon Says has transcribed the file, click export in Simon Says. Choose the FCPX icon and the option (titles or captions) that you desire.
If you want to translate the subtitles to other languages, you can also do it from the export screen and then choose the relevant languages and click export.
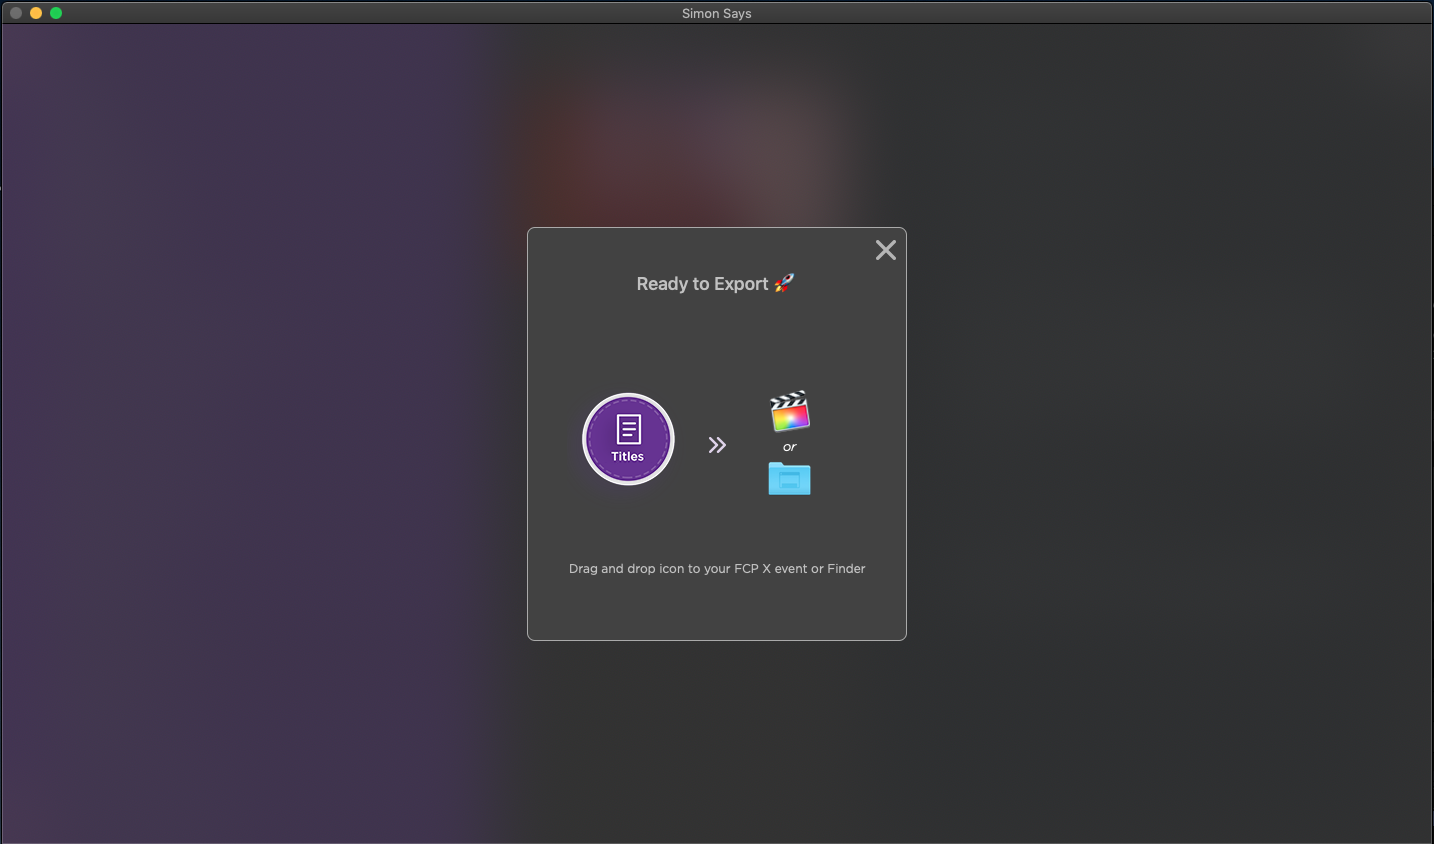
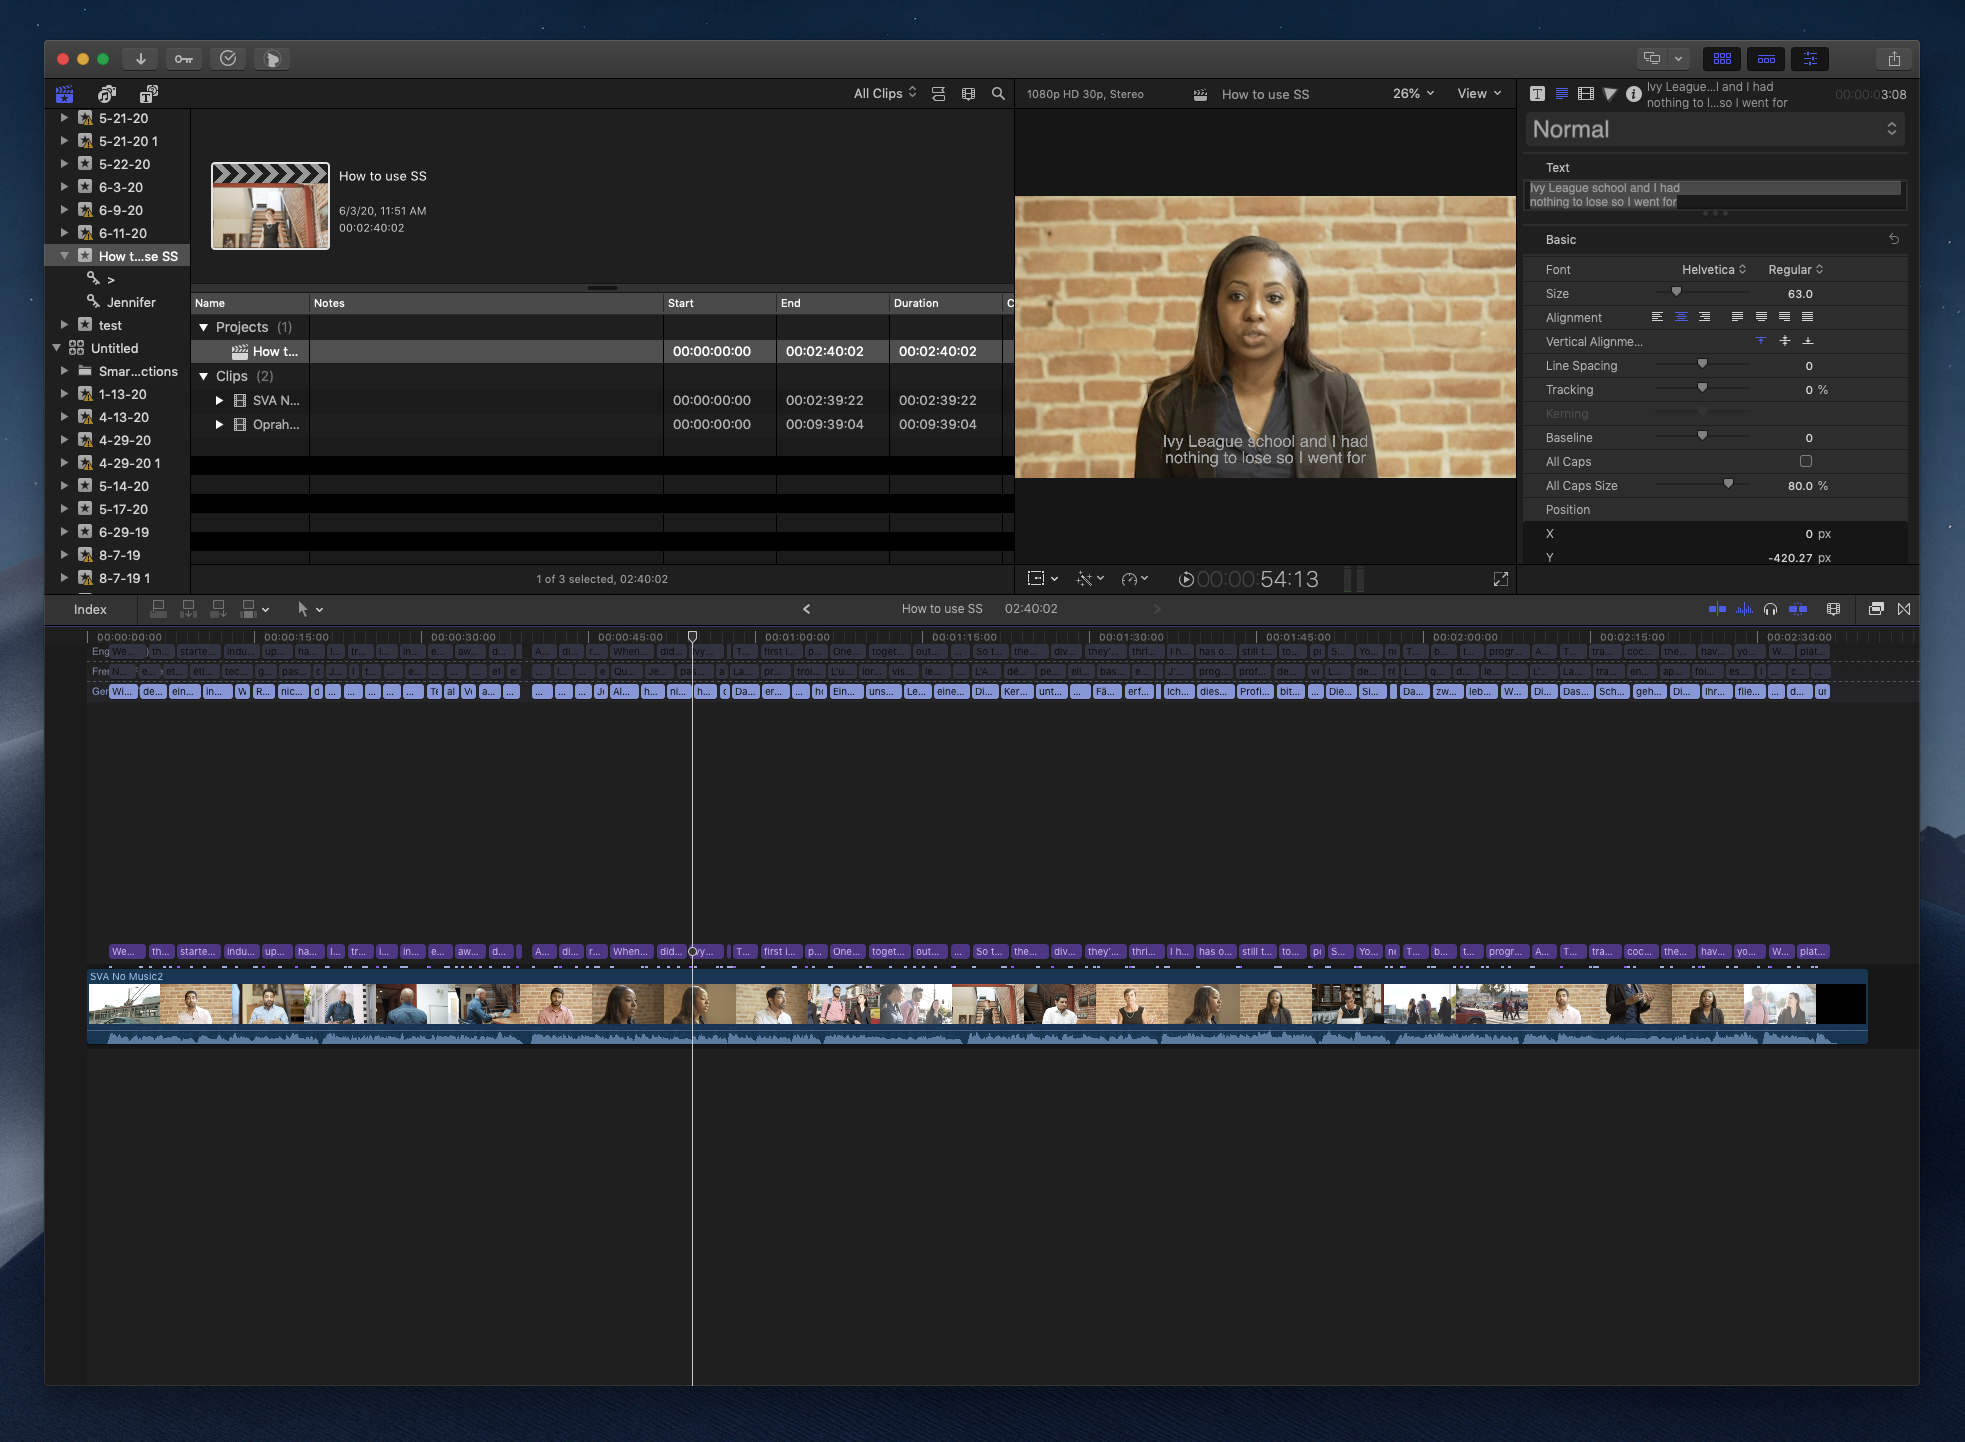
Drag the purple circle icon back to your FCPX event which contains the relevant project. The metadata and media will reattach. Click the FCP project and you should see the light blue captions or purple titles on the timeline.
TaDa!! Your FCPX project now has subtitles, captions, and titles!!
Related Help Articles:
Use Share Destination to get ranges for clips
Install Simon Says Share Destination for FCP
Features of the Simon Says Mac app (a visual guide)
How-to: getting started with the FCP X Extension (video)
Best Practices for importing Multicam and Sync clips with the SS FCP X Extension
Steps to install/uninstall our FCP X Extension / MacOS app
Supported Imports (FCP X Ext/Mac app)