Export XML for Adobe Premiere Pro (markers)
How to export from Simon Says and import markers directly into Premiere
(to see subtitles of this how-to in a different language, click the setting icon in the video and select an available language from CC/Subtitles)
This article is about receiving markers on the Adobe Premiere Pro clip and sequence via the Adobe Premiere Pro XML export from the Simon Says website. (This export is also available via the Simon Says macOS app.)
Separately: If you want subtitles / captions in Adobe Premiere Pro: export "SRT subtitles" from Simon Says and import that to Adobe PP. The video above shows you how or see this article.
And see here for exporting to other non-linear editing software.
Adobe Premiere Pro markers for clips and sequences
Export markers for Adobe Premiere Pro clips and sequences.
- Once your audio / video is transcribed in Simon Says, click the Export button:

2. A pop-up will appear (like in the image below). Select “Adobe Premiere” from the options and often you will want to check “only bookmarks” if you highlighted the key rows in the transcript.
If you don’t select “only bookmarks” you will get your entire transcript broken into clips that correspond with the transcript rows.

Export from Simon Says: select Adobe Premiere Pro and you will receive a ZIP file. Unzip it and you will find an *.xml file.
3. Open Adobe Premiere Pro and create a Project. If you have the option to, match the settings (such as for the frame rate and resolution) of the media file you transcribed in Simon Says. Then go to the “File” menu and click “Import…” like this:
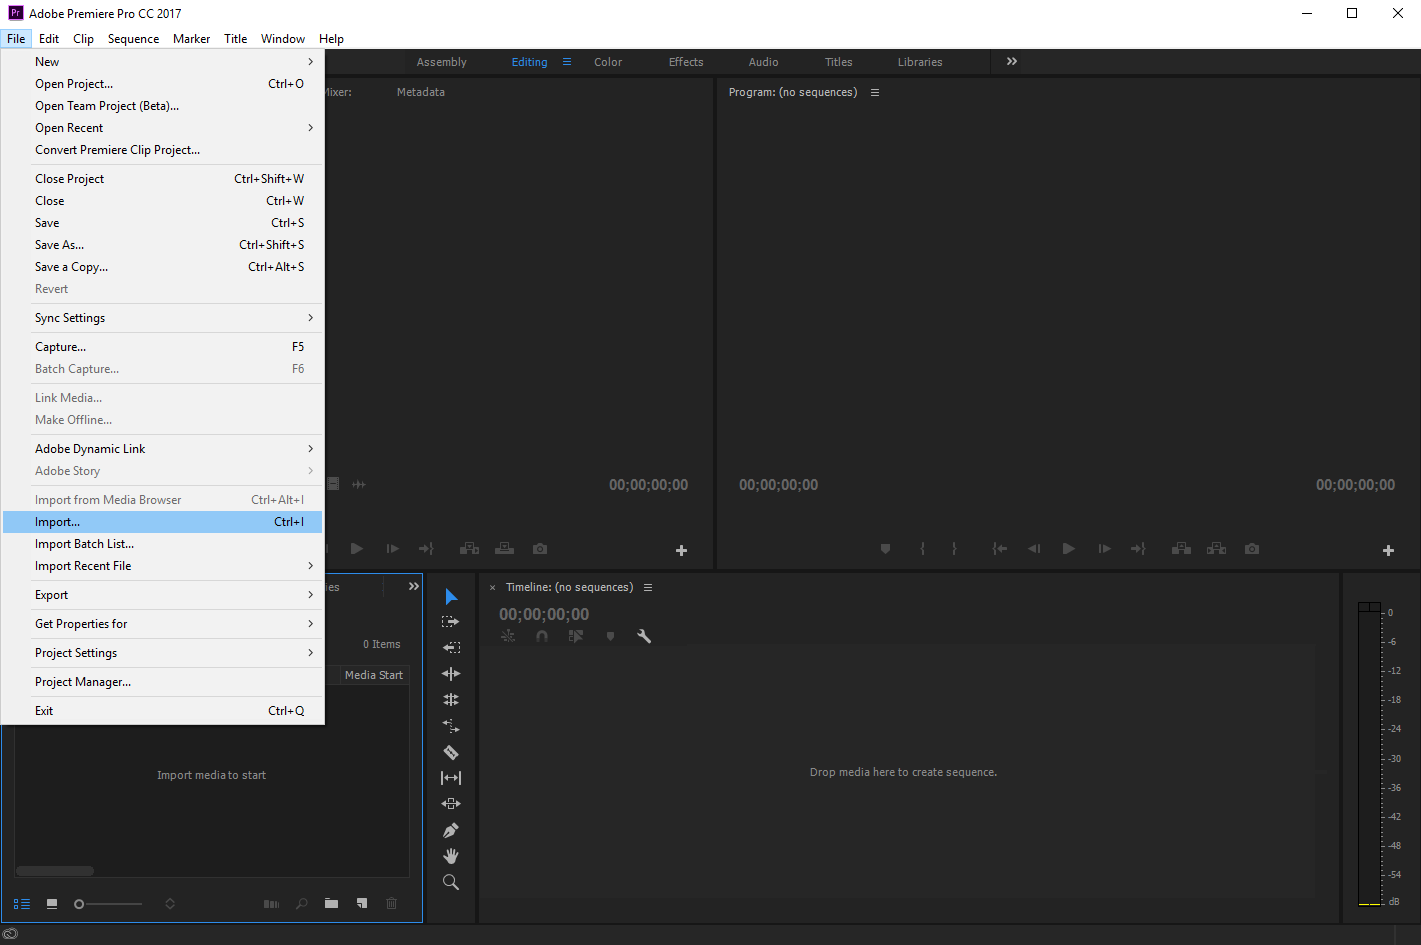
4. An Import/file chooser box will pop up. Navigate to the folder that contains the XML file and select it.
5. A Link Media box will pop up. Click “Locate” at the bottom right.
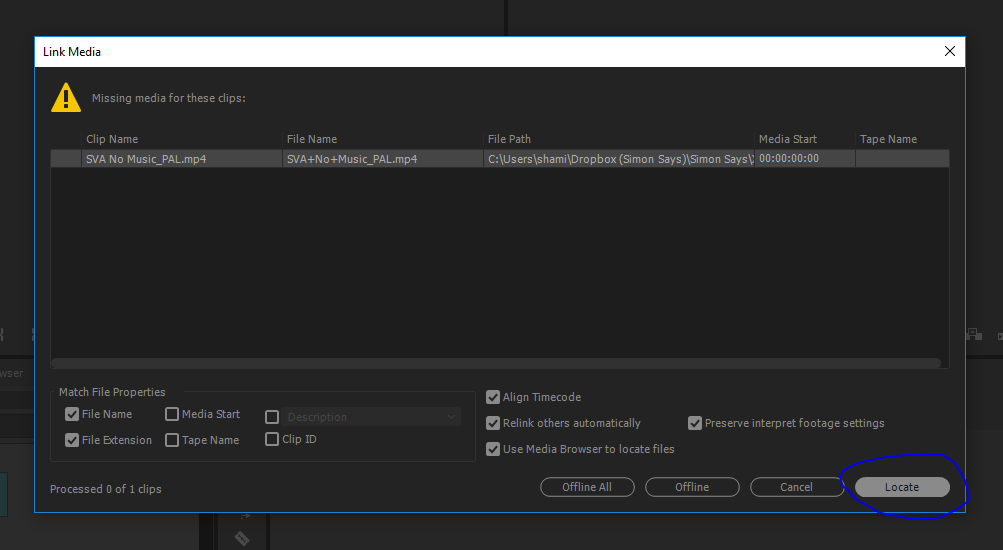
Then in the Locate File box, navigate to where the media file which you uploaded to Simon Says is on your computer. Select it.
6. TaDa! Adobe Premiere Pro will connect to the reference media file and you will see markers (with transcript text) on both the clip and a sequence that corresponds to what you saw (and heard!) on Simon Says.
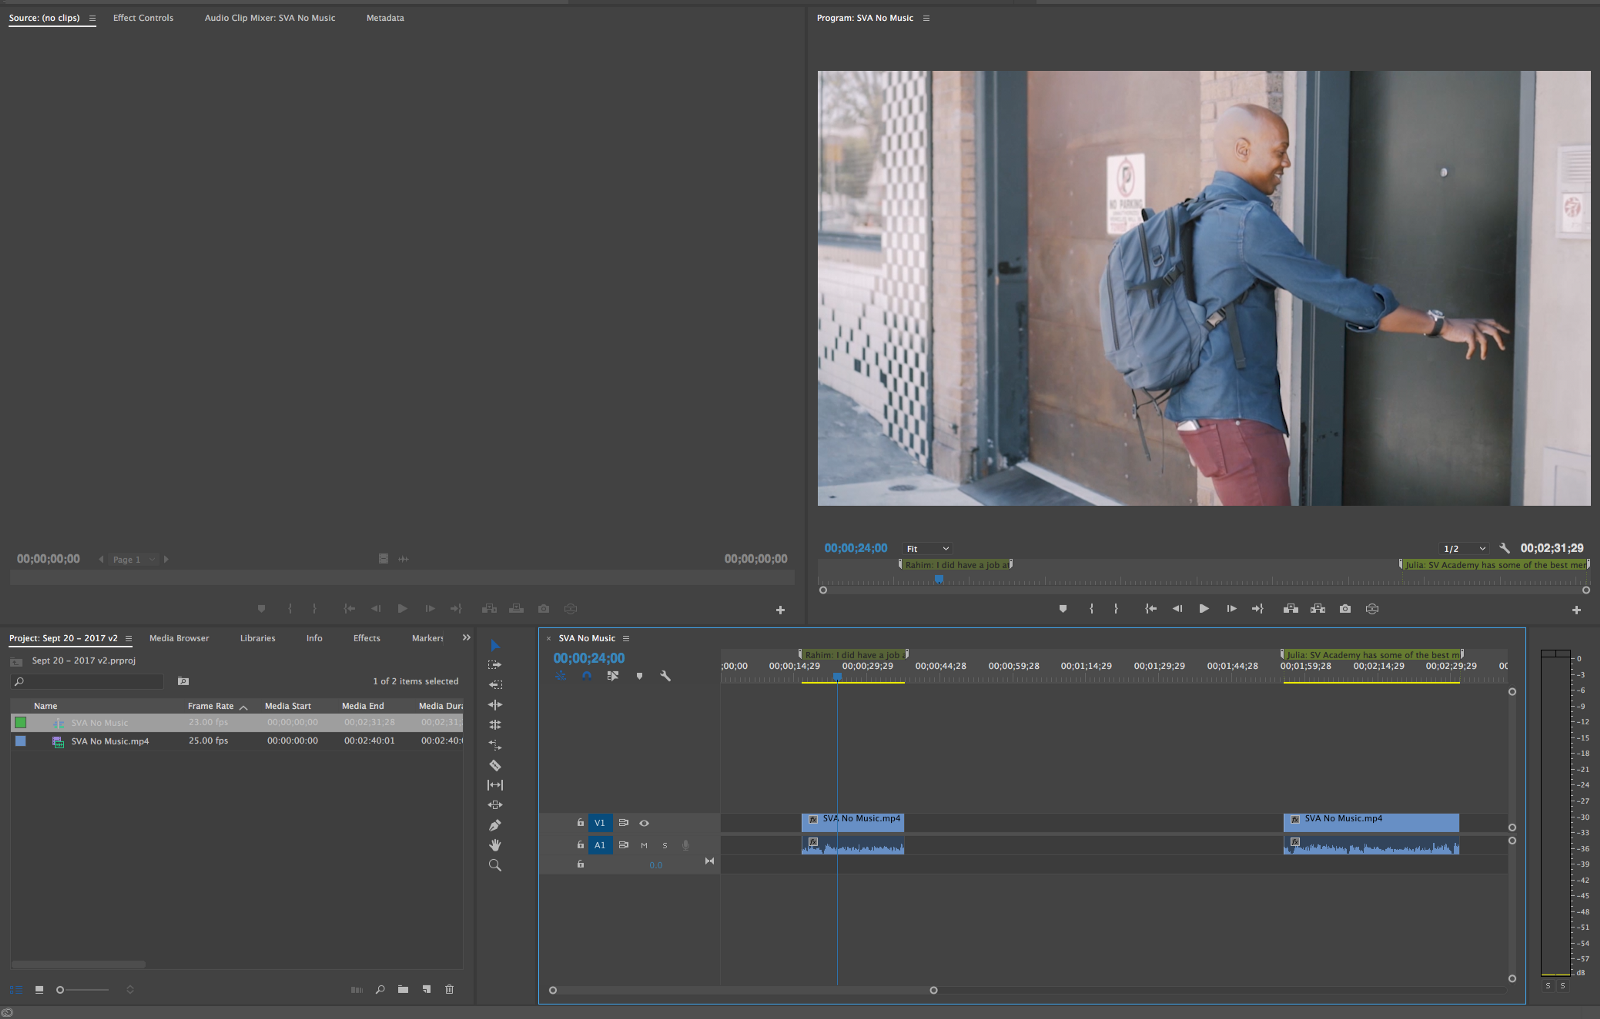
On the timecode area you will notice a green bar. This green bar will have a snippet of the transcript and when you mouseover you can see the full transcript for that clip.

Or you can see all the clips and their speakers and transcripts in the Markers window. To go to the Markers window, go to “Window” menu and click “Markers.”

Open the “Markers” window to see the list of clips and their transcripts.

Notice you can search for keywords which makes finding key quotes really fast.

Zoomed in: this is how the transcripts associated with clips look. It includes speaker names too (if you’ve assigned it in Simon Says’ transcript screen).
*If you have multiple files in your Simon Says project and you want to bring each one directly into Adobe Premiere Pro, you will need to follow the above Export steps (starting at Step 1) for each file individually.
**The method outlined above is best used at the outset of an edit and to find the key parts of your clips to edit from. If you are looking to caption an edit, we suggest export to SRT and then import the SRT to Premiere.
Related Help Articles:
Auto-sync timecode and frame rate
Exporting video proxies from your NLE to preserve timecode/framerate through to transcript export
How to Export to Adobe Audition
How to import into Final Cut Pro X
How to import into Pro Tools
How to receive video proxies on Simon Says website from the Mac app
Working with folders and labels
Which formats can I export my transcript to?
Which formats/codecs do you support?