.jpg)
How to Save DaVinci Resolve Videos as Mp4
Blackmagic Design’s DaVinci Resolve is the best free video editing software currently on the market. While there is a paid option, the free version of DaVinci Resolve is wonderful enough for most editing needs. It’s a great tool to edit and export content in, providing a whole slew of codec options.
While programs such as Adobe Premiere Pro may have been around for longer, DaVinci Resolve has shown to be a new dominant force in the post-production industry.
This beginner tutorial will go over everything you need to know about the MP4 container and go over the reasons why so many people still use MP4 video.
Does DaVinci Resolve support Mp4?
The short answer is, yes DaVinci Resolve supports MP4. The great thing about MP4 is that it’s an international container. QuickTime (the closest competitor for MP4) is specifically designed for macOS devices. MP4 on the other hand works great on both Mac and Windows. MP4 is also a very popular container because it supports the two most popular codecs H.264 and H.265.
The biggest difference between QuickTime and MP4 is that MP4 is typically a little bit more compressed than QuickTime. MP4 also gives the exported video file a .mp4 file extension whereas QuickTime files have a .mov file extension.
As a video editor, it can often be tempting to go with the container that yields the absolute highest video quality. If a video is hosted on social media platforms though, it often doesn’t matter how high quality the image is since it’ll be compressed. Sites like Vimeo have a data cap as well, making it advantageous not to have a large video file size.
Importing Mp4 files into DaVinci Resolve
Importing MP4 files into DaVinci Resolve is a very simple process that can be accomplished with three different methods. To start, you’ll want to launch DaVinci Resolve, create a new project file, and go to the media tab at the bottom of the page.
Once there, you’ll want to click on “file” in the upper left-hand corner and then hover over “import” and click on “media’.
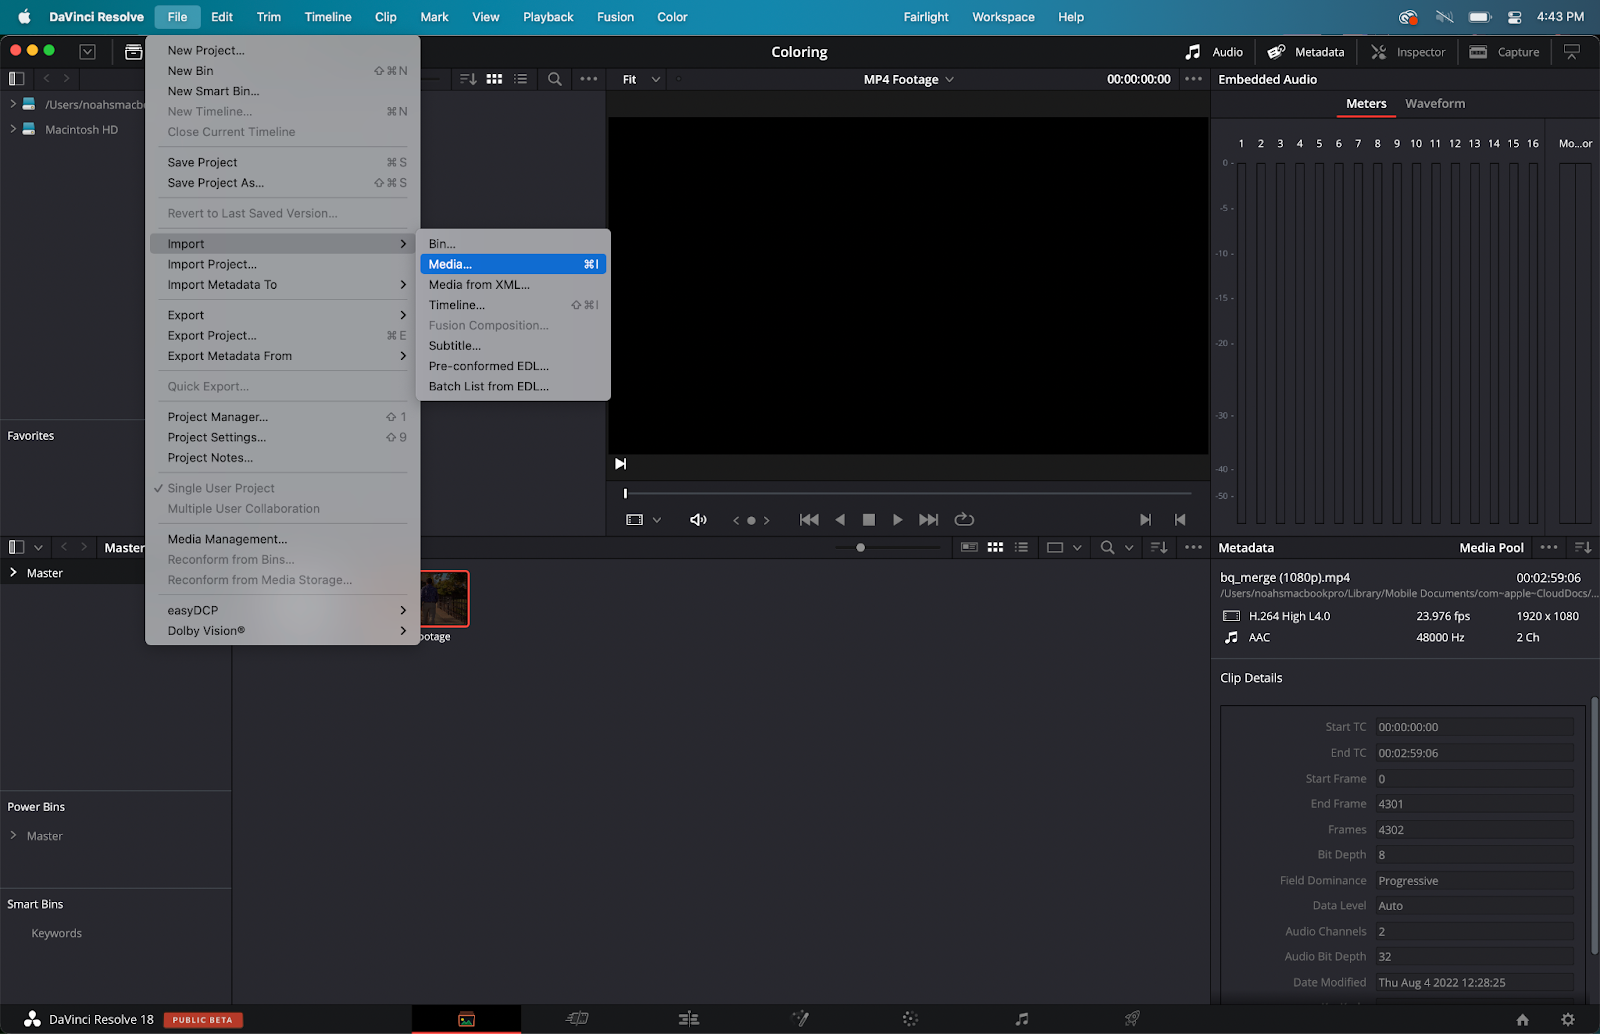
You’ll then be brought to your finder or file window where you can import whatever footage you’d like. This can also be accessed by hitting ctrl + m or cmd + m on your keyboard.
The other way to do this would be to drag your footage from the finder or file window into the empty space below the playback window.
How to export DaVinci Resolve project to Mp4
Exporting to an MP4 file is just as easy, and there’s really only one way to export video in DaVinci Resolve.
First, go to the “deliver” page which you can access by clicking the rocket ship icon at the bottom of the screen. ‘’

This will bring you to your export settings with all sorts of presets available. You’ll get information like frame rate, and encoder settings, as well as options to change the file name.
In the “render settings” tab there will be an icon titled “format”. Clicking on this will give you a slew of container options. In the drop-down menu, there will be an MP4 format option.
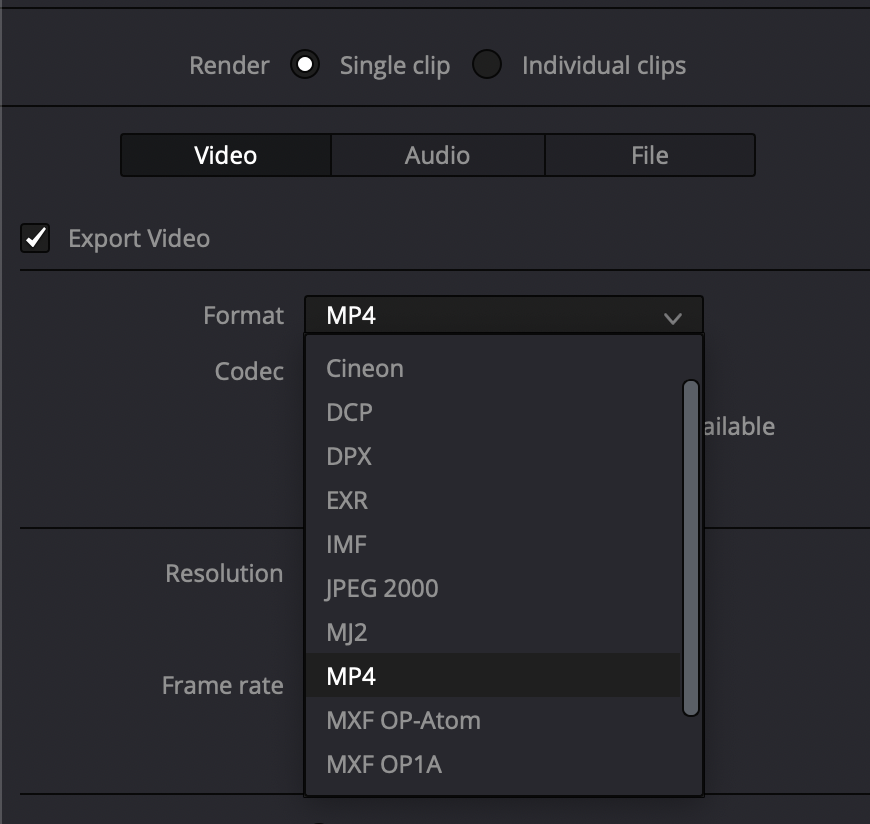
You will then be able to set your codec to either H.264 or H.265. This is all you need to start your export.
You’ll then want to go over to “add to render queue” at the bottom of “render settings” tab. This will put your video on the right-hand side. Clicking on “start render” will begin the export.
You now have an MP4 file.
Troubleshooting DaVinci Resolve Mp4 export issues
While DaVinci Resolve is great (and it keeps on getting better with DaVinci Resolve 17 and on), a few issues can sometimes arise when exporting, specifically with audio.
Fixing audio issues with Mp4 export
The first thing you’ll want to do is make sure that the audio checkbox in the timeline of your footage is checked. This can happen to even the best video editors.
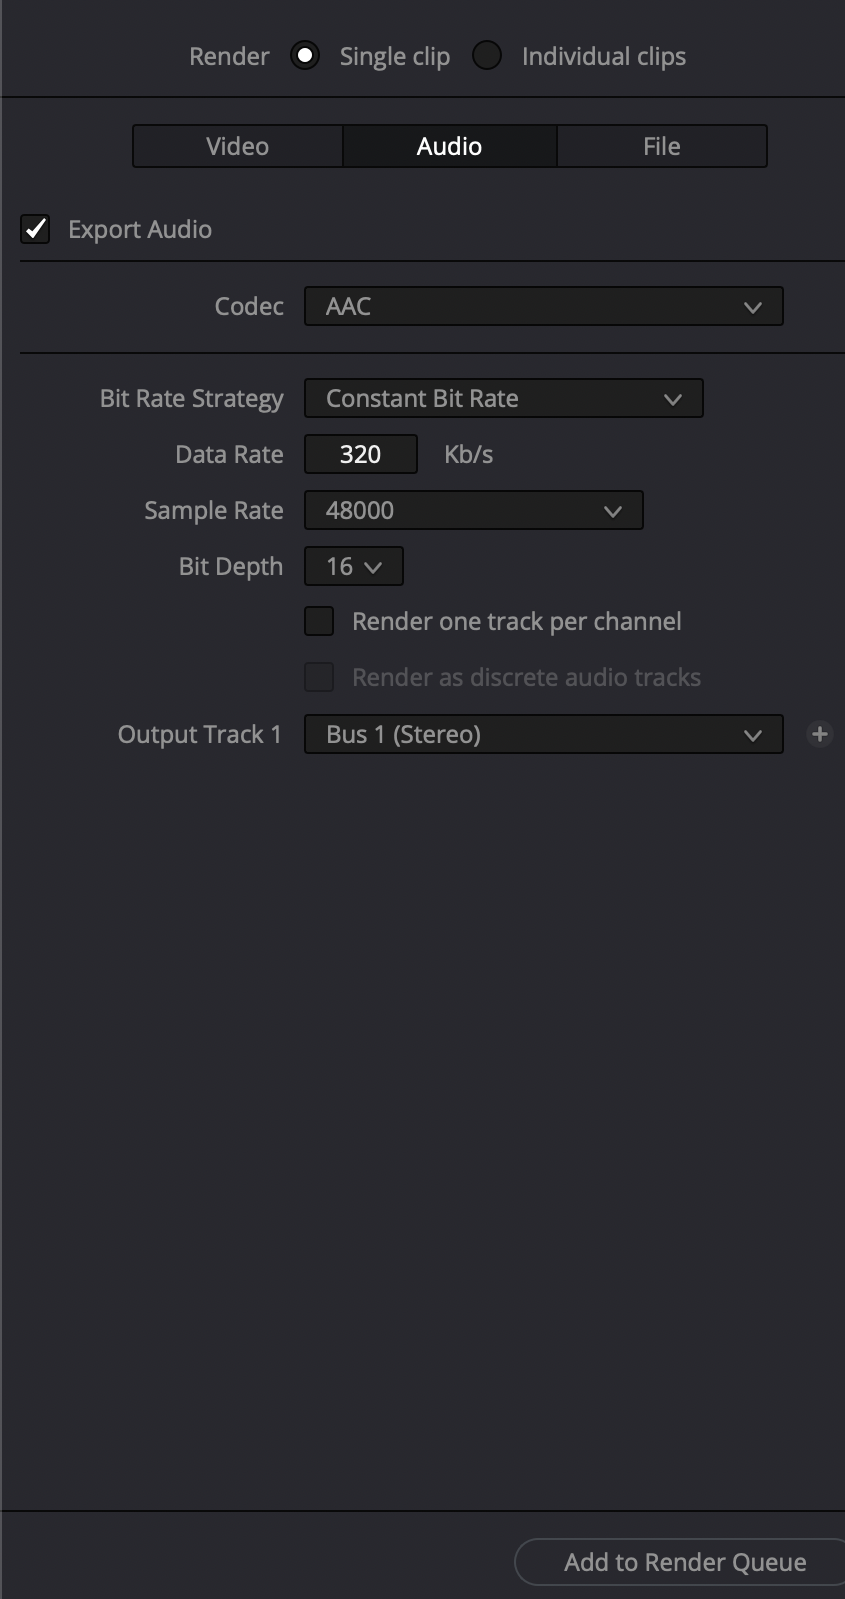
If it is check-marked, go back over to the “deliver” window and go to the “audio” tab. Make sure that the “export audio” checkbox is checked off. At the bottom of this same window is a drop-down menu labeled “Output Track 1”. Make sure that this is set to “Bus 1 (Stereo)”.
Fixing gamma shift with Mp4 export
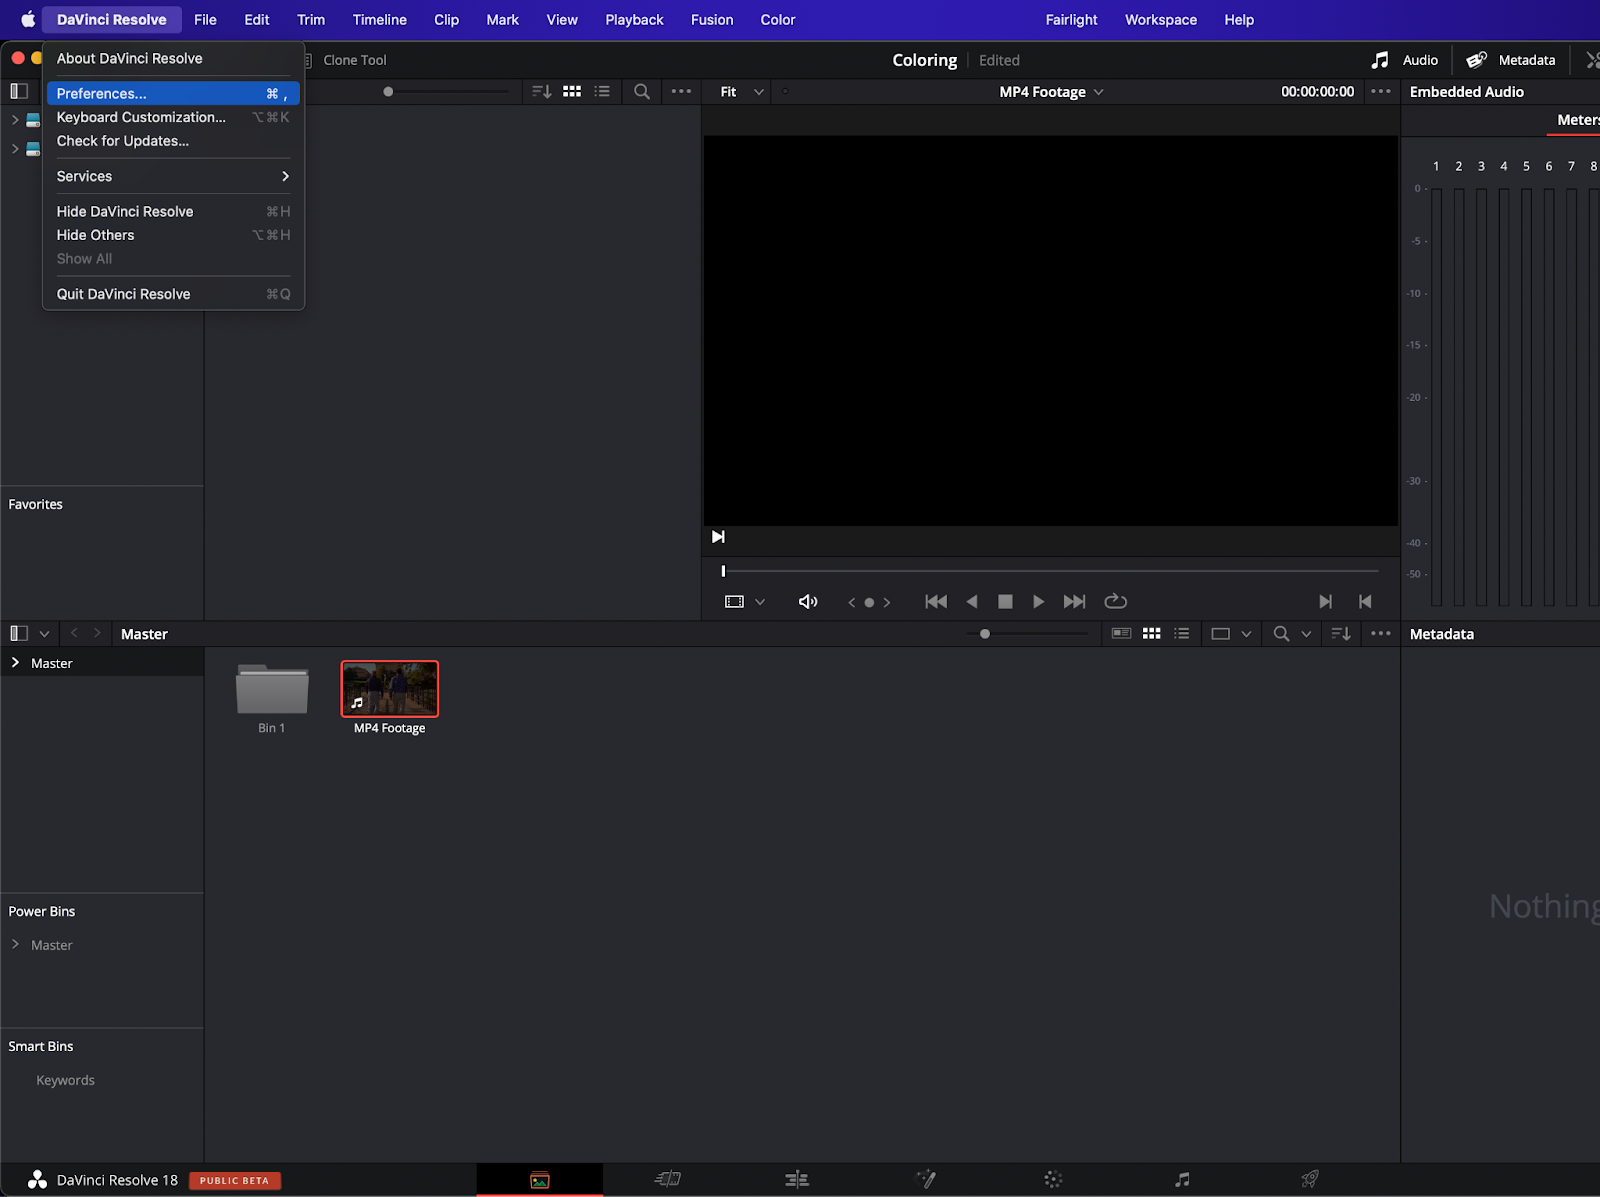
Some users might experience problems such as gamma shifting in their MP4 exports. The first thing you can do is check your DaVinci Resolve preferences. This can be done by going to the upper left corner of the screen and clicking on “DaVinci Resolve”.
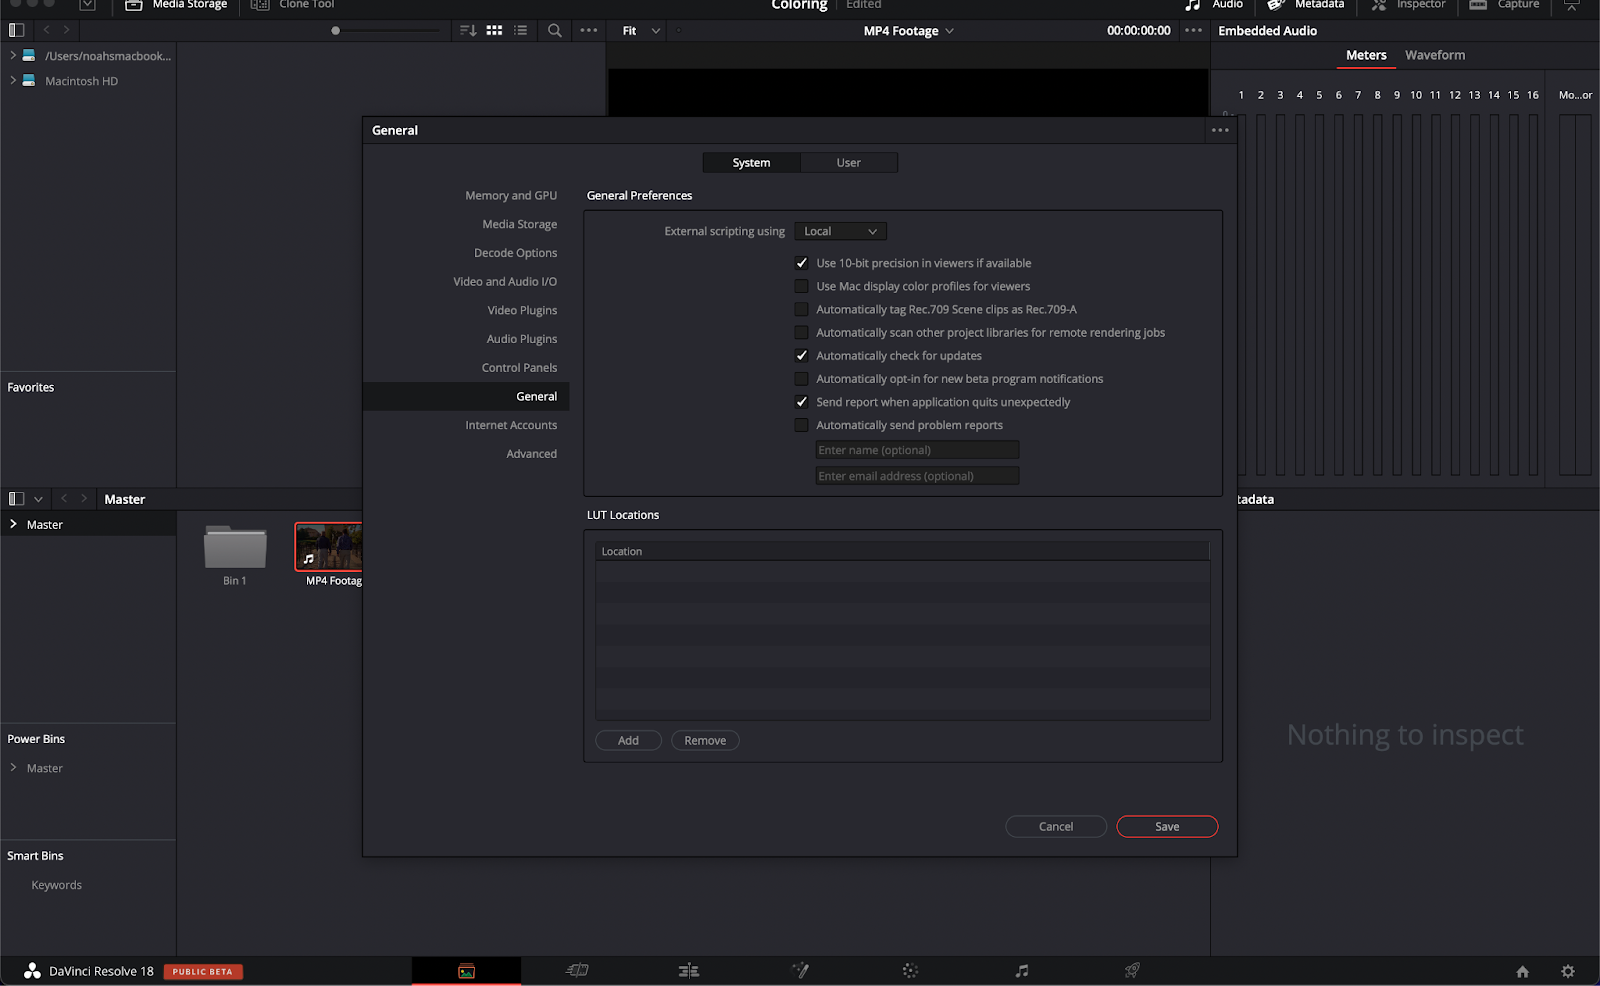
You’ll then want to go to “preference” and make sure “use Mac display profile for viewers” and “automatically tag Rec.709 scene clips as Rec 709-A” are checked off. For Windows users this process is the same.
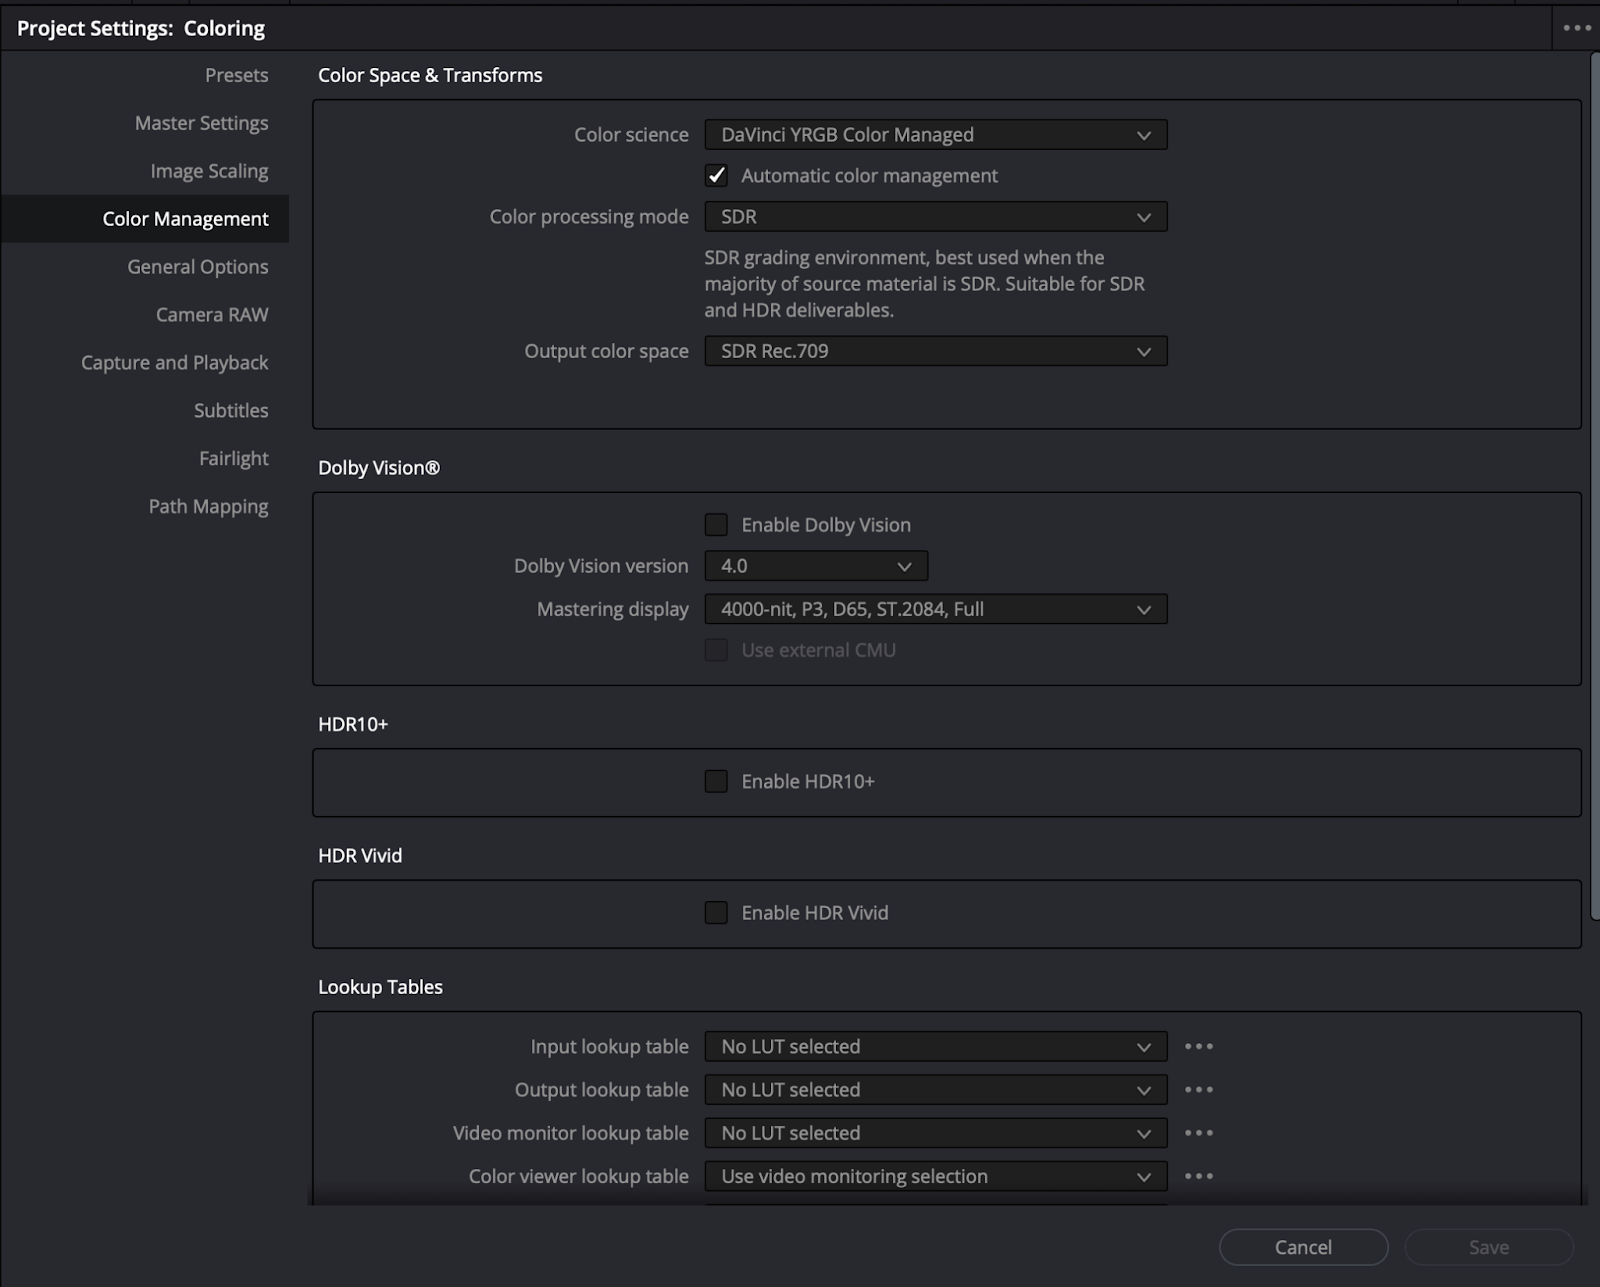
The next thing you’ll want to do is go to the “color management” panel which you can find under project settings. You’ll want to make sure that all of the settings here are to your liking for your specific project. It’s best to keep this at the default settings if you’re a beginner.
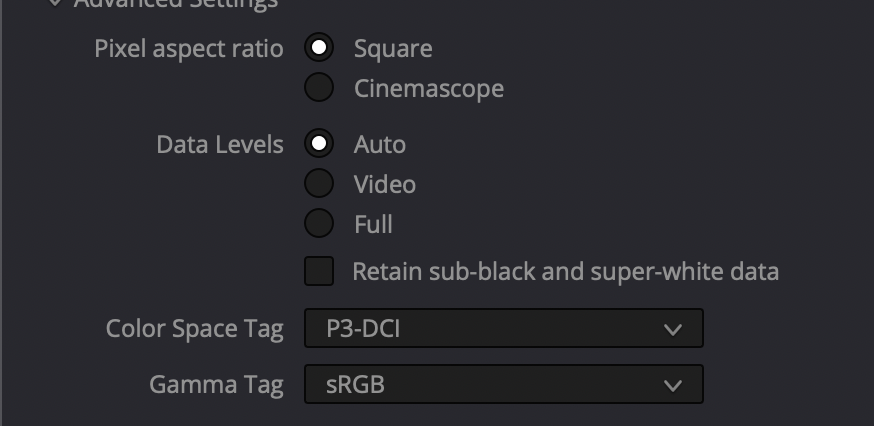
If that still doesn’t work, go to your deliver tab and scroll down to the “color space tag” and “gamma tag” drop down menu under “advanced settings”.

Here, you’ll want to set the color space tag to “P3-DCI” and the gamma tag to sRGB. This will give you a consistent look throughout the board.
Wrapping up
DaVinci Resolve just keeps getting better and better, and it is the best free option for post-production software. With it, exporting MP4 content has never been easier. Plus, with tools like Simon Says, you can quickly add an extra layer of ease and professionalism to your videos.