How to Export Video From Adobe Premiere Pro
Video exporting might be one of the most overlooked steps in the post-production process which is unfortunate considering it may just be the most important. A lot can go wrong during the export process, and it’s important you know how to export a video to keep your footage looking just as beautiful and as sharp as when you shot it.
Many creators rely on Adobe Premiere Pro for creating video content. It has been one of the most popular video editing software since its conception nearly twenty years ago. Its great user interface, incredible effects, and wonderful integration with an abundance of Adobe Creative Cloud apps would be meaningless though if it wasn’t also a powerhouse at exporting videos.
Adobe Premiere Pro export options
Premiere Pro has a plenty of export options right at your fingertips. The various export options can be found by clicking the “file” dropdown menu and then hovering over “export”.
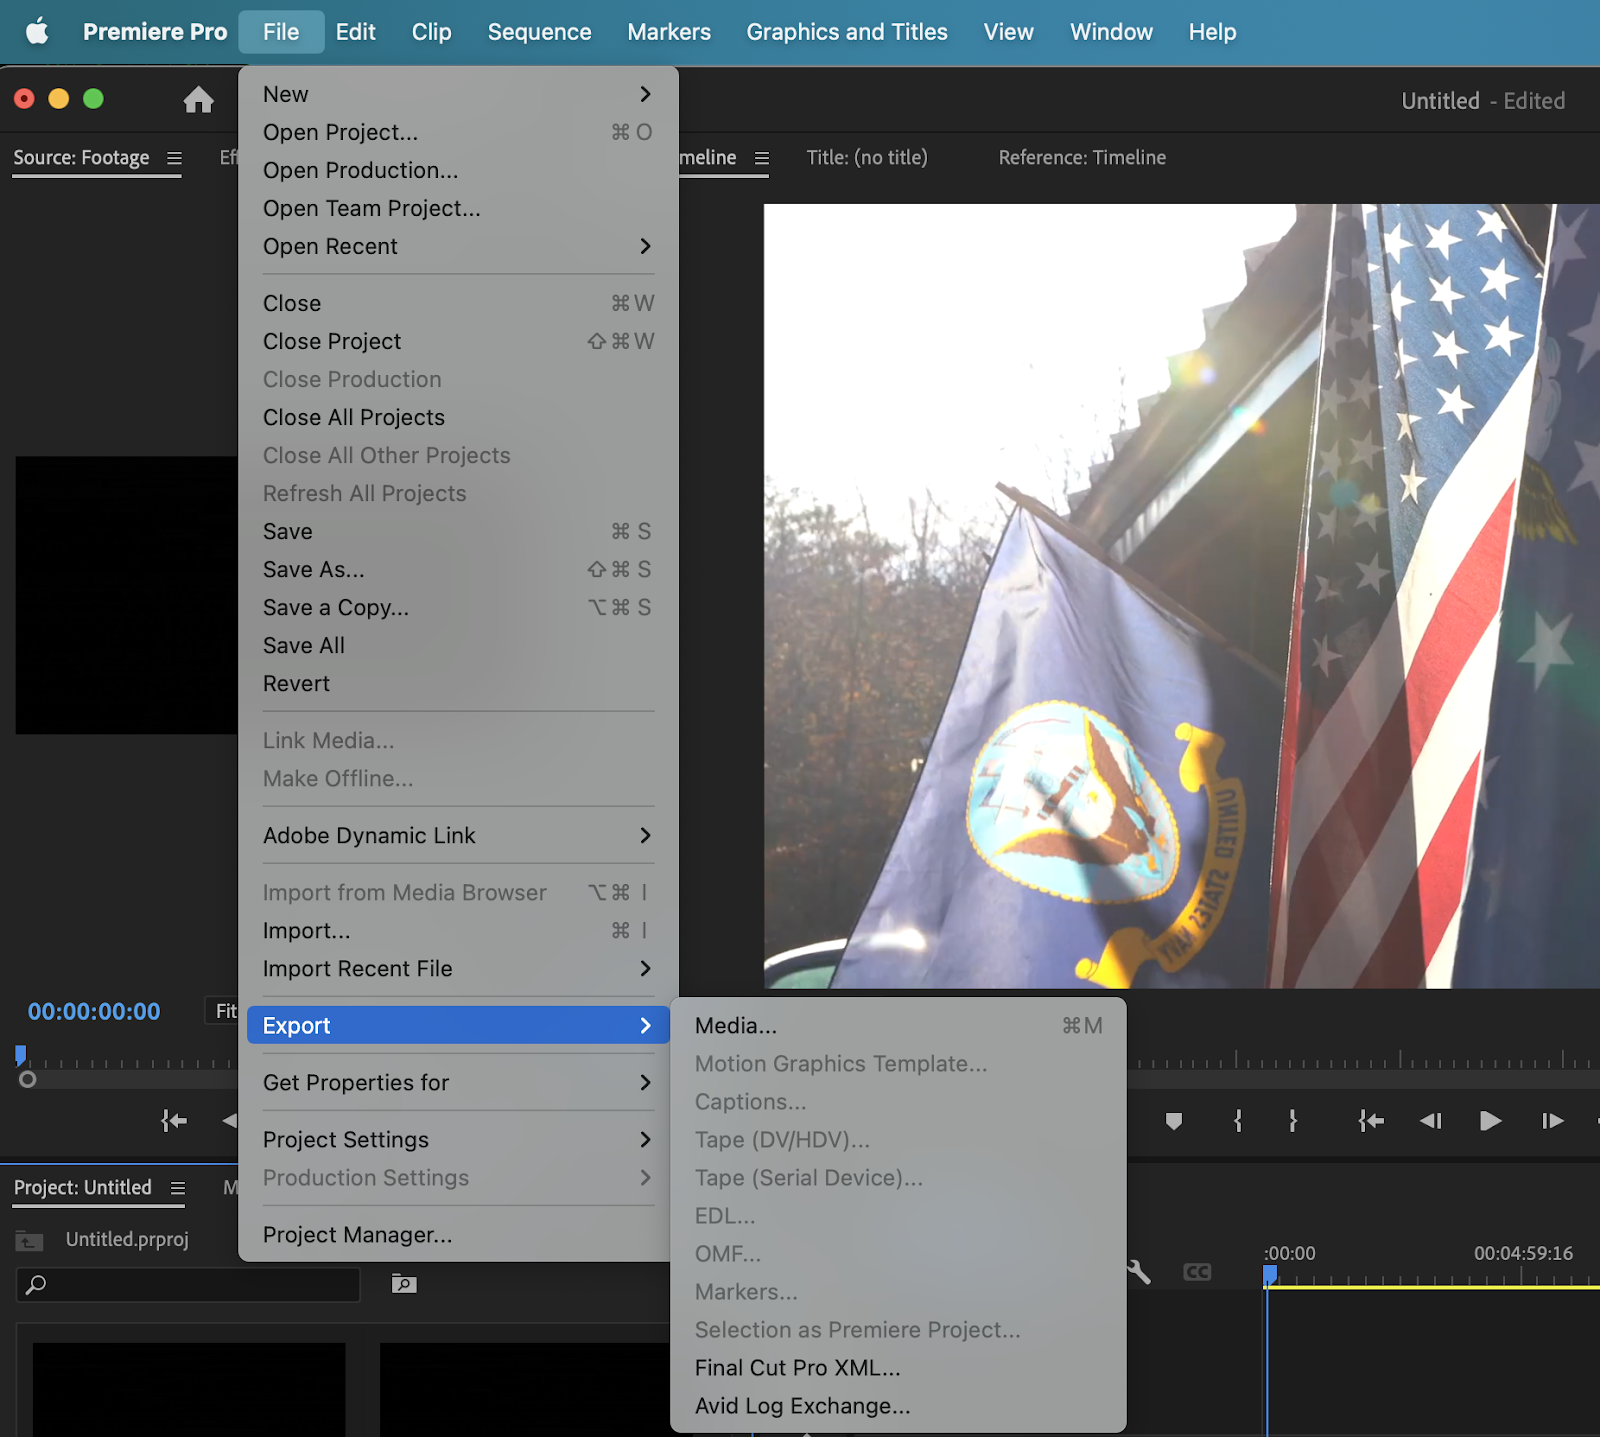
The most common export type that you’ll most likely use is “media”. Media brings you to the traditional export settings window with codec, bitrate, and output options. This window has recently had an updated new look in the 2022 version of Adobe Premiere Pro but functions essentially the same as older builds.
This can also be accessed by clicking ctrl + m on your keyboard or cmd + m if you’re on a Mac.
The “Motion Graphic Template” button in the dropdown menu will bring you to save any motion graphics you make in Adobe Premiere Pro as a MOGRT file. This is a great way to reuse motion graphics that might have a purpose across multiple videos, saving them as presets. This option will only be available if you have the motion graphic you want exported selected in the timeline.

Another common export type is “captions”. Subtitle and captioning have become more important than ever in the age of social media. Choosing captions allows you to save and export your subtitles or captions as an SRT file. While NLEs like Adobe Premiere Pro try and make the captioning process simple and intuitive, it can still be quite a process to do captioning all by yourself. Luckily, there are a lot of great third-party extensions such as Simon Says that does all the hard work for you.
We have an extension designed specifically for Adobe Premiere Pro that transcribes, captions, and translates in 100 languages all natively within the program.
The last major export option you could use is “Final Cut Pro XML”. This exports your entire project as an XML file so that you can open it up in Final Cut Pro if you so desire. This is great if your workflow requires the use of another NLE.
How to export from Adobe Premiere Pro
While having all these export options is great, most users will primarily be sticking to “export media”. In the new 2022 version of Adobe Premiere Pro CC, this menu has been completely overhauled, making it more visually pleasing and simplistic. All of the old options found on the previous versions of Adobe Premiere Pro CC are still there though with some new features thrown in as well.
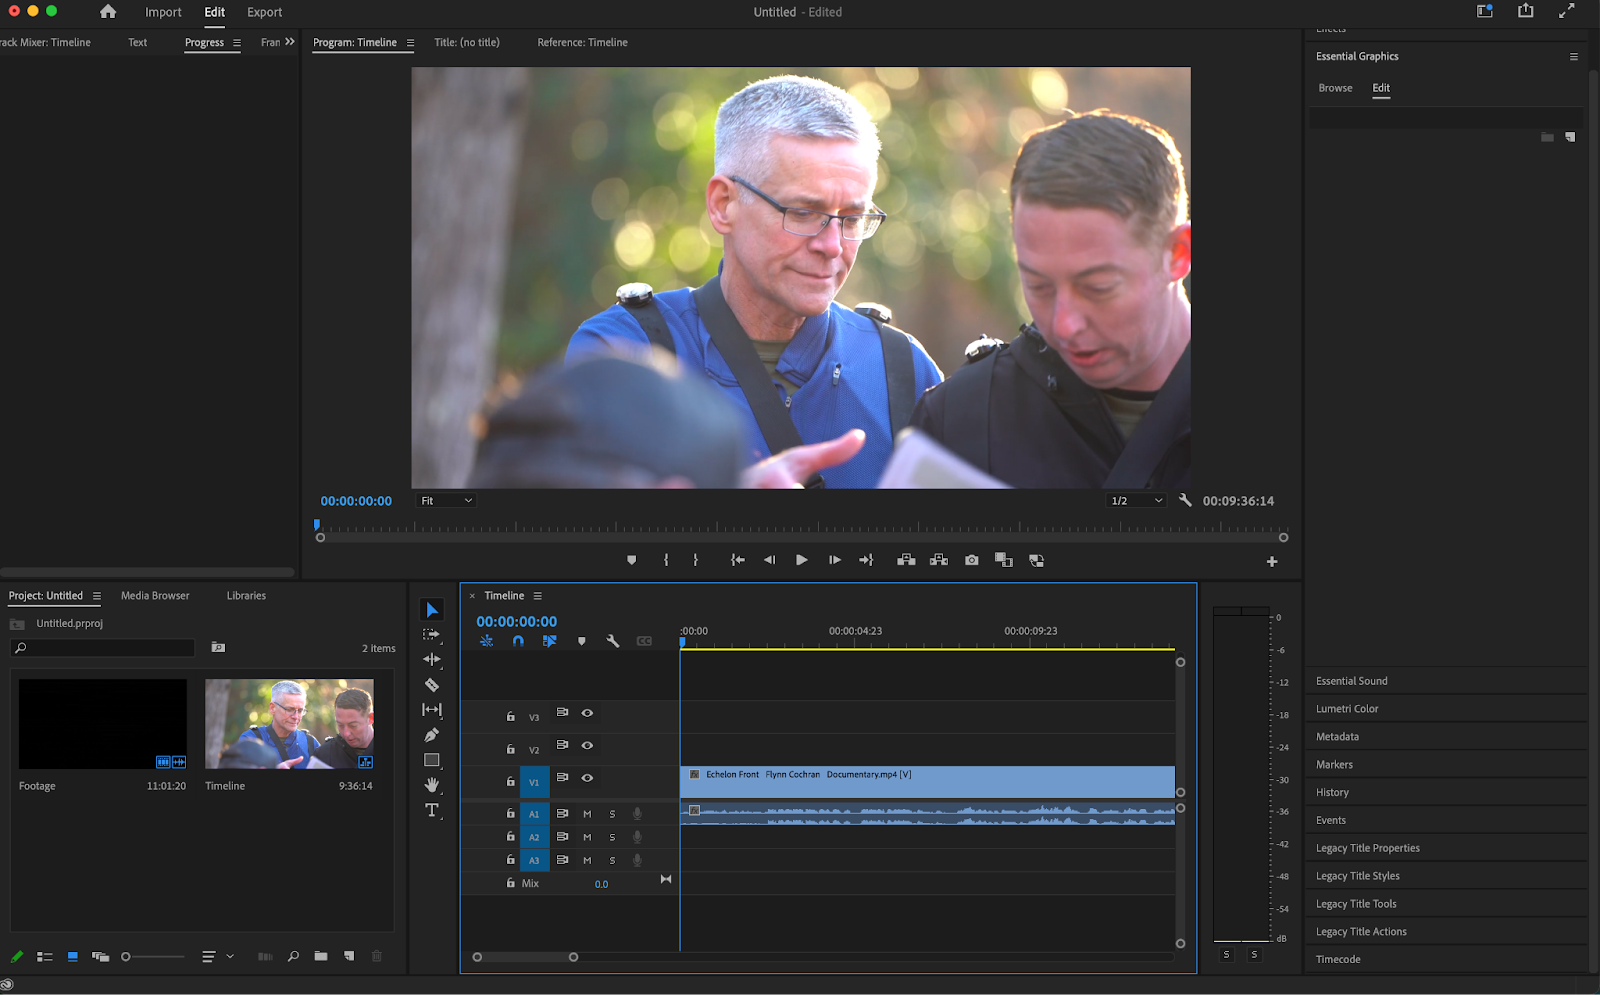
Step 1: Select the project to export
The first thing you’ll want to do is open up your desired project. Triple-check to make sure that everything is in order before beginning your export. There’s nothing worse than viewing your finished export only to realize that you misspelled a word, colored a clip wrong, or missed a transition.
Step 2: Open the export window
After everything is to your liking, you’ll want to open up the export window. This can be down one of three ways.
The first way is to click “File” and then scroll over the “Export” button and click “Media.
The second way is by simply hitting ctrl + m or cmd + m on your keyboard.
The third way was updated for the 2022 version of Adobe Premiere Pro CC. Next to the “Edit” button on the top left of the screen is a button called “Export”. Clicking it will bring you over to the export window.
Step 3: Adjust your sequence settings
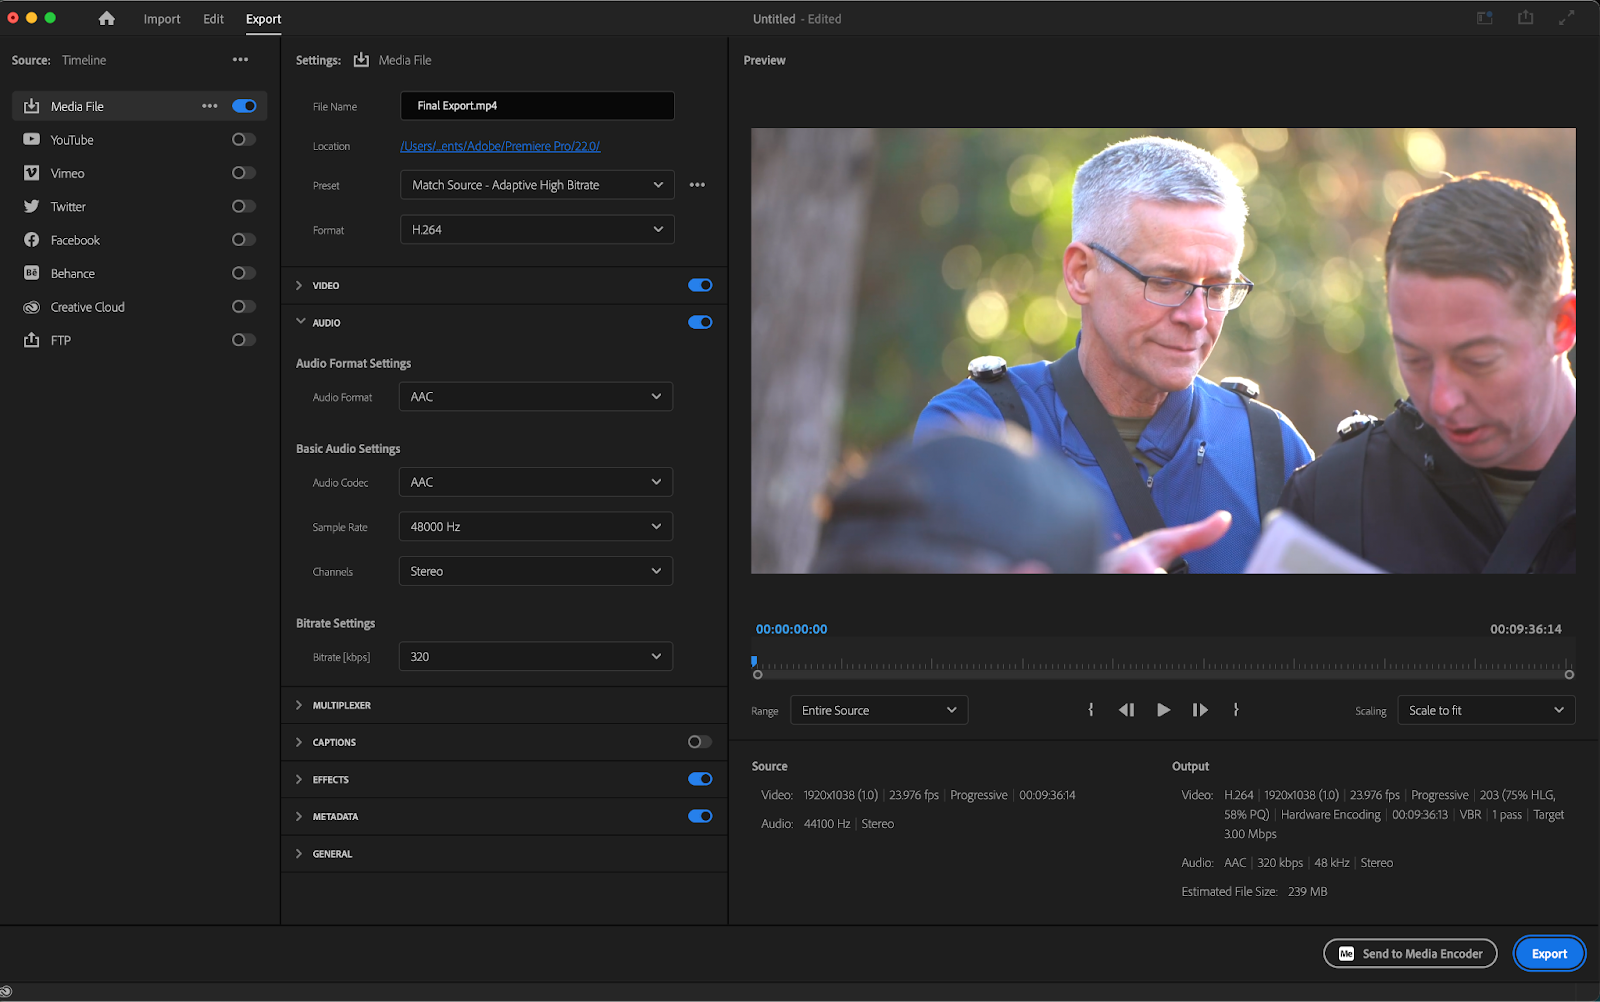
Once inside the export window, you’ll be greeted with a wide array of export options. The export window itself is broken down into three columns.
The column on the left (labeled “timeline") shows all of your presets, the column in the middle (labeled “settings”) gives you all of your metadata and output options, and the column on the right (labeled “preview”) shows a playback window of what your project will look like as well as all of your important data such as file size and frame rate.
The settings column is the most important one out of the bunch. “File name”, “Location”, “Presets”, and “Format” are accessible right away in this column. By default, the preset drop-down menu is set to “Match Source” which will match the sequence settings of your project.
Clicking on this will open up a drop-down menu allowing you to choose from a small batch of presets. Selecting “more presets” will give you access to hundreds of Adobe presets with options to even import and export your own.

Below this menu are seven different drop-down menus. The most important two are “Video” and “Audio”. Inside of video, all of the options are greyed out by default. It’s best to keep this the same since it matches the settings you chose in the timeline. If you’d like to change any of these, it can be done by clicking the checkboxes on the right-hand side of the column.

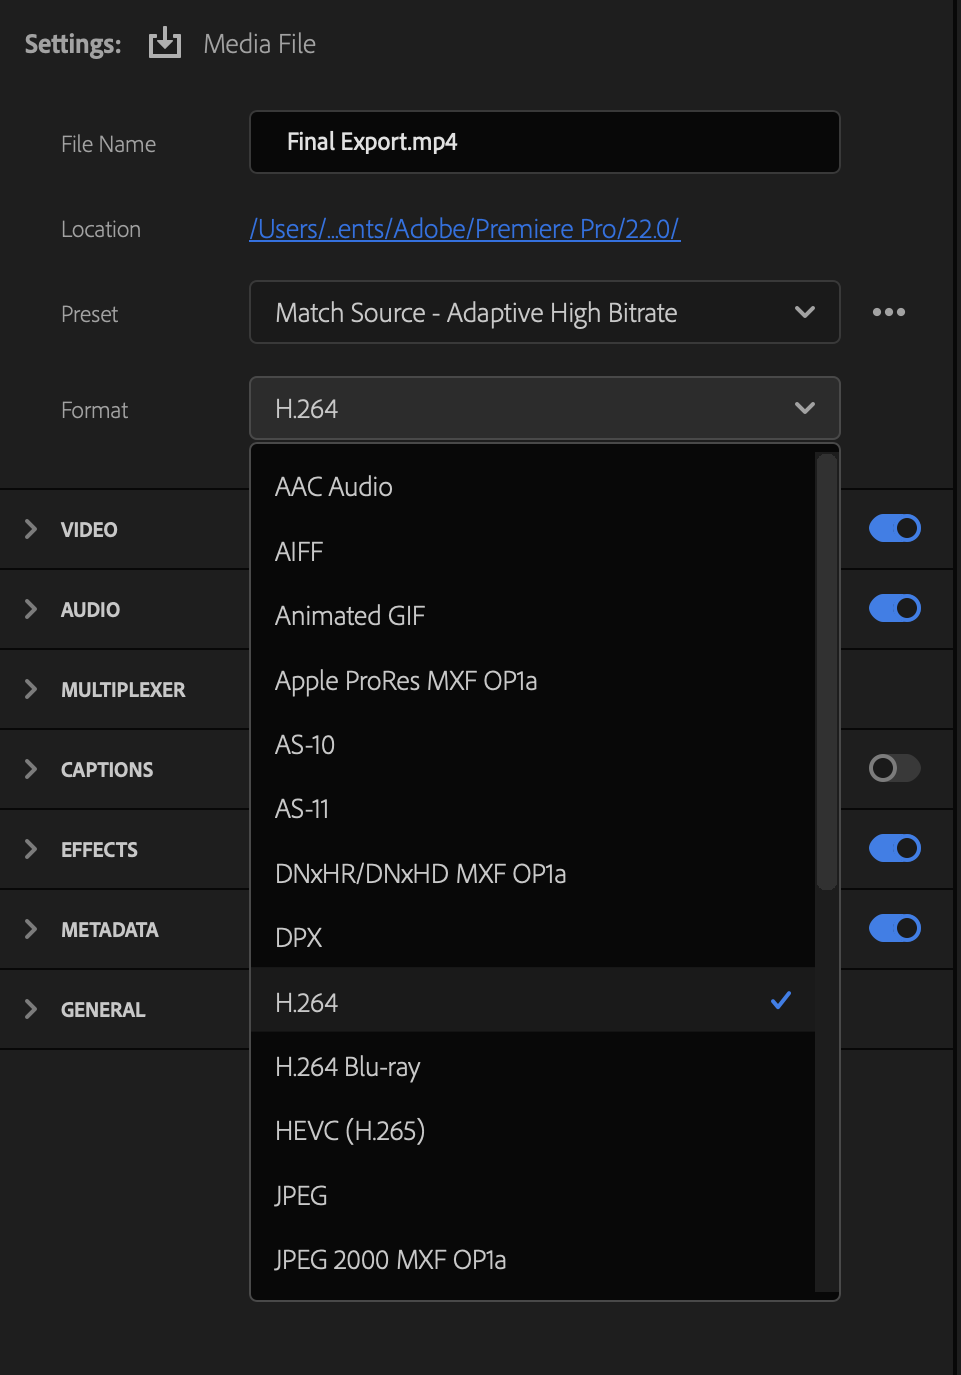
Step 4: Select the format and the codec
Which codec you choose is one of the most important decisions in any export. The “format” drop-down menu gives you a lot of high-quality containers to choose from. The best export settings will vary from person to person depending on the type of project they’re working on.
Generally, H.264, H.265, and QuickTime are the three most common video containers people use. There are also containers designed specifically to export audio. Audio-only exports can be done by selecting containers such as MP3.
After choosing your container, you’ll want to go to the “video” drop-down menu in order to select your video codec. The codec options will vary depending on what container you chose earlier. If you’re working within an H.264 container, no codec options will be available at all. It’s important to choose a container and codec that fits your needs. Maxing out all of your video options isn’t necessarily always better.
Step 5: Adjust the remaining export settings
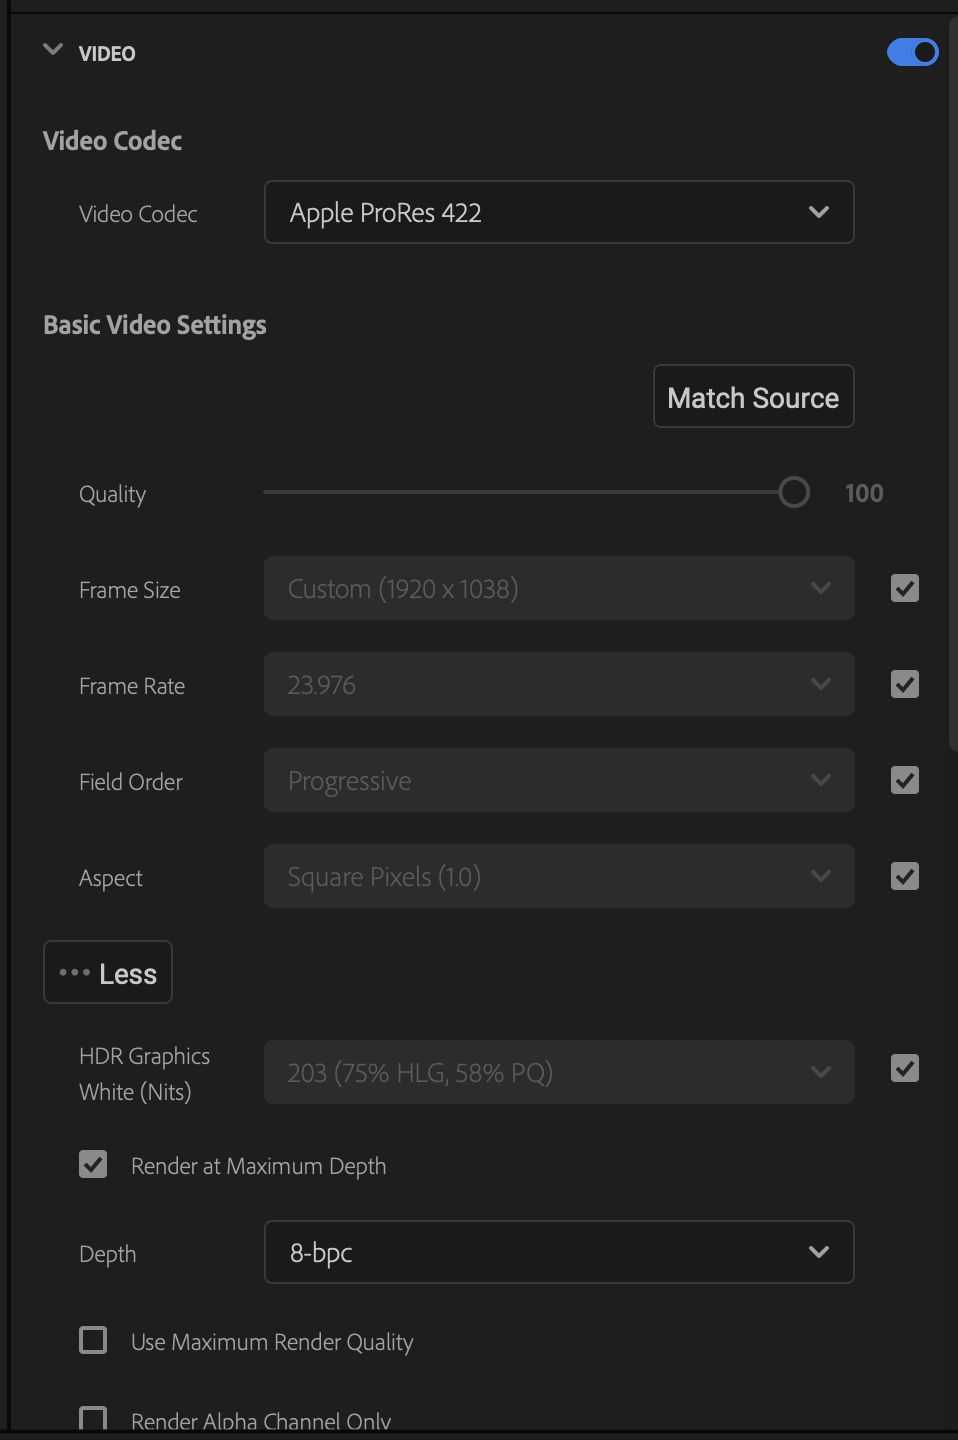
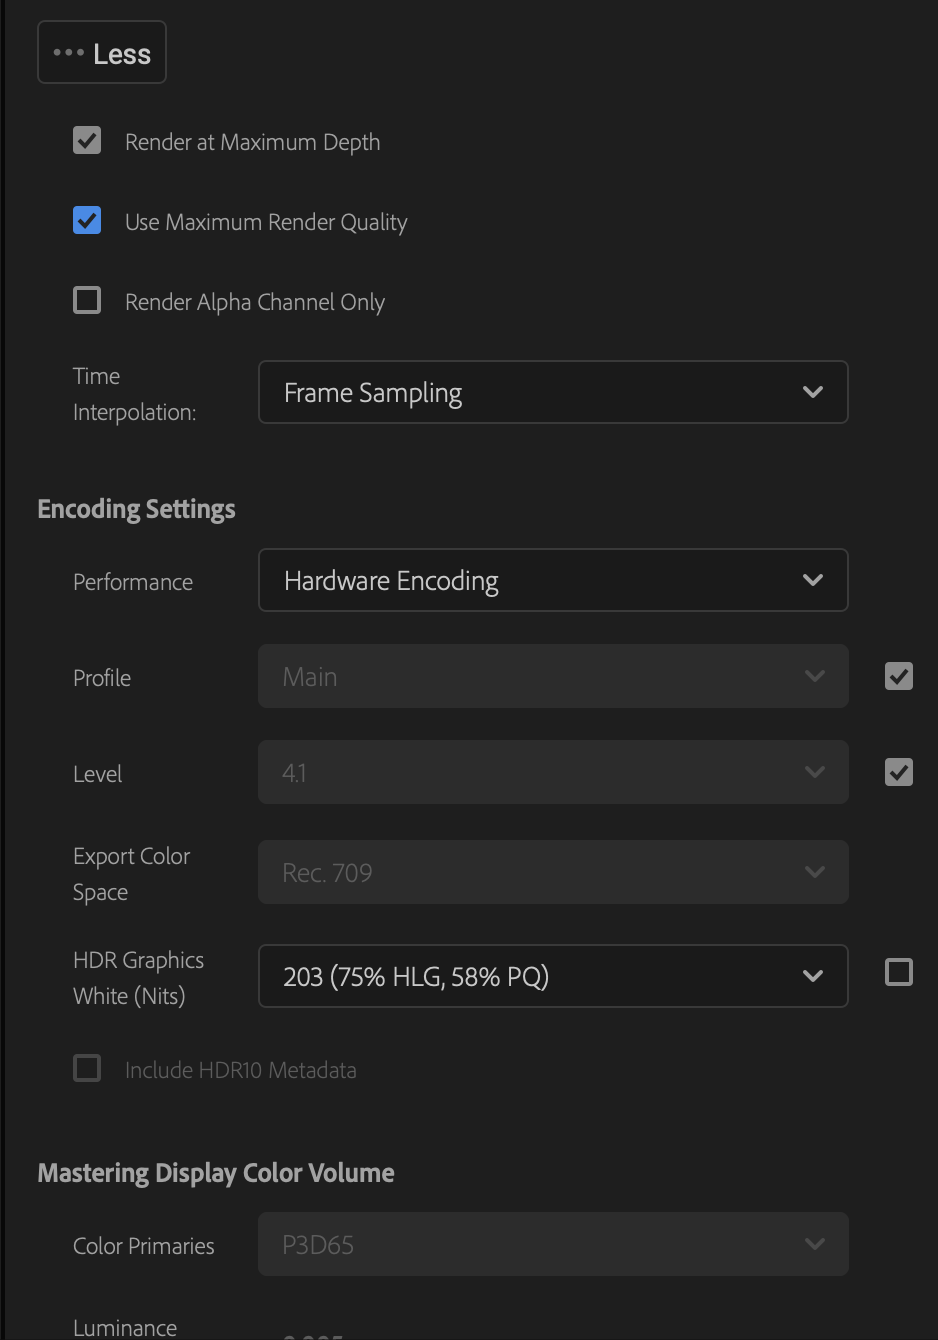
A lot of the more advanced video settings can be found under the “more” tab in the video drop-down menu. Here, you can customize things such as bitrate settings and encoding settings. Most users will be focused primarily on bitrate settings. This also changes depending on which container you chose.
The default H.264 container gives a lot of bitrate encoding options. Because of that, it’ll be the one that we’ll primarily focus on.
At the top are checkboxes with an option to “render at maximum depth” as well as an option to “use maximum render quality”. Both of these will create a sharper, higher-quality export at the cost of a longer export time.
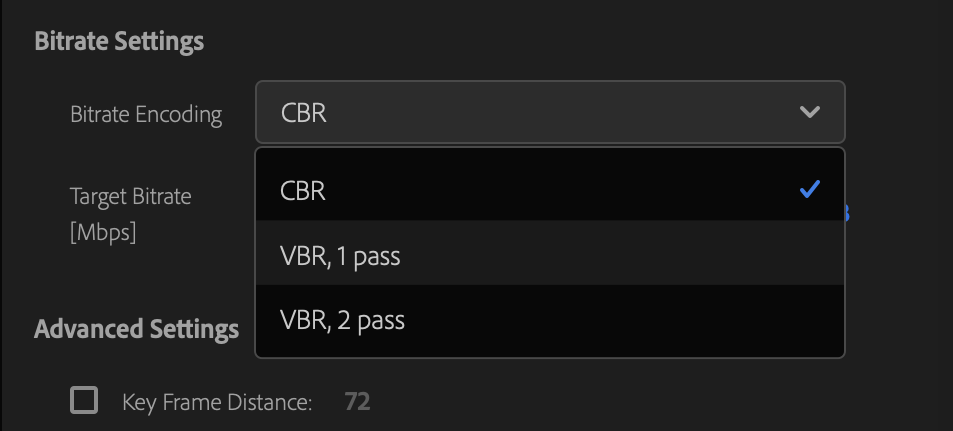
Scrolling down a little bit, you’ll find a section labeled “bitrate settings”. In the bitrate encoding drop-down menu, you’ll find options for CBR (constant bit rate) and VBR (variable bit rate). Below that is a slider where you can set your target bit rate.

Chosing between a CBR and VBR depends entirely on your content. CBR is great because of its consistency. It can be lower quality than VBR in some cases but is perfect for things such as live streaming.
VBR on the other hand is great for uploading higher-quality content. VBR, 2 pass provides you with a “target bitrate” and a “maximum bitrate”. Something important to note is that your maximum bitrate should also be double what your target bitrate is.
A high bitrate doesn’t always mean a great upload though. Sites such as YouTube, Vimeo, and even streaming platforms such as Hulu have various different bitrate standards. It’s always a good idea to look at the rules and guidelines of your video hosting platform of choice before exporting. Adobe themselves has a really great guide on what they think the best export settings are.
Step 6: Name the file and export
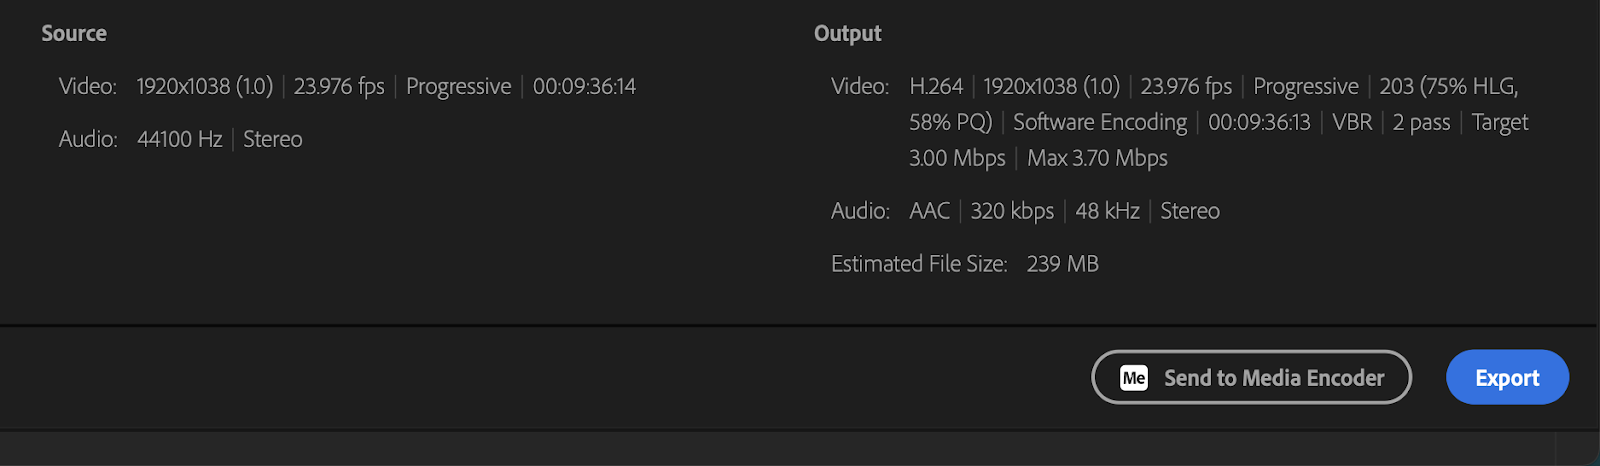
Once all of your settings are to your liking you’ll want to give your file a unique output name before sending it off to export. You’ll also want to choose an output location by clicking the blue highlighted text underneath “File Name”. This will bring you to a finder or file window where you can choose the output location of your export.

In the lower right-hand corner are two export options. There’s a blue button labeled “Export” and a button right beside it labeled “Send to Media Encoder”. Clicking “Export” will export your file to the destination you chose. Clicking on “Send to Media Encoder” will open up Adobe Media Encoder.
Adobe Media Encoder is free with Adobe Creative Cloud and a great tool to use for exporting multiple video files at once. It also provides even more encoding options and allows you to keep on working as your video exports in the background.
Tips for exporting from Premiere Pro
The biggest way to help speed up the export process is through the use of presets. Adobe Premiere Pro offers a wide array of presets, with options to save your own.
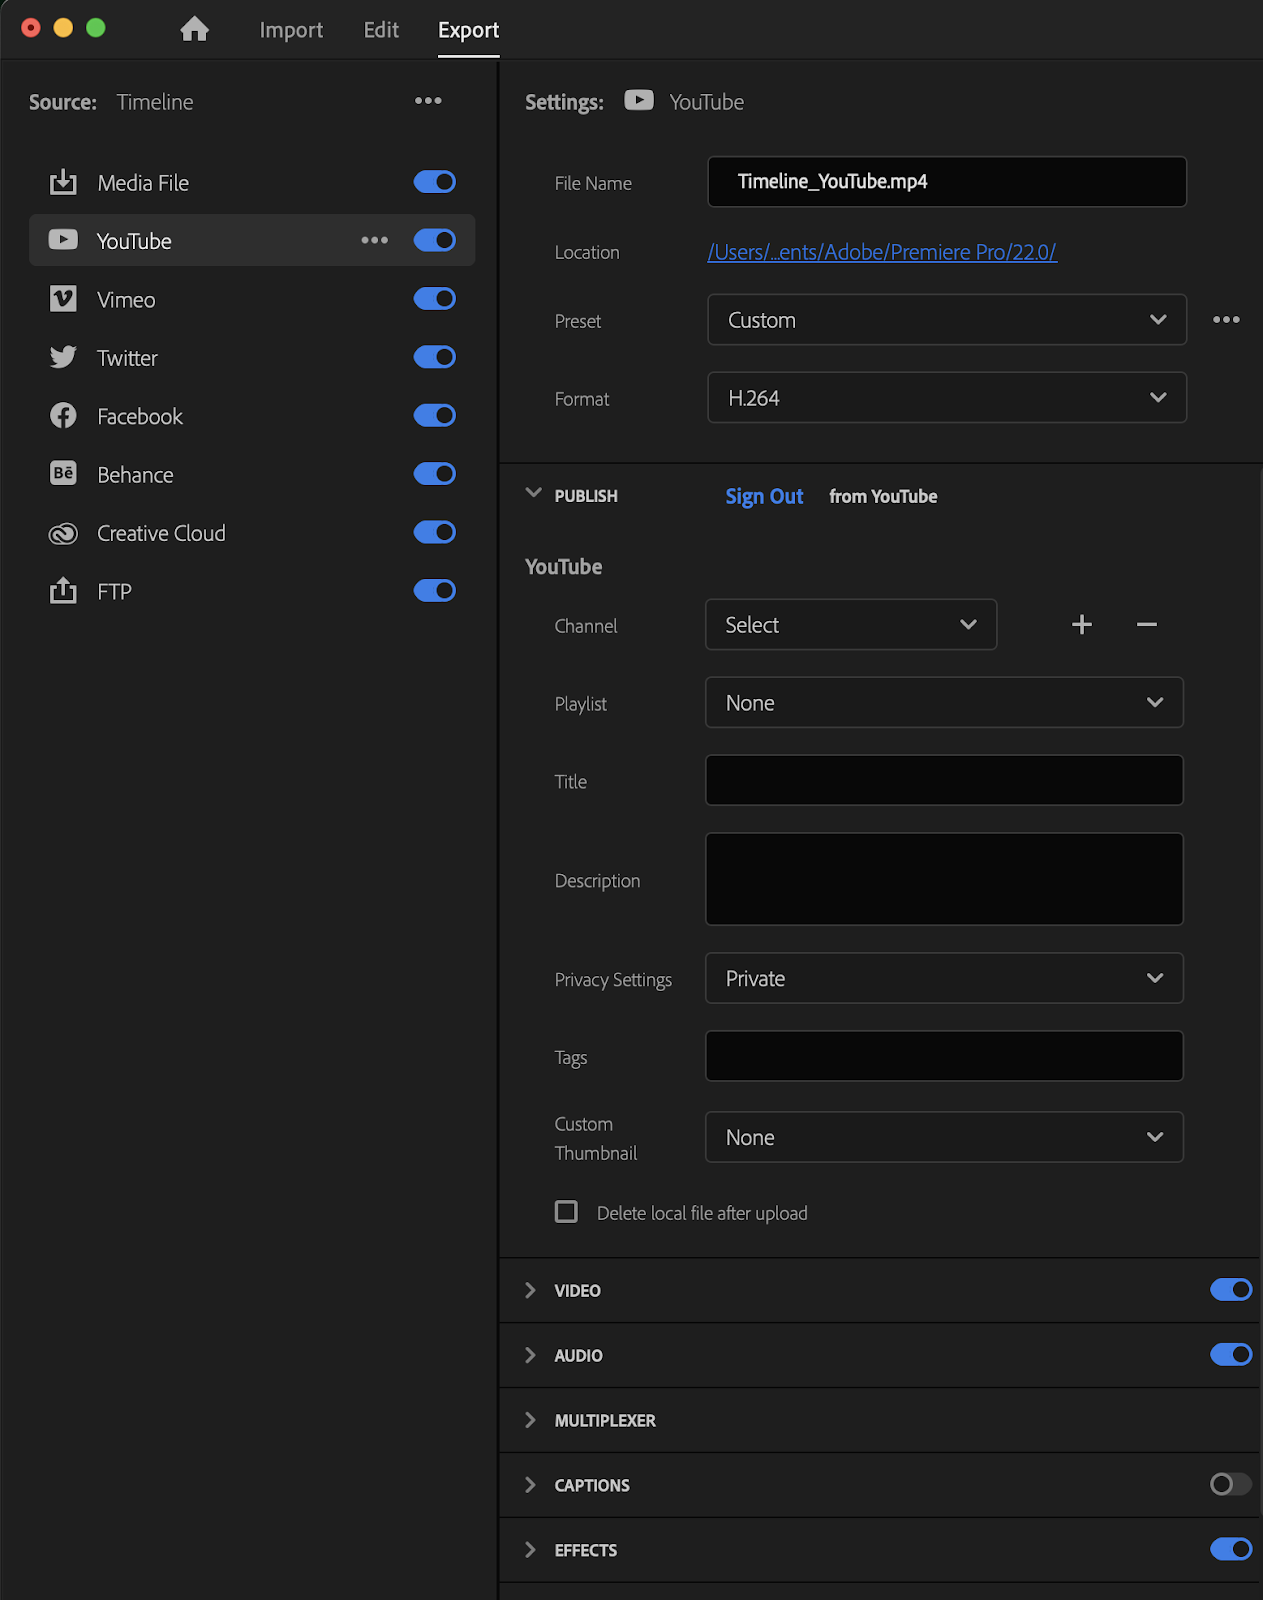
The left-hand column in the export window gives you presets for social media platforms like YouTube, Vimeo, Twitter, Facebook, and even Adobe’s custom apps such as Adobe Behance and Creative Cloud.
These social media options allow you to upload directly to your platform of choice by signing in. In the case of YouTube, it even allows you to change things such as title, description, and privacy.
To save a custom preset, all you have to do is click on the three-dot dropdown menu next to “preset” and click on “save preset”.

Conclusion
Programs such as Premiere Pro, After Effects, and Photoshop have made Adobe a force in the creative field. Adobe Premiere Pro has been a mainstay in the film industry, and it’s not at all hard to see why. The robust exporting options it has may be more than any other NLE.
That said, video editing can also be a daunting and tiring task at times. Because of that, it’s important to try and make the process as easy as possible.
Simon Says is a great and affordable way to add an extra layer of ease and professionalism to videos.