
How to Fix Captions not Showing in Premiere Pro
Captions and subtitles are absolute necessities when posting content to social media. Platforms such as Instagram, TikTok, and Facebook thrive off of closed captions.
Open captions (captions that cannot be turned off or burn-in subtitles) are now more popular than ever too, letting creators spice up their videos with intricate designs. A majority of videos watched in public are watched with zero sound, making captions quintessential.
Adobe Premiere Pro is a great video editing software when it comes to managing subtitles and captions. Like most software though, there’s no shortage of things that may go wrong while working within it.
The following is a quick step-by-step tutorial on what to do if captions are not showing up in Premiere Pro.
Fixing captions not showing up in Premiere Pro
Saying that it’s frustrating when things don’t work the way they’re supposed to in Premiere Pro is an understatement. Oftentimes, it’s usually something incredibly simple or small that’s at the root of the problem.
For captions, the issue most likely has nothing to do with you and more to do with Premiere Pro itself.
1. Check your version of Premiere
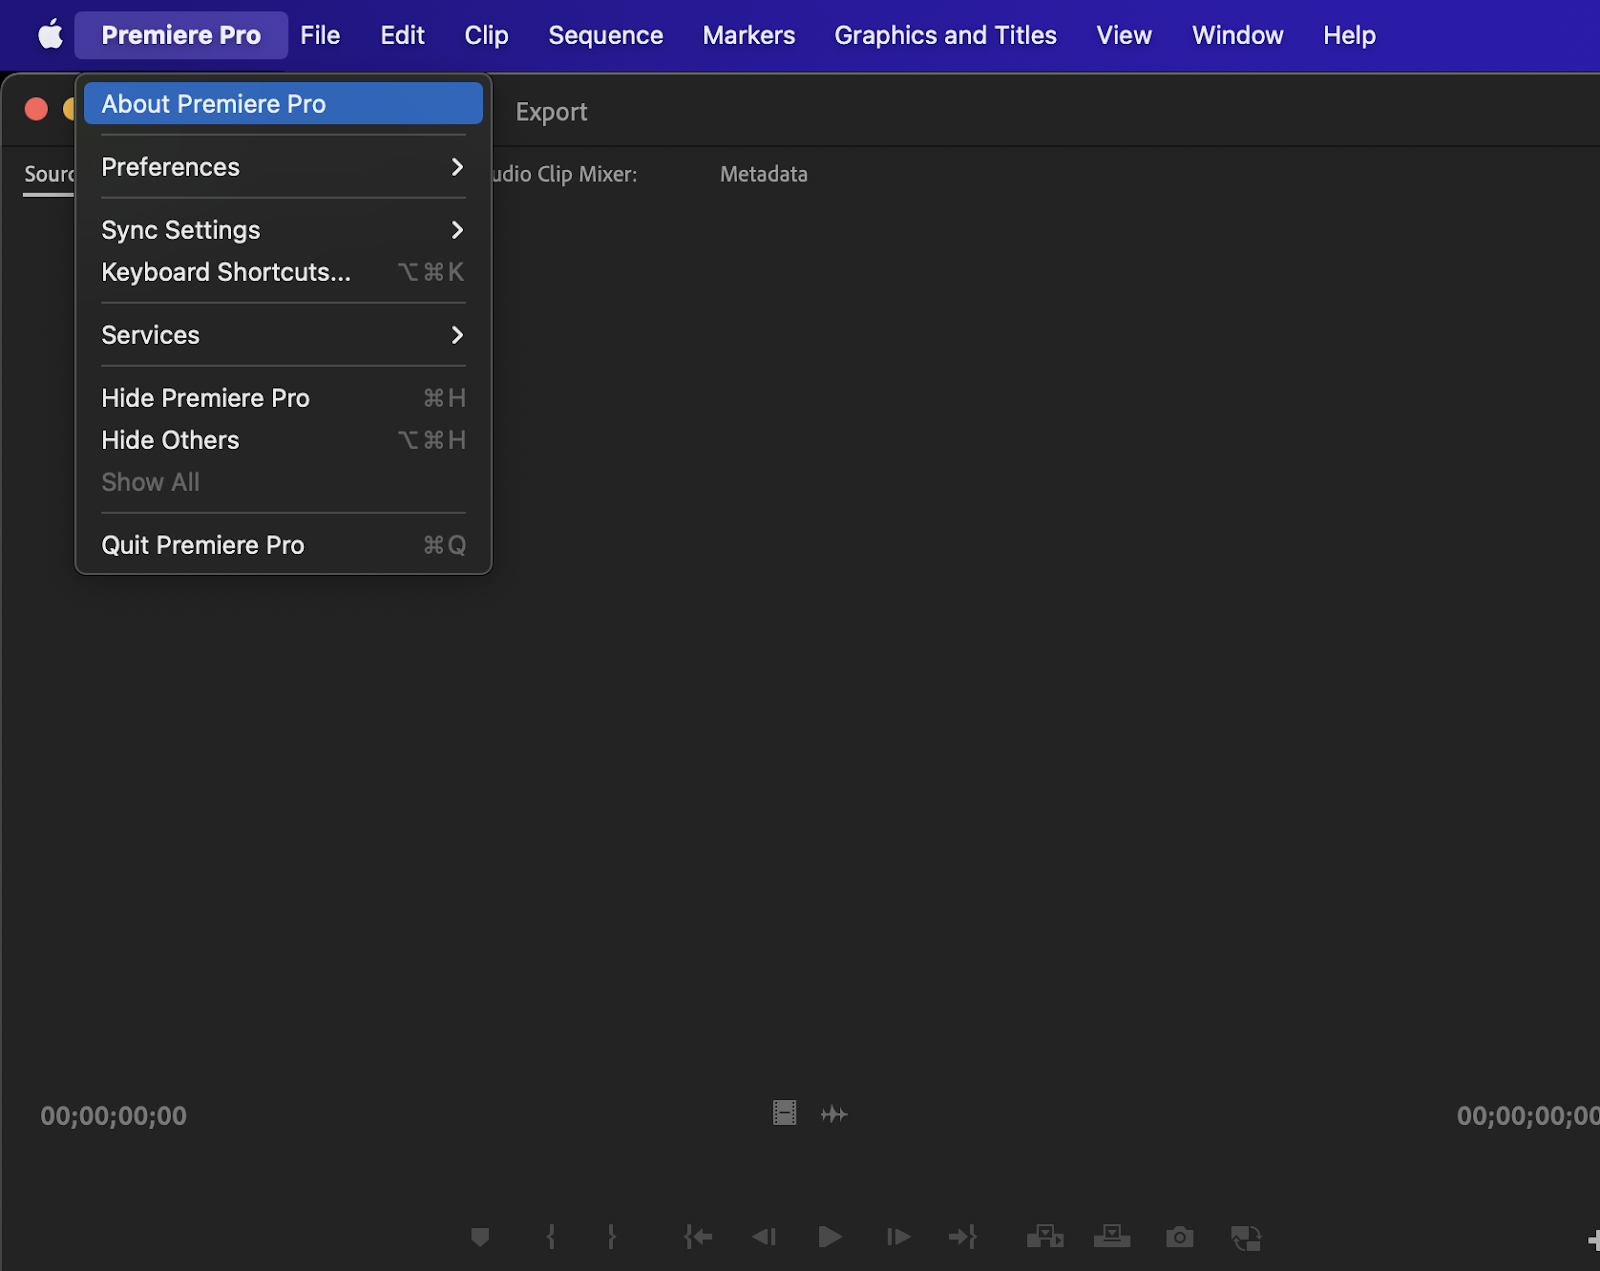
It may seem to easy to be true, but sometimes all Premiere Pro needs is a quick update to get everything working smoothly again. To check the version number within Premiere itself, you’ll want to go to Premiere Pro in the upper left-hand corner of the screen and go to About Premiere Pro when the drop-down menu appears.
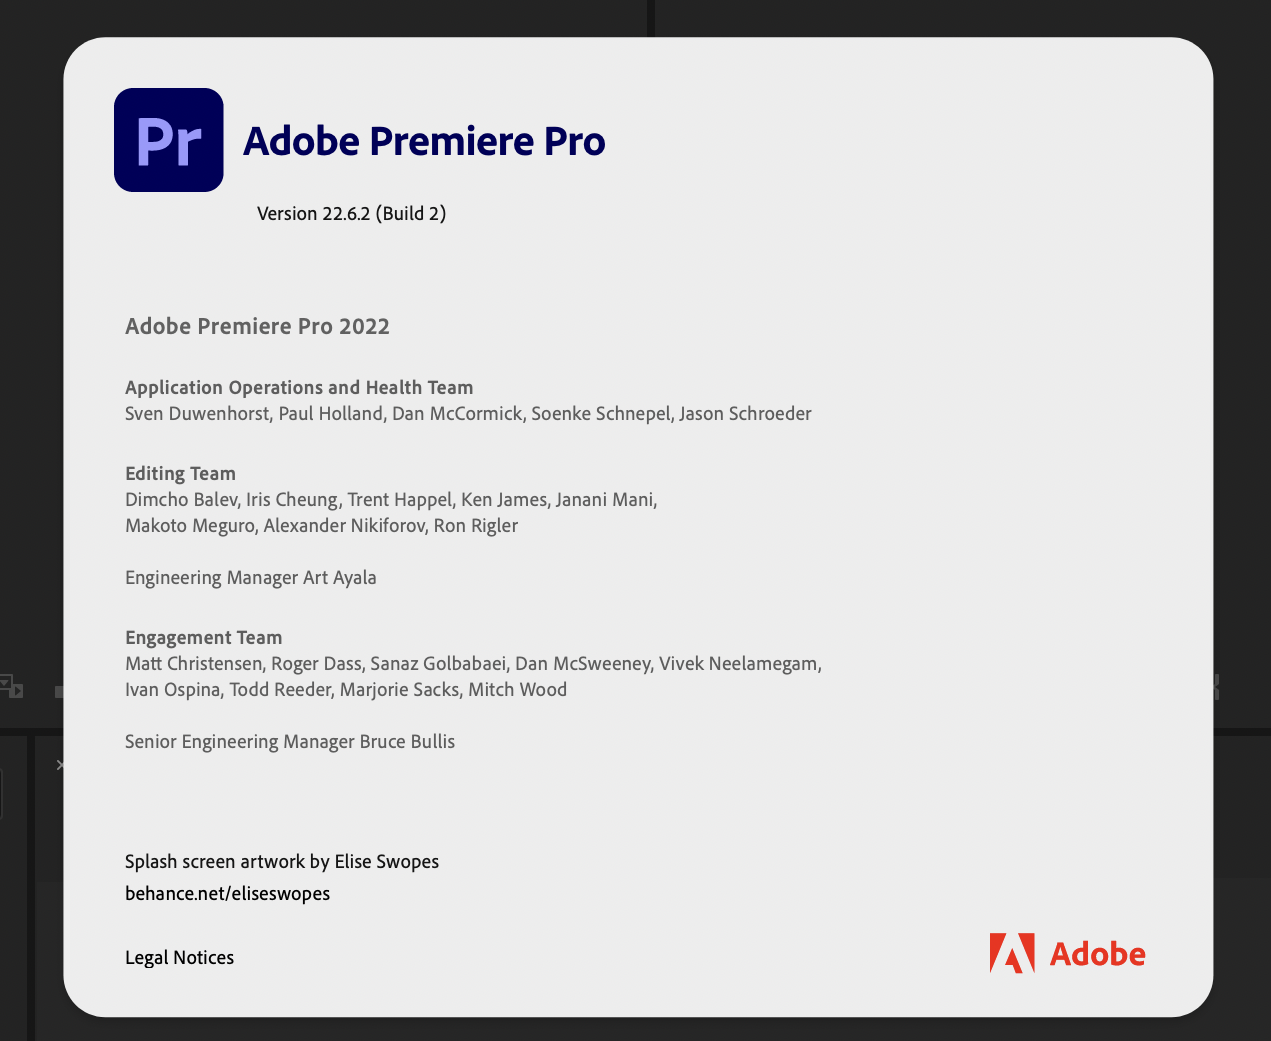
A pop-up window will show up that gives the build of Premiere Pro.
If Premiere Pro is out of date, you’ll want to go to the Adobe Creative Cloud App. Here, Creative Cloud will tell you if Premiere Pro is up-to-date. If it isn’t, you’ll be able to update it directly within this app.

2. Check your Workspace option
Sometimes, a custom workspace can cause issues with your subtitles not appearing. While custom workspaces are a great way to personalize Premiere Pro to your liking, they can occasionally cause weird bugs and glitches.
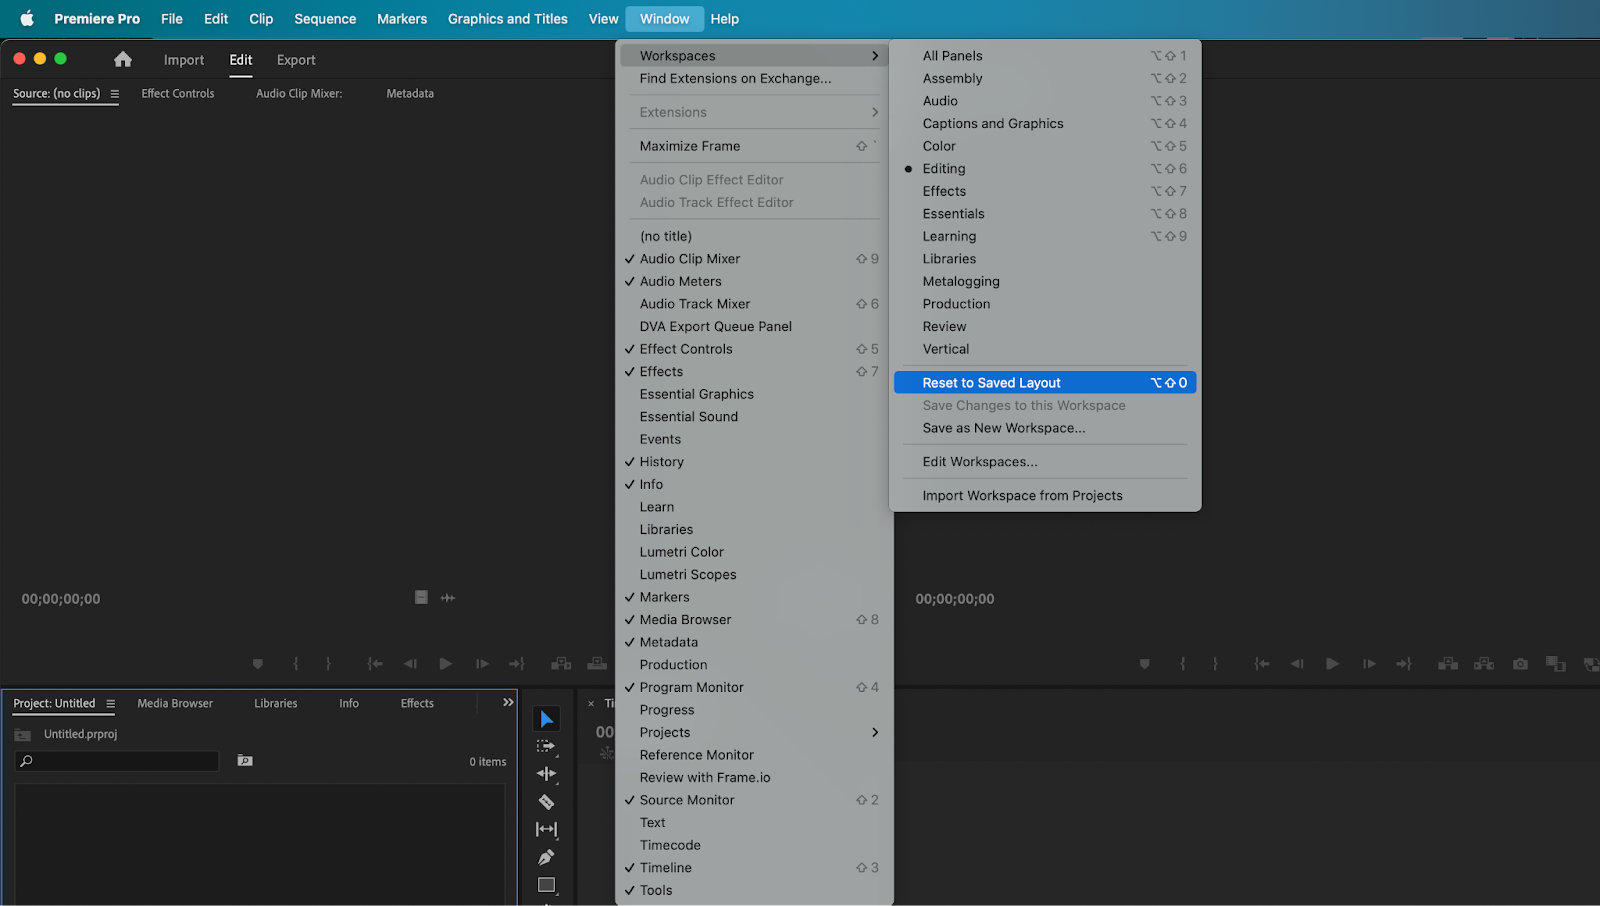
To check your Workspace, you’ll want to go to Window>Workspace>Reset to Saved Layout. Check your captions one more time to see if this fixes the issue at all.
3. Check the Program Monitor
The program monitor is what plays back the sequence of video files you have in your timeline. There are options within the program monitor to exclude captions when playing back your video. This can be handy when you want to simply focus on the edit and nothing else.
Now, captions got a major overhaul in the 2022 version of Adobe Premiere Pro (Premiere 15.0 and later). You used to have to right-click on the program monitor and select closed captions display to view missing captions.
If this didn’t work, you would have to go into settings and enable CEA-608 or CEA-708. Captions no longer work like this in Premiere Pro though.
Ever since the captions panel has been reworked, the captions in Premiere Pro can now be viewed directly in the timeline. There are a few different options for your caption files and subtitle files here.
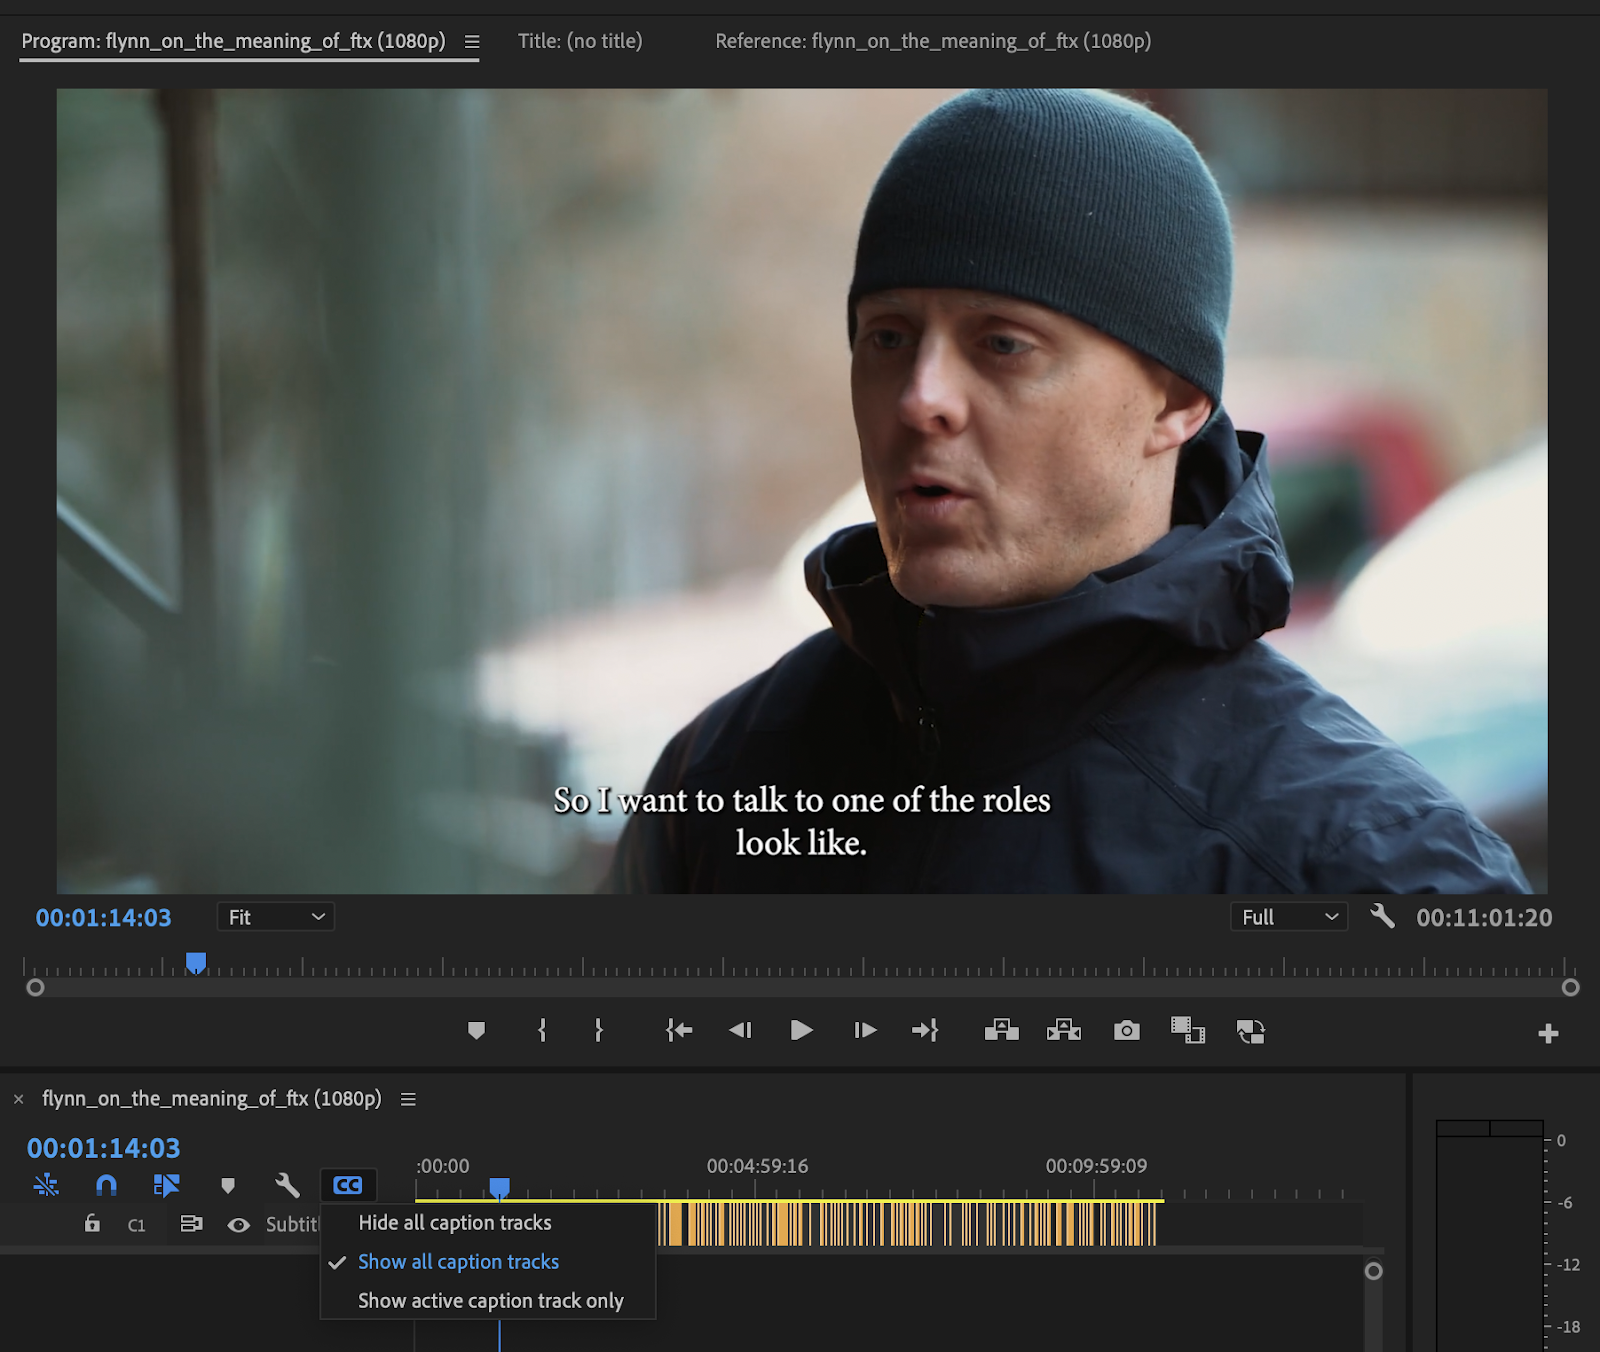
Clicking the CC icon will let you hide the captions completely from the timeline (while still being able to view them in the program monitor), and clicking on the eyeball icon will hide the captions from the program monitor completely.
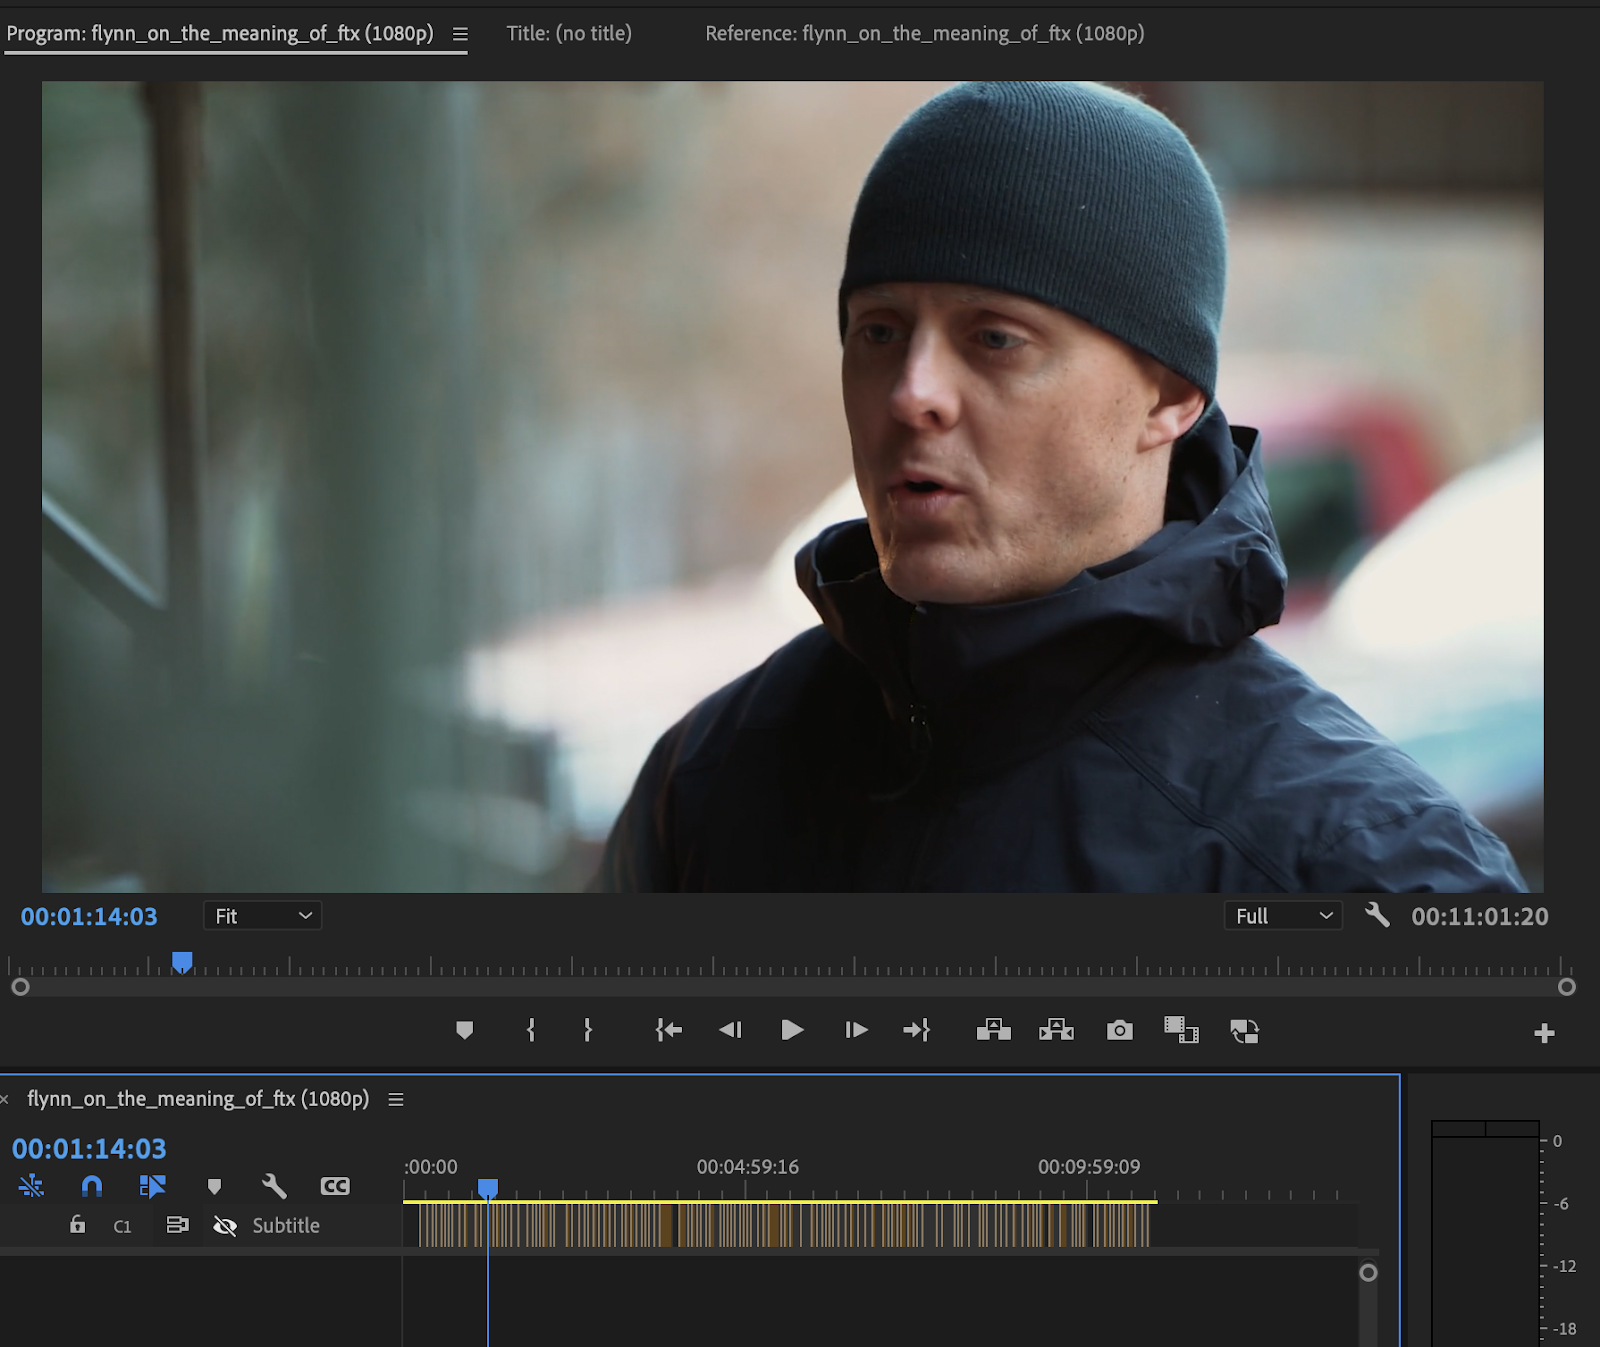
The new version of Premiere has made viewing SRT files and transcriptions incredibly simple in this regard. They are now viewed as layers within the timeline. You’re able to create new caption tracks and play them all on-screen in real time. You can even export captions as a sidecar file in Premiere Pro through the captions tab.
4. Add the captions again
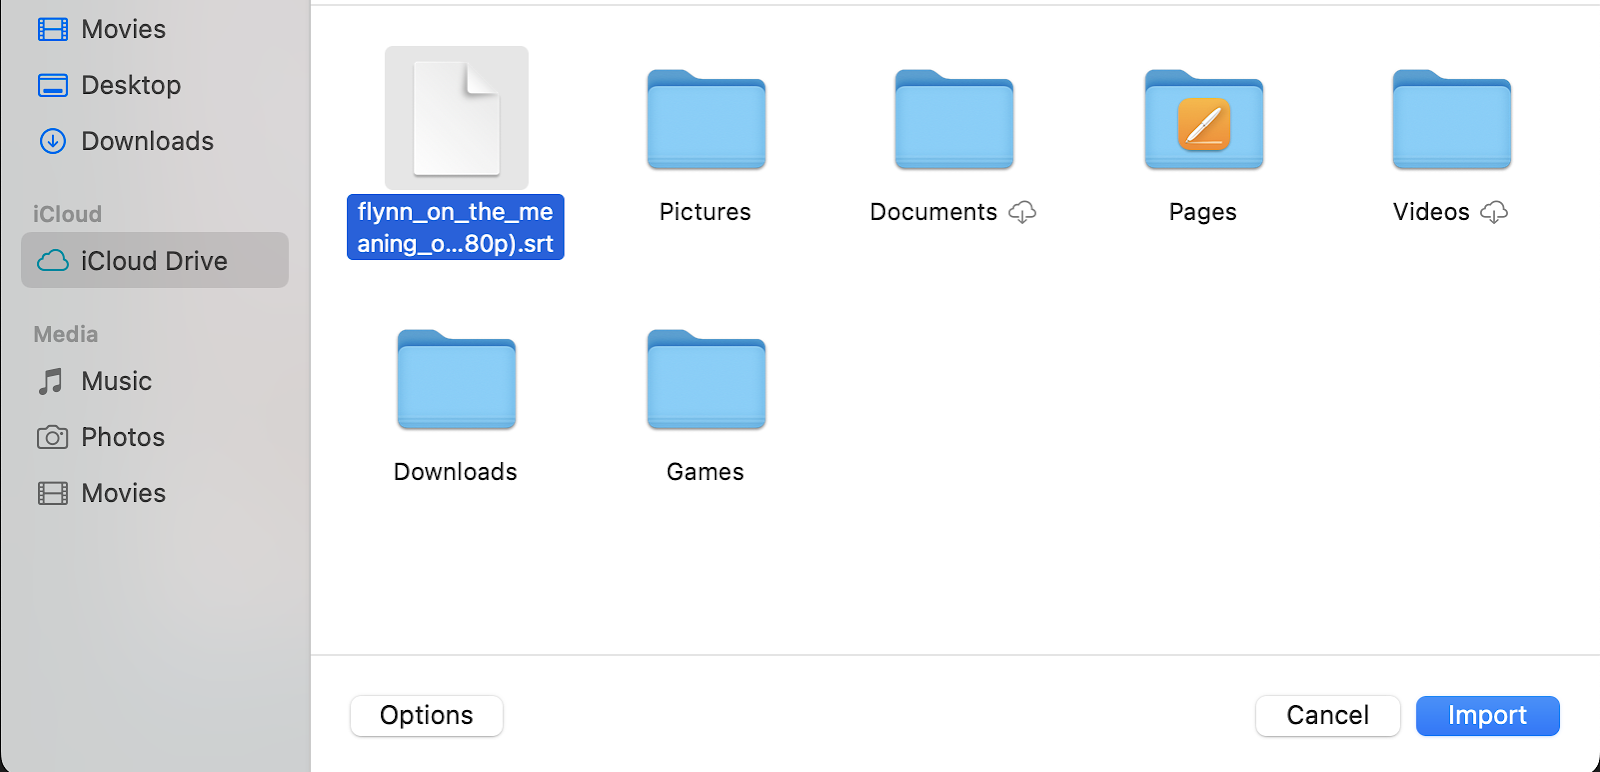
If all else fails, you can always add the captions again. To import captions, you’ll want to go to File>Import (or use the shortcut Command + I) and upload your SRT file. Put the file in the timeline and, on playback, your subtitles should hopefully appear on the screen.
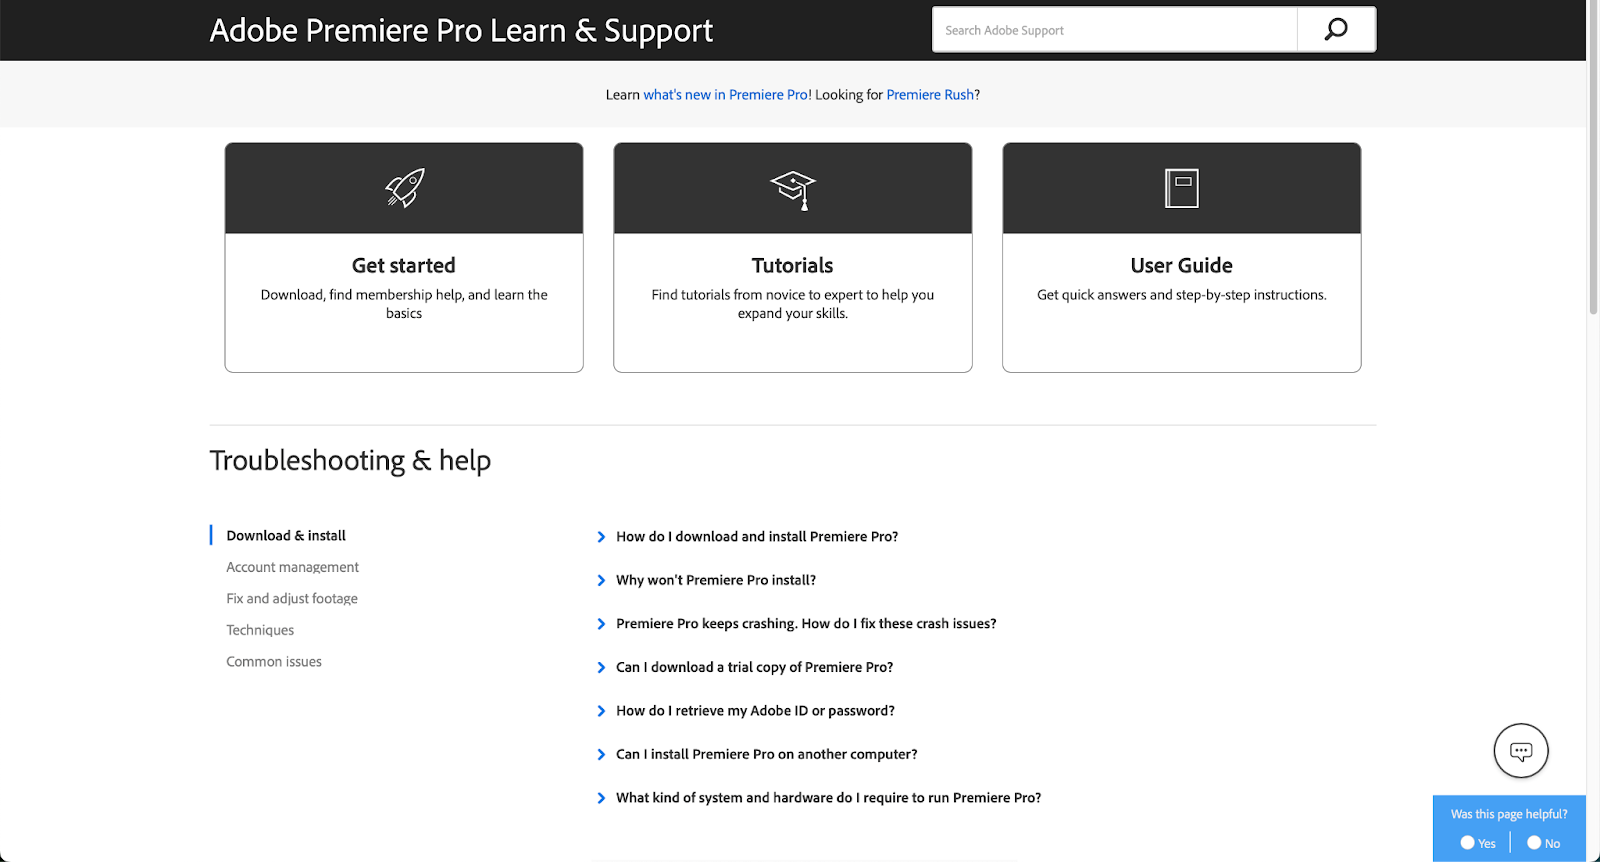
If this doesn’t work at all, it may be a problem with your version of Premiere Pro. In cases such as these, it’s best to contact Adobe directly through their site. There, you can contact someone who can help with your Premiere Pro version and chat live with a representative.
Other options for creating Premiere Pro captions
Premiere Pro may have built-in methods to transcribe video, but some of the options are limiting. They’re also not the most accurate and only offer a handful of subtitle formats and text formatting options. This kind of workflow may work for beginners, but when you’re uploading your content for professional use, it’s important that your captions are as accurate and clean looking as possible.
Thankfully, there’s a wonderful third-party extension called Simon Says that can take care of all of your caption needs for you. Simon Says works natively inside Premiere Pro and offers caption and subtitle sequences in over 100 different languages. It also works brilliantly inside DaVinci Resolve and Final Cut Pro as well. Not only that but there are options to translate subtitles as well.


