A Guide to Color Correcting and Grading In DaVinci Resolve
Color plays a major role in how we interpret video content. Different colors can convey a certain feeling or can draw the audience’s attention to a specific point on the screen.
Working with color used to take place entirely on the lighting and film stock during production. Now, color correction and color grading can be done entirely within your video editing software of choice.
While programs such as Final Cut Pro and Adobe Premiere Pro are competent video editing programs, no software matches Blackmagic Design’s DaVinci Resolve. The DaVinci Resolve color grading is the absolute best on the market.
DaVinci Resolve originally started out as a pro-level, professional color suite for colorists and has gotten only better as the years have gone on. It’s been used a lot in Hollywood and by filmmakers as a coloring program for feature films. Because of that, DaVinci Resolve is slightly more complex than your standard NLE
This post-production tutorial will go over coloring for video production in DaVinci Resolve 17 / DaVinci Resolve 18 for Mac and Windows devices, perfect for video editors looking to up their coloring workflow.
Note: If you want to take your transcriptions and captioning up a notch, Simon Says has exactly what you need. The intuitive easy to use software works natively within DaVinci Resolve
DaVinci Resolve Color Page
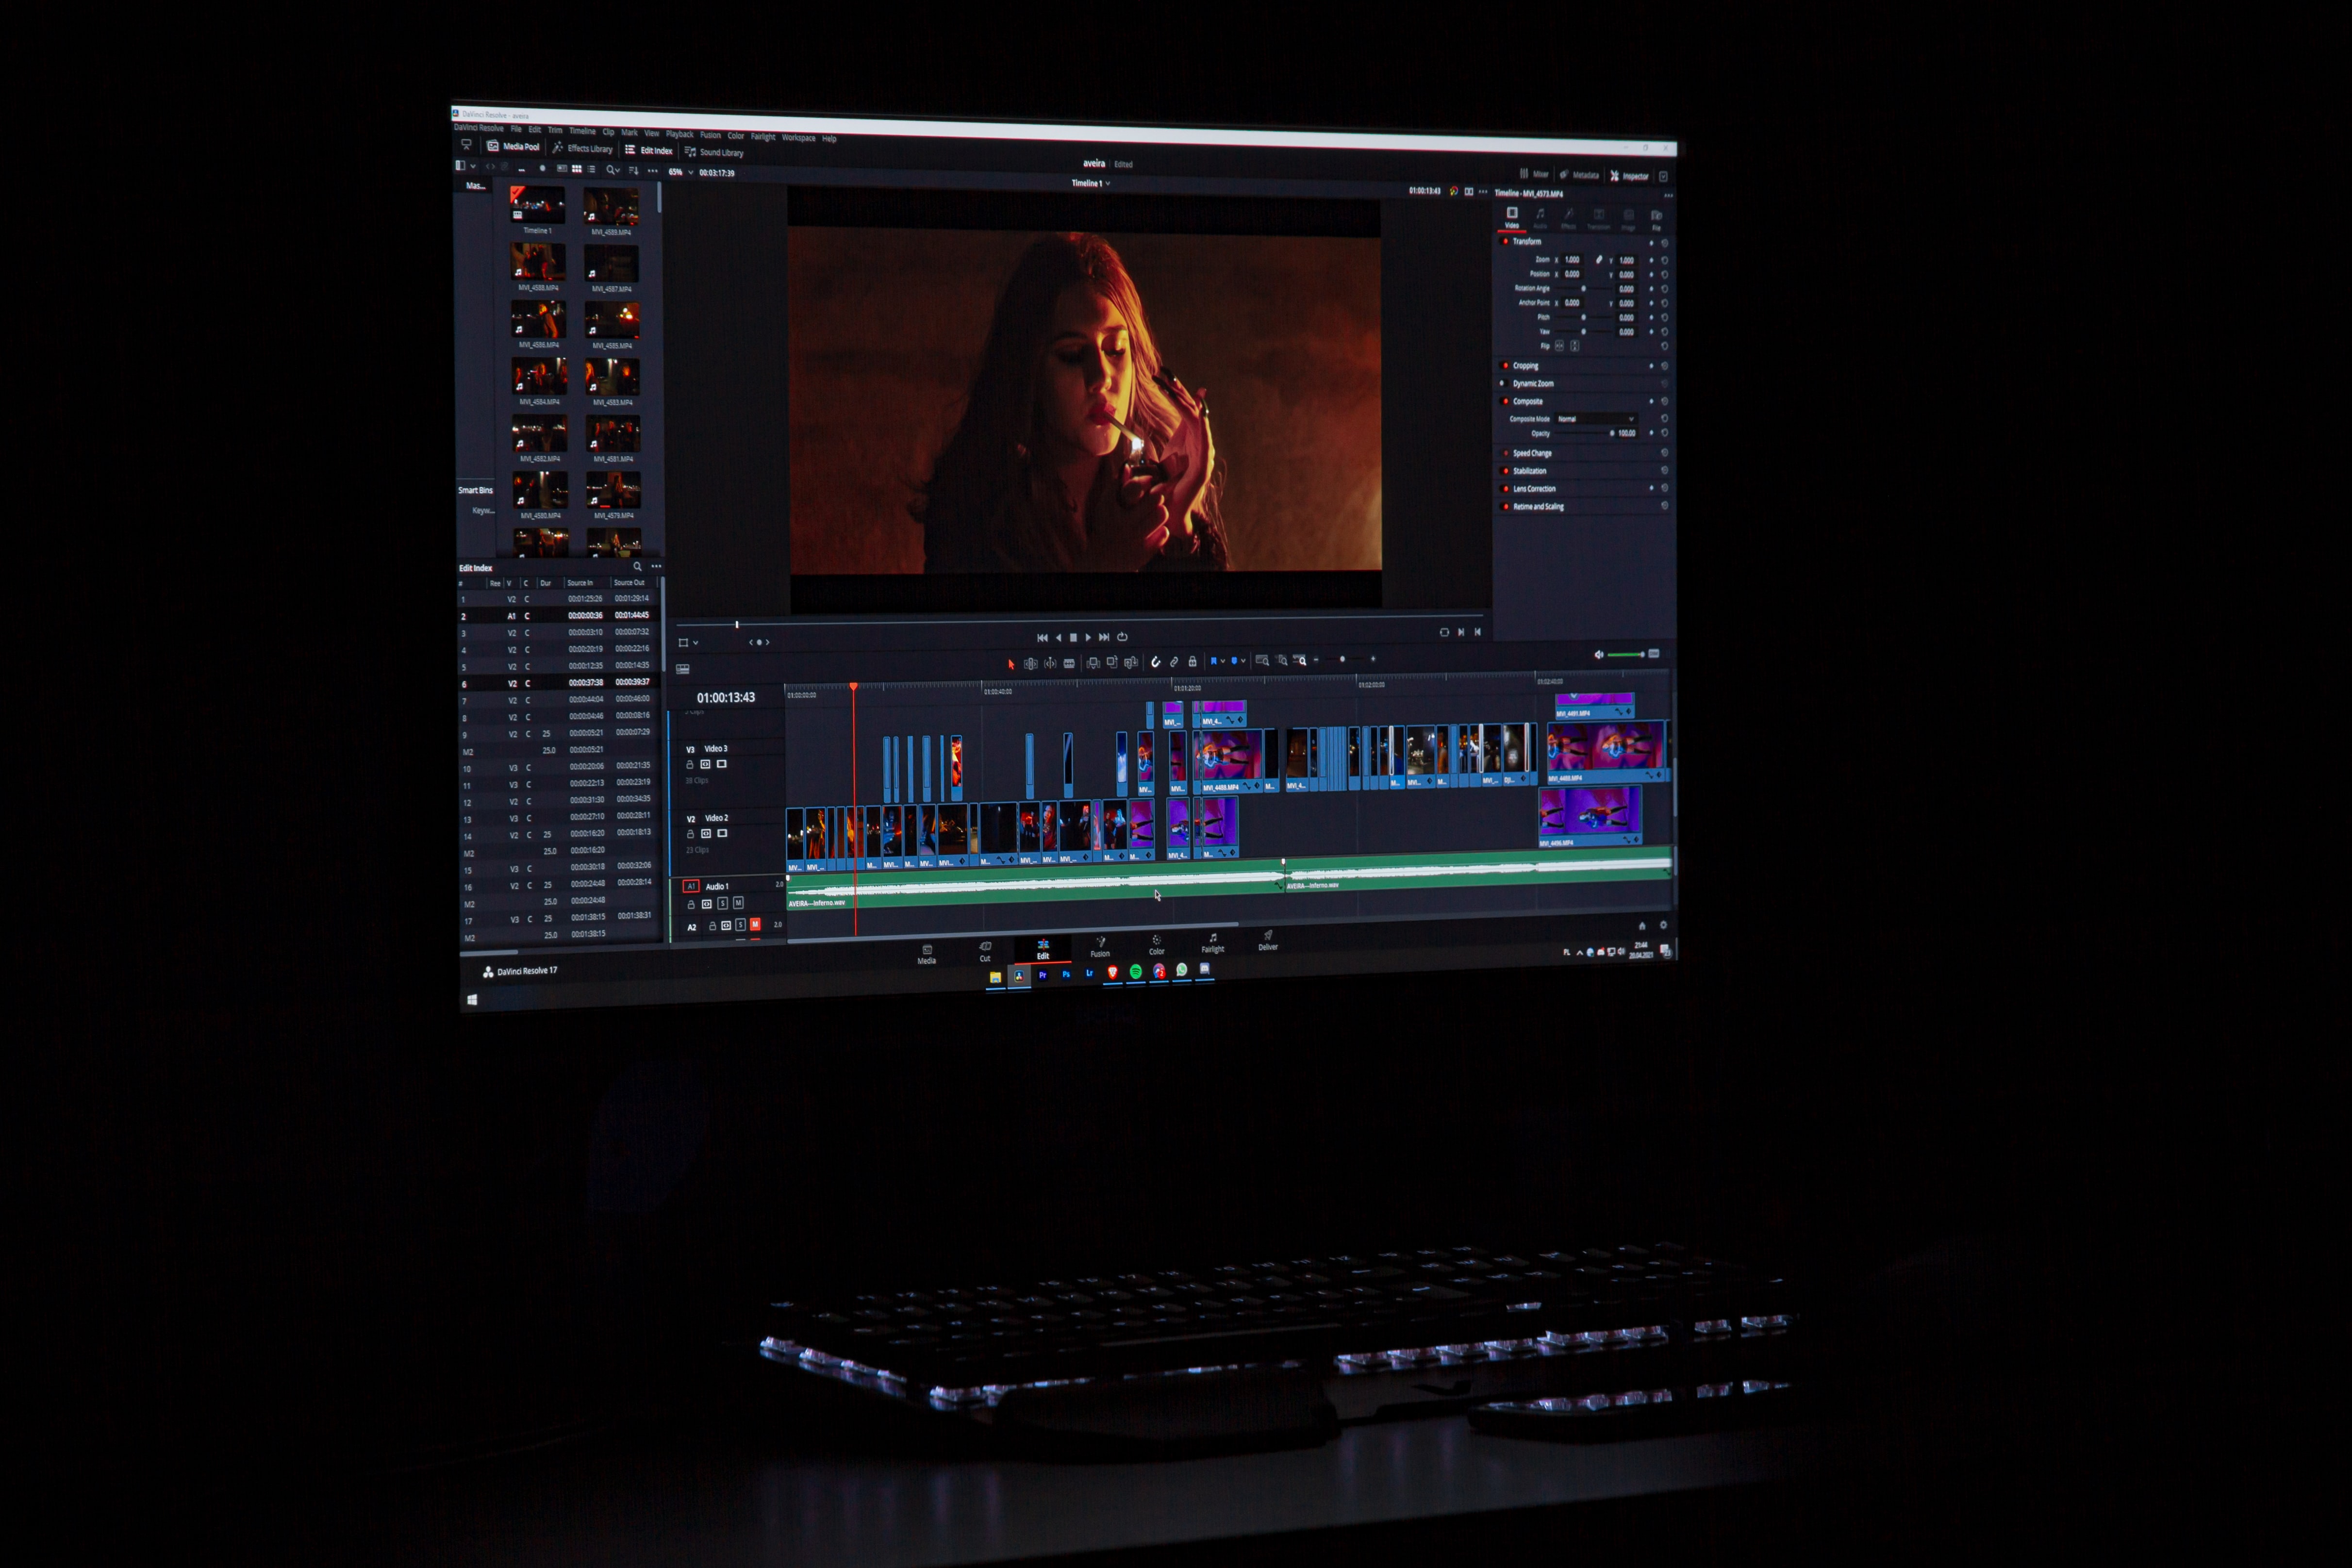
The Color Page in DaVinci Resolve is where you’ll find all of your color grading tools. DaVinci Resolve is broken up into a few different workspaces. There are Media, Cut, Edit, Fusion, Color, Fairlight, and Deliver workspaces. These workspaces can be accessed at the bottom of the screen. Clicking on Color will bring up the color page in Resolve.
DaVinci Resolve Color Page
Within the Color page, you’ll find everything needed to color your image. Before starting with your grade, you’ll want to go into Project Settings. This can be accessed by clicking on the gear icon in the bottom right-hand corner. From here, you’ll want to go into the Color Management tab so that you can adjust your color space settings.
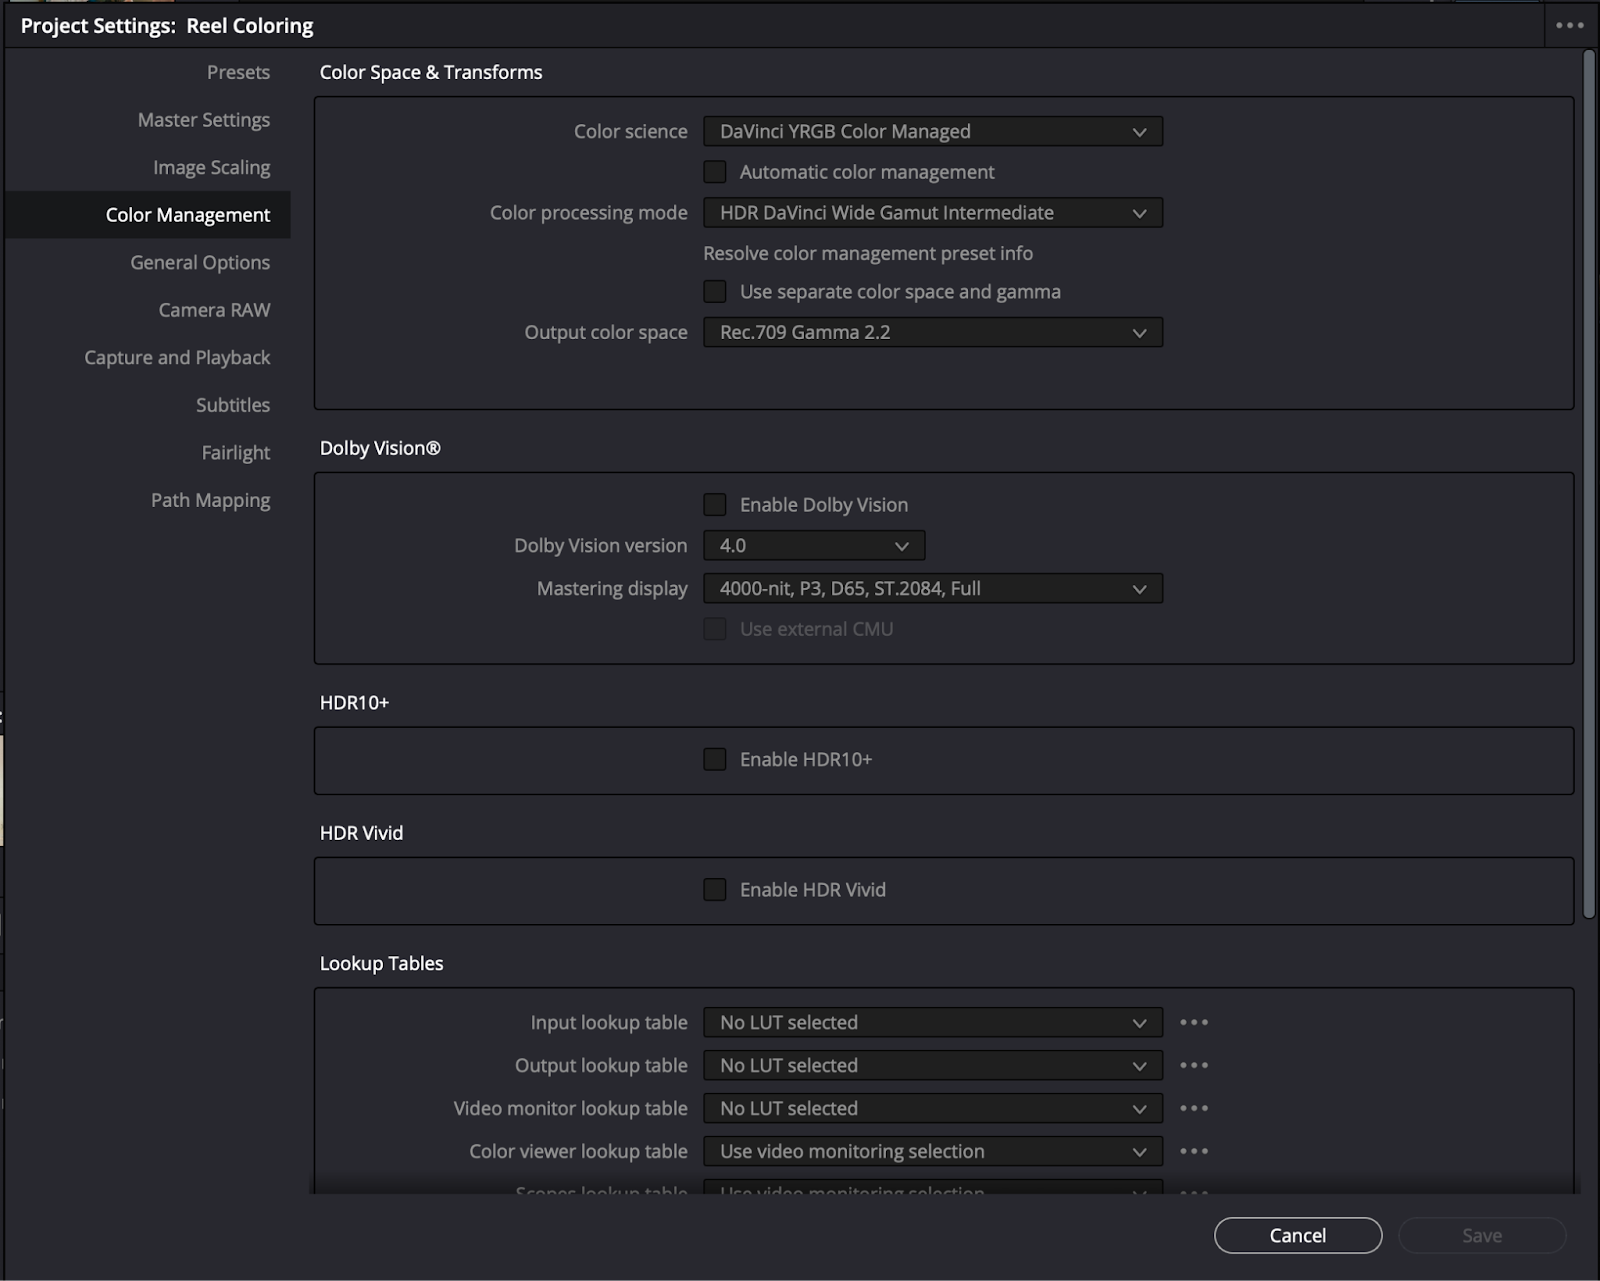
Color spaces are how DaVinci Resolve processes the color of your footage. The main things to focus on for beginners are Color Science, Color Processing Mode, and Output Color Space. For those new to DaVinci, it’s best to leave these settings as their default.
Once these settings are to your liking, exit out and return back to the color page.
Viewer
The Viewer in the color page is simply where you see your footage. It’s incredibly similar to the Viewer in the edit page. You can scrub through the footage using the scrubber at the bottom. You can also loop the footage using the circular arrow at the bottom or play and pause the footage using the other various buttons.

Gallery
In the top left-hand side of the screen is the Gallery Window where you can view any screen captures that you decide to take.

Next to this, you can click on the LUTS Window which allows you access to a whole slew of LUTS. The Creative Lut (or look-up table) gives the picture a much more unique flare.
DaVinci Resolve has a myriad of presets, but there are also plenty of Resolve plugins available online for you to play with if you so desire. A LUT gives a certain look or feel and is often synonymous with color grading as opposed to color correction. This is what can give a “cinematic look” to your footage.

Beside the LUTS Window is also the Media Pool Window. Here in the Media Pool, you can access your timelines so that you can switch between color-grading different scenes.

Timeline
The timeline is where you’re able to click on the clips you wish to color. By default, DaVinci Resolve has this set to thumbnails with no real timeline data.

Clicking on Timeline in the top right side of the screen will give you access to a miniature timeline that you can scrub through.


Node Editor
Next to the viewer is the Node Editor. This is an area where DaVinci Resolve is quite different in coloring, visual effects, and motion graphics when compared to traditional NLEs.
DaVinci Resolve uses a node-based system for all effects and color changes, a system that can be incredibly daunting to master but very effective once it’s mastered.

Nodes are wonderful because of the amount of control they offer video editors, though there is a bit of a learning curve. They’re great for colorists though and allow different effects to be connected to one another very precisely in almost a web-like shape (or node tree).
Creating a new node is as simple as right-clicking inside the node editor and going down to Add Node. You can assign different effects and colors to these nodes, allowing for an incredibly fast and intuitive workflow.
Curves
At the bottom of the screen are all of the wonderful color tools that DaVinci Resolve has to offer. There’s:
- Camera Raw
- Color Match
- Color Wheels
- HDR Grade
- RGB Mixer
- Motion Effects
- Curves
- Color Warper
- Qualifier
- Window
- Tracker
- Magic Mask
- Blur
- Key
- Sizing
- 3D
Each of these bottom windows is represented by an icon.
Let’s go over Curves first. Curves give you much more control over a lot of basic coloring features. For example, the RGB Curve is used to adjust the contrast of your image.
A simple “S curve” will boost the highlights and darken the shadows. You can create a curve by clicking on the line in the middle of the color graph. A dot will form that you can drag around. Right-clicking this dot will reset everything back to normal.

Primary Wheel
The primary wheels can be accessed by going over to color wheels. Color Wheels are the main way DaVinci Resolve users are going to color their images. They’re very similar to curves but in wheel form. The Gain Wheel adjusts the intensity of your highlights, the Lift Wheel will adjust the intensity of your shadows, and the Gamma Wheel will adjust the intensity of your mid-tones (which is pretty much everything in between your highlights and shadows).
There’s also the Offset Wheel which adjusts your entire image. You’re also able to shift the color of your shadows, highlights, and midtones by pushing the white dot in the middle of the wheels toward a certain color.
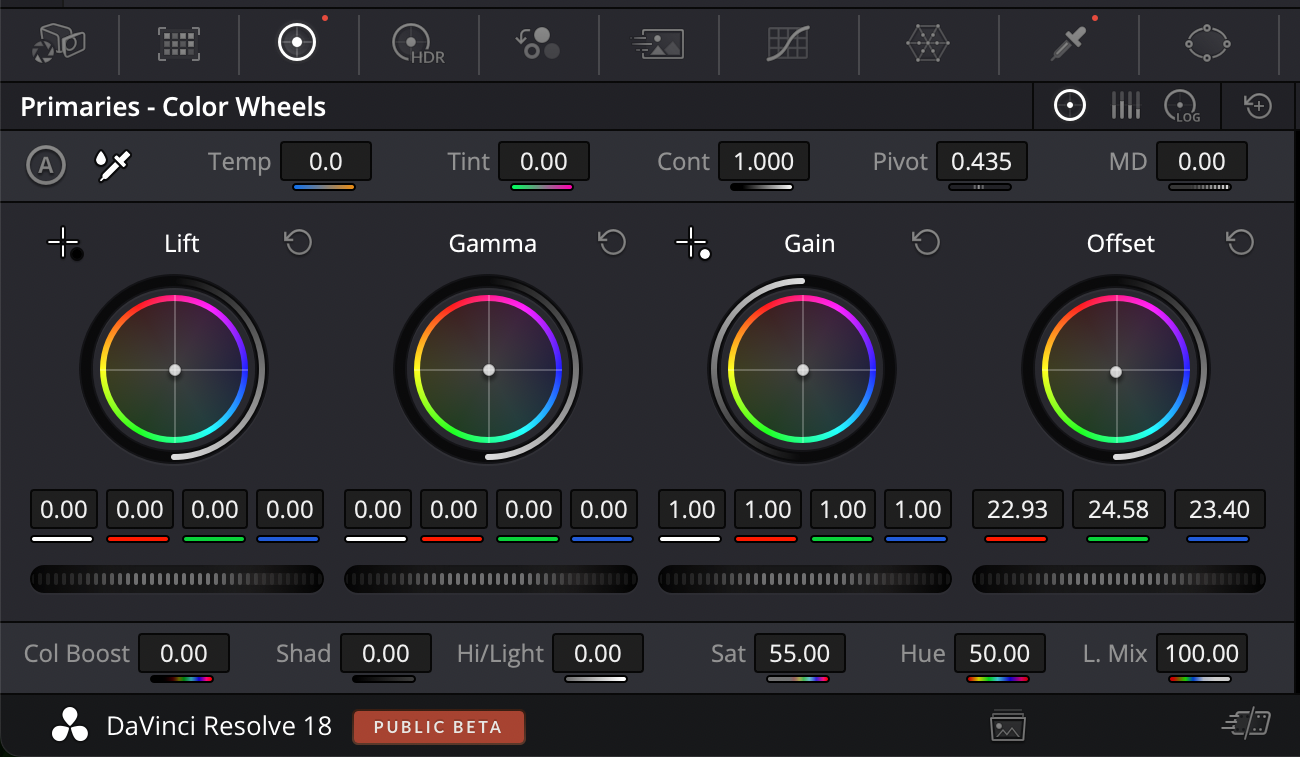
At the top and bottom of each of the color wheels are further coloring options.
- White Balance: The white balance is indicated by the eyedropper icon. The White Balance gets rid of any weird color casting that may be present in your footage and helps render white as being - well - white. Ever seen footage that has a super orange or blue tint to it? This is probably due to the white balance being incorrect. Both temperature and tint will help fix this issue.
- Contrast: What contrast does is increase the distinction between lighter and darker areas of your image.
- Pivot: Pivot adjusts the center point of where the contrast changes are made. This is great for fine-tuning your contrast adjustments.
- MD (Mid/Detail): Adjusts the detail in the midtones of an image. Using power windows, you can smooth out faces using the MD slider.
- Color Boost: The color boost slider is able to adjust the vibrance of your colors.
- Shadows: This slider adjusts how bright and contrasty the dark areas of your image are.
- Highlights: This slider changes how bright and contrasty the bright areas of your image are.
- Saturation: The saturation of your image is how vibrant the colors are. An image with no saturation will appear black and white whereas an image with incredibly high saturation will have colors that pop.
- Hue: Hue changes the hue of your colors in your image or what the colors are perceived as. It can turn reds to blues and blues to greens.
Scopes
The Scopes panel is located on the lower right-hand side of DaVinci Resolve and can be used as a reference to see how over or underexposed your image is. There are so many reasons to be using scopes while coloring.
Our eyes can only do so much and are far from accurate when viewing colors. Your monitor also may not be entirely accurate, requiring you to rely on scopes for complete color accuracy. Clicking on the drop-down menu at the top of the scopes page will let you display a few different kinds.

Parade
This is the default scope in DaVinci Resolve. The parade splits your image up into RGB values. What the parade does is measure the saturation of each of these colors in your image.

Waveform
The Waveform scope asses the brightness of your image as well as specific colors using an IRE scale that ranges from 0-100.

Vectorscope
A vectorscope is incredibly handy for measuring the degree of hue and saturation in an image. The further the markings are from the center, the more saturated your image and colors are. There’s also a line indicating where your skin tones should be.
Skin tones can often shift green or blue depending on your camera, so it’s good to have this indicator to make changes in post-production.

Histogram
A histogram is a graph that measures the brightness of an image by representing the frequency of each tone as a value on a bar chart. Your histogram running off towards either hand indicates that either your highlights or shadows are being clipped. A histogram is most important when filming and is a great tool to have while on set.

Color correction and grading workflow in DaVinci Resolve
It’s always best to start out with a simple color correction while working. Color correction fixes any imbalances you may have had while shooting. Things like white balance, highlights, and shadows all fall under color correction. In DaVinci Resolve, it’s incredibly important to do as many of these things in separate nodes. Naming your nodes allows for more organization.
Color grading on the other hand is the more creative side of coloring. Things like saturation and LUTs all fall underneath color grading. It’s usually a good idea to perfect your coloring correction first before moving on to color grading.
It’s also essential to use scopes while coloring. As stated before, our eyes and even computer monitors are incredibly inaccurate. Utilizing scopes ensures that your image looks consistent across a wide range of devices.
Summary
Programs such as DaVinci Resolve have made Blackmagic a force in the creative field. With its strong color features, it’s not at all hard to see why DaVinci Resolve has been a mainstay in the film industry.
Color isn’t all that makes a great video, as extras like captions and subtitles can help make your content more accessible and engaging. With Simon Says, you can effortlessly caption and transcribe your content natively within DaVinci Resolve. Check out the extension and see how it can improve your video editing workflow.