How to Use Green Screen with Final Cut Pro
A green screen lets creators bring to life any scene they can possibly imagine. The best part is how easy green screen removal has become in recent years. There are so many incredible NLEs (non-linear editors) that make keying green screen footage a breeze.
Programs such as Adobe Premiere Pro and After Effects allow for green-screen video to be taken care of with a simple click of a button but can be extremely costly given the subscription model that they follow.
One of the best programs to remove green screens has been around for nearly two decades and is developed by Apple. Final Cut Pro X (FCPX) is such a powerful video editing software for both professionals and beginners. Green screen in Final Cut Pro is incredibly simple to master, something only a few clicks away for most video editors.
In this tutorial, we’ll go over how to work with a green screen in Final Cut Pro for video production and go over some tips and tricks on how to speed up your post-production workflow.
Using a green screen in Final Cut Pro
Utilizing green screens can be an amazing tool, but it’s important that you use the effect in moderation. Ever hear the anecdote “too much of a good thing”? Well, this definitely applies to green screen. Too much of the effect can start to become something of a crutch and even take viewers out of your work, especially if it’s done poorly. You never want a distracting green screen.
This is especially important if you’re a filmmaker. For a filmmaker, selling the audience on their work is crucial. Using green screens sparingly is usually the best outcome for selling your story.
Green and blue screens are the most common backdrops in VFX (visual effects) because they’re the farthest colors away from human skin tones. This means that they’re the two easiest colors to key out. Blue is technically the farthest away from our skin tones but is more common in everyday objects, which can make keying a nightmare.
The green color used for green screens, however, is far less prevalent in most objects. Blue screens are best used for dimly lit environments since the vibrance from the green reflects light and bounces onto subjects more. Like most things in media, there are a variety of different use cases for both backdrops. You just need to know which one works best for the environment that you’re in. It’s a huge time-saver when you move on to post-production.
Recording and importing green screen footage
When you record your green screen footage, you’ll want to make sure that your green backdrop has as few shadows as possible. Also, make sure to avoid any wrinkles in the green screen itself - this will allow for a much cleaner key.
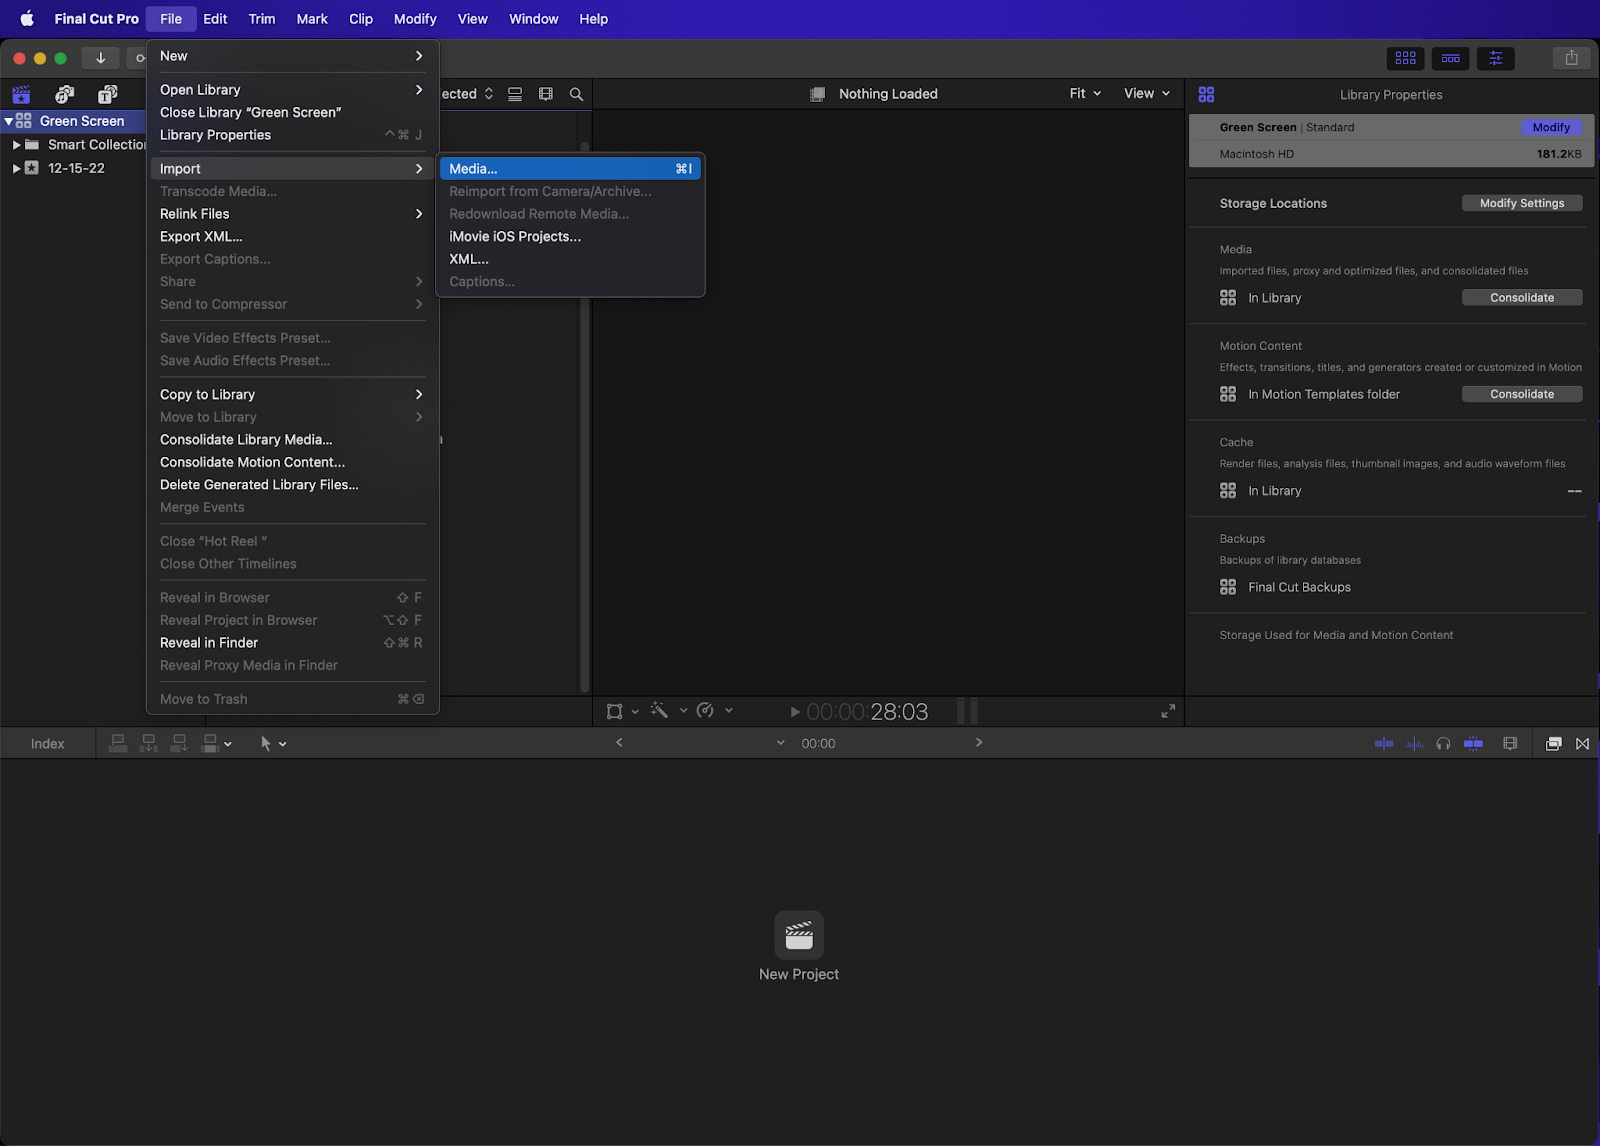
Importing green screen footage in Final Cut Pro is as easy as going to File > Import > Media. This can also be done by clicking ⌘I. You can also click on the Import button in the Library Sidebar.
You’ll then need to drag your footage into a new or existing Project. This can be done by going to File > New > Project or by clicking ⌘N on the keyboard. After your footage is inside your project, there’s one super easy way to key out your green background.
Adding the keying effect
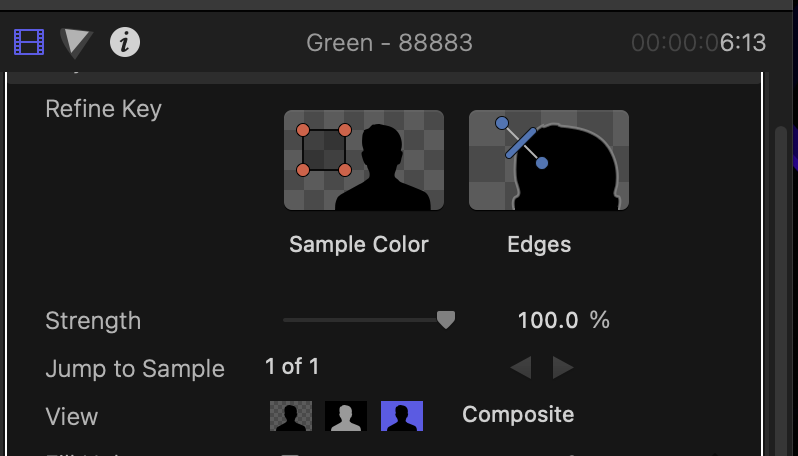
The only method of removing green screen in Final Cut Pro is by going down to the effects browser in the lower right-hand side of the screen (located right next to the transitions browser). You can show or hide this sidebar by clicking ⌘5 as a keyboard shortcut. Once there, you’ll want to go to keying>keyer and drag the effect on top of your footage. Immediately, your green screen clip should have the color removed the instant the chroma key effect is applied. You can change the color (color selection) that is being keyed out by clicking on Sample Color and selecting the color area that you want.

Making adjustments and using the Chroma Key
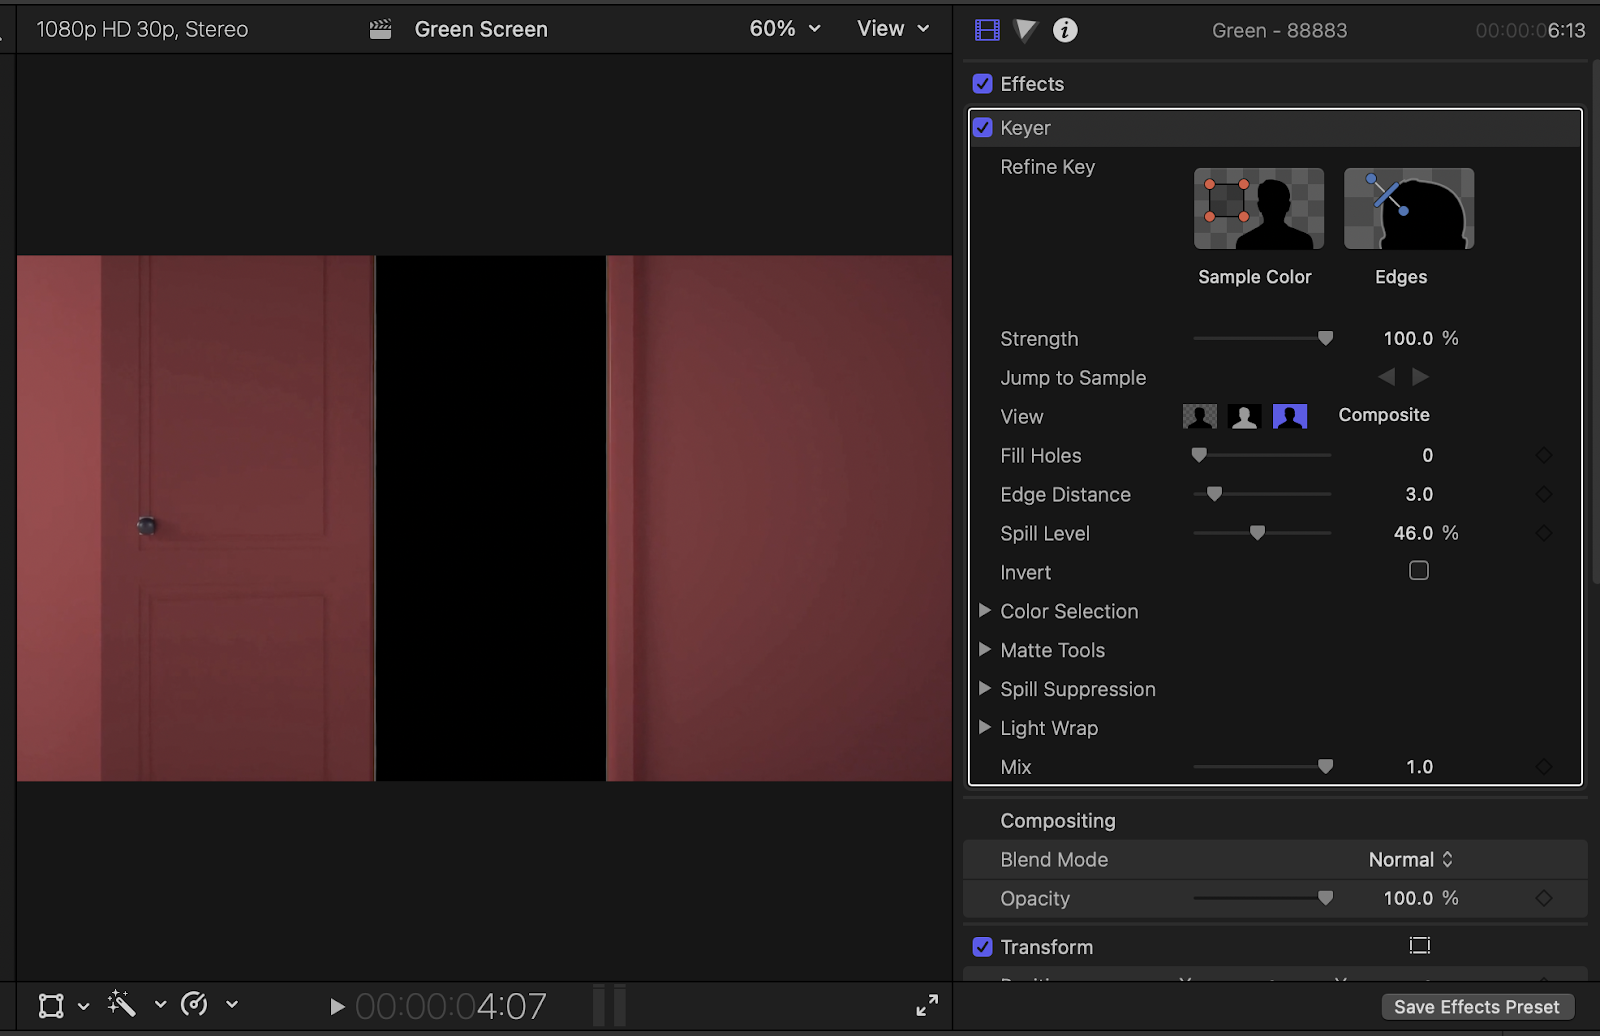
From here, there are a few different options you can change in order to achieve a better key. First, there are options that help you view your green screen effect.
- Composite: This shows what your final image is going to look like. This is what the keyer effect is set to by default.
- Matte: This displays the grayscale matte or alpha channel, that’s being generated by the keying operation. The white areas are the ones that are opaque whereas the black areas are what’s solid.
- Original: This simply shows what your original image looked like before it was keyed.
Beneath these are a few more options that help you better your keying.
- Fill Holes: If you tweak this parameter some of the transparent spots in your image will become solid. It quite literally fills in some of the holes that may appear.
- Edge Distance: Reducing or increasing this parameter changes how the edges of your footage look.
Summary
Final Cut Pro is not just one of the best free tools for green screen footage but one of the best tools overall. Using the Key Effect, the Chroma Keys, and the Key Light tools are quick and easy ways to key out your green footage. Final Cut Pro provides you with so many options for working with your video clips.
Creating films, social media videos, and commercials has never been easier. Using green screens can add so much production value to your content, but just remember to use it sparingly. The use of VFX can add a lot of time during the post-production process, so it’s best to know when to utilize it. In the world of post-production, every second saved is an absolute gift.
With Simon Says you can simplify this process by transcribing footage natively within Final Cut in 100 languages.