How to Undo In DaVinci Resolve: A Quick & Simple Guide
It doesn’t matter if you’re a beginner or a professional, mistakes happen during the post-production workflow. Fortunately, today’s video editing programs make it easy to fix these mistakes. The undo button is a video editor’s best friend and something universal across so many different programs, not just editing software.
This tutorial for mac and Windows devices will go over how to fix all of your mistakes in DaVinci Resolve 17 and DaVinci Resolve 18 through the use of the undo and redo buttons.
Undo in DaVinci Resolve using shortcut keys
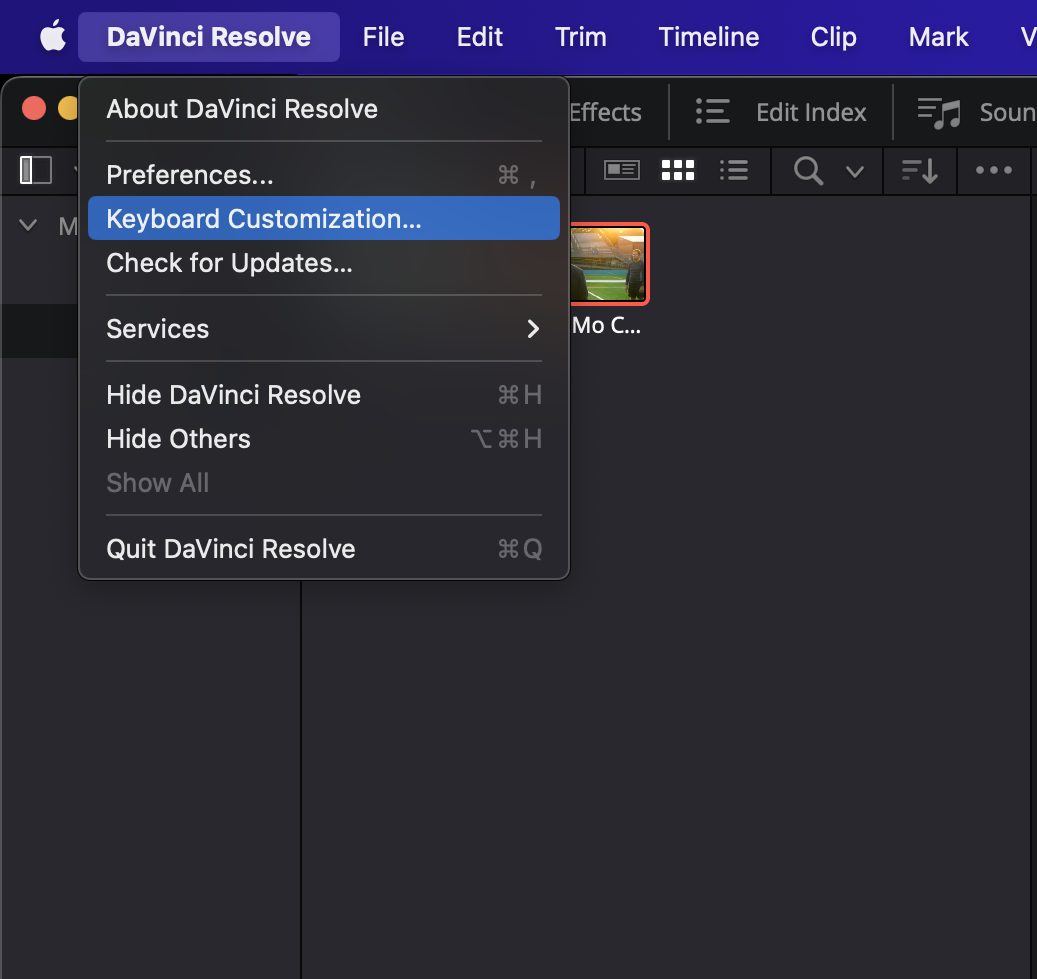
Utilizing keyboard shortcuts is one of the best ways to speed up the editing process with your video tracks. After making a mistake, clicking CMD + Z or CTRL + Z will undo it. If you’d like, you can also change this hotkey by going up to keyboard customization at the top of the screen.
This type of customization is great for more advanced users who want more control over their workspace and project settings.
Both undoing and redoing in DaVinci Resolve saves depending on which workspace you’re in. If you go to the Fairlight workspace and undo something, these changes will only affect this workspace. Jumping over to the edit page will have a separate redo and undo history.
Undo in DaVinci Resolve using the Edit menu
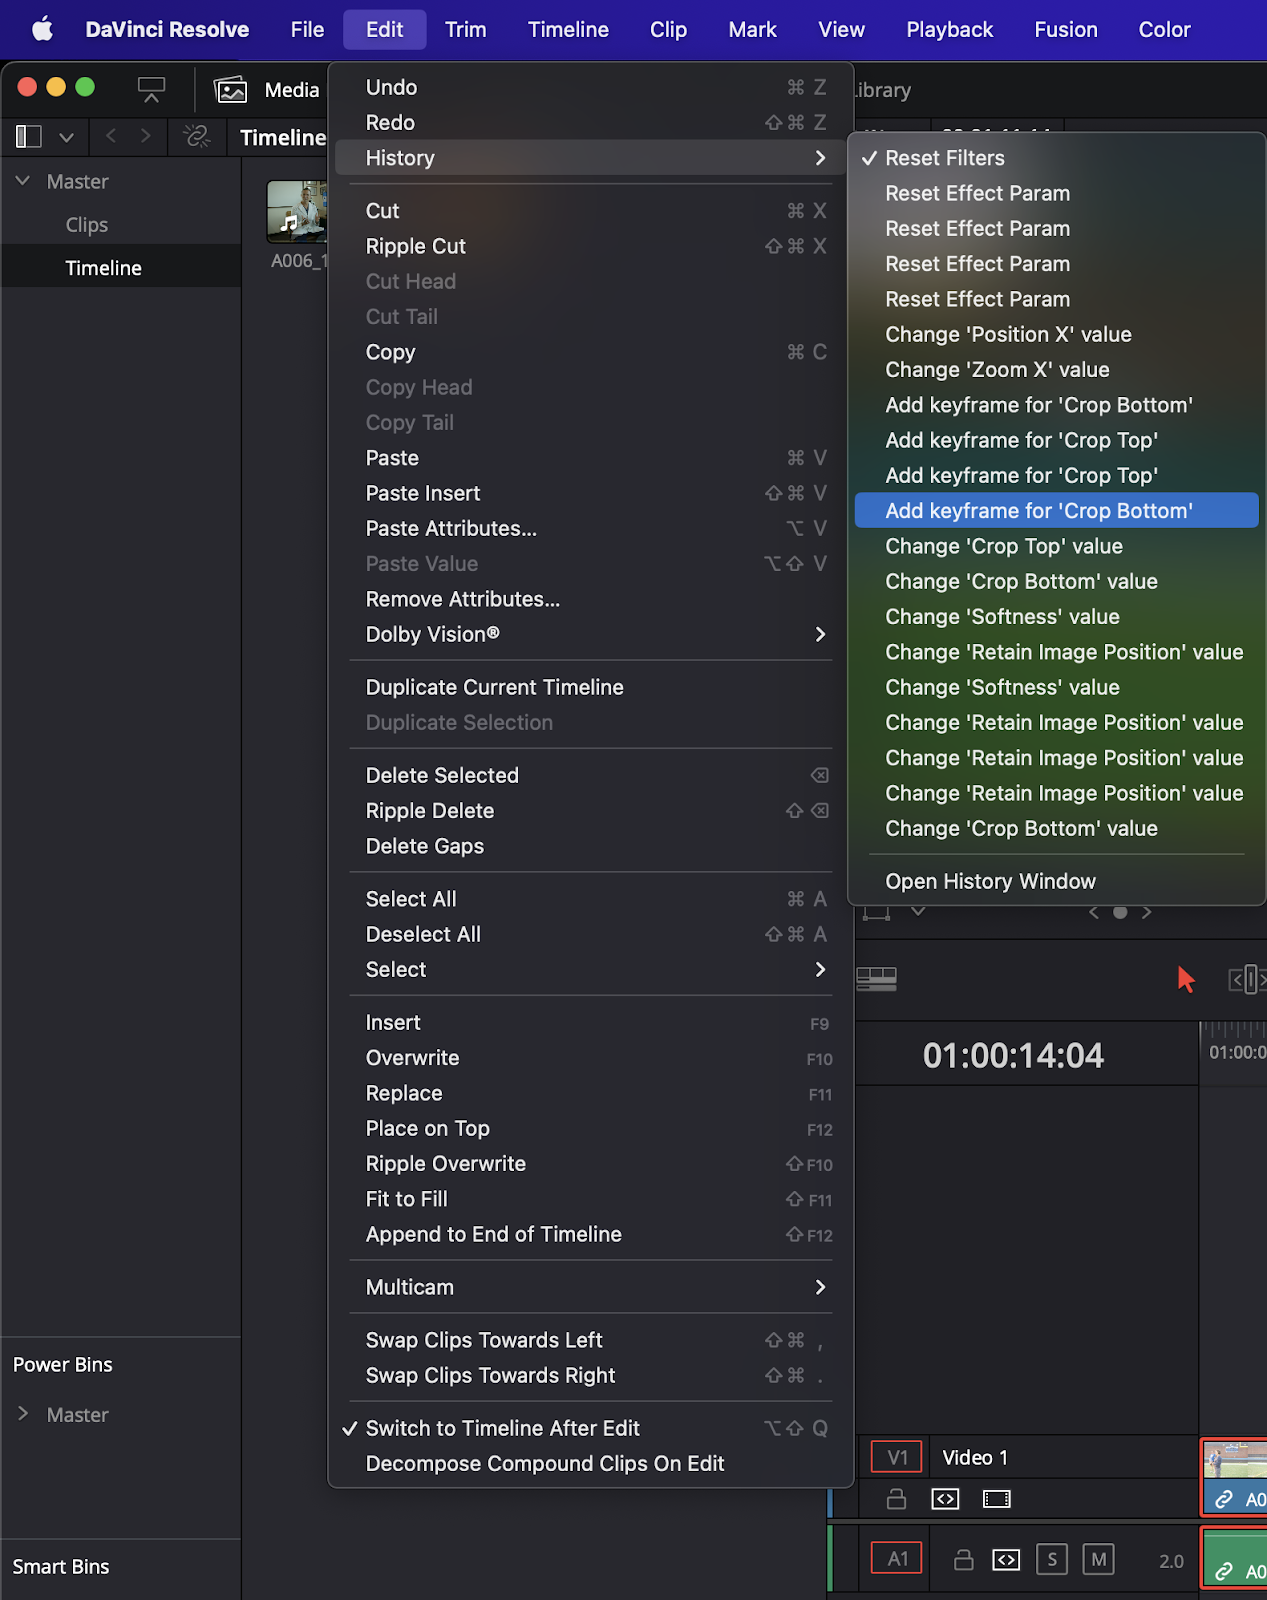
Another incredibly simple way to undo a mistake in DaVinci Resolve is through the edit menu. Go up to the top left corner and select Edit. Here, you’ll find an undo command which has a place on top of the dropdown menu. Clicking on this will fix any mistakes that you have made.

How to Redo in DaVinci Resolve
What if you want to redo a recent command in Resolve? Well, the process is incredibly similar to undoing. The keyboard shortcut for redoing is CMD + SHIFT + Z or CTRL + SHIFT + Z. You can also make this change by going to the edit menu and selecting Redo.
DaVinci Resolve Undo History
Another great feature Resolve has is being able to view the history of all of your actions within the program. You can view the history window by going up to the Edit menu at the top of the screen and going over to History. A drop-down menu will appear allowing you to overwrite any changes that you made.
Opening up the history window will give you a more in-depth look at all of the changes that you’ve made including things such as keyframes, effects, color work, and even select clips.
Conclusion
Plenty of mistakes get made while working on video projects. Undoing and redoing in apps such as DaVinci Resolve can speed up this process and allow for a seamless workflow.
With Simon Says, you can save even more time during the editing process, something crucial in the post-production industry. The Simon Says extension works natively in DaVinci Resolve, allowing you to quickly translate, transcribe, or add captions to level up your video content.