DaVinci Resolve Green Screen: How to Edit Footage & How to Remove
A green screen lets creators bring to life any scene they can possibly imagine. The best part is how easy green screen removal has become in recent years. There are so many incredible NLEs (non-linear editors) that make keying green screen footage a breeze.
Programs such as Adobe’s Premiere Pro allow for green-screen video to be taken care of with a simple click of a button. However, one of the best programs to remove green screens is completely free. Blackmagic’s DaVinci Resolve is such a powerful video editing software and green screen in the platform is a video editor’s dream, especially considering how amazing Resolve already is with its slew of color grading features. Plus, when combined with robust captioning and transcription software like Simon Says, you have everything you need for an optimal workflow.
In this post, we’ll go over how to work with a green screen in DaVinci Resolve for both macOS and Windows devices as well as tips and tricks to speed up your post-production workflow.
How to edit green screen footage in DaVinci Resolve
Utilizing green screens can be an amazing tool, but it’s important that you use the effect in moderation. Ever hear the anecdote “too much of a good thing”? Well, this definitely applies to green screen. Too much of the effect can start to become something of a crutch and even take viewers out of your work, especially if it’s done poorly. You never want a distracting green screen.
This is especially important if you’re a filmmaker. For a filmmaker, selling the audience on their work is crucial. Using green screens sparingly is usually the best outcome for selling your story.
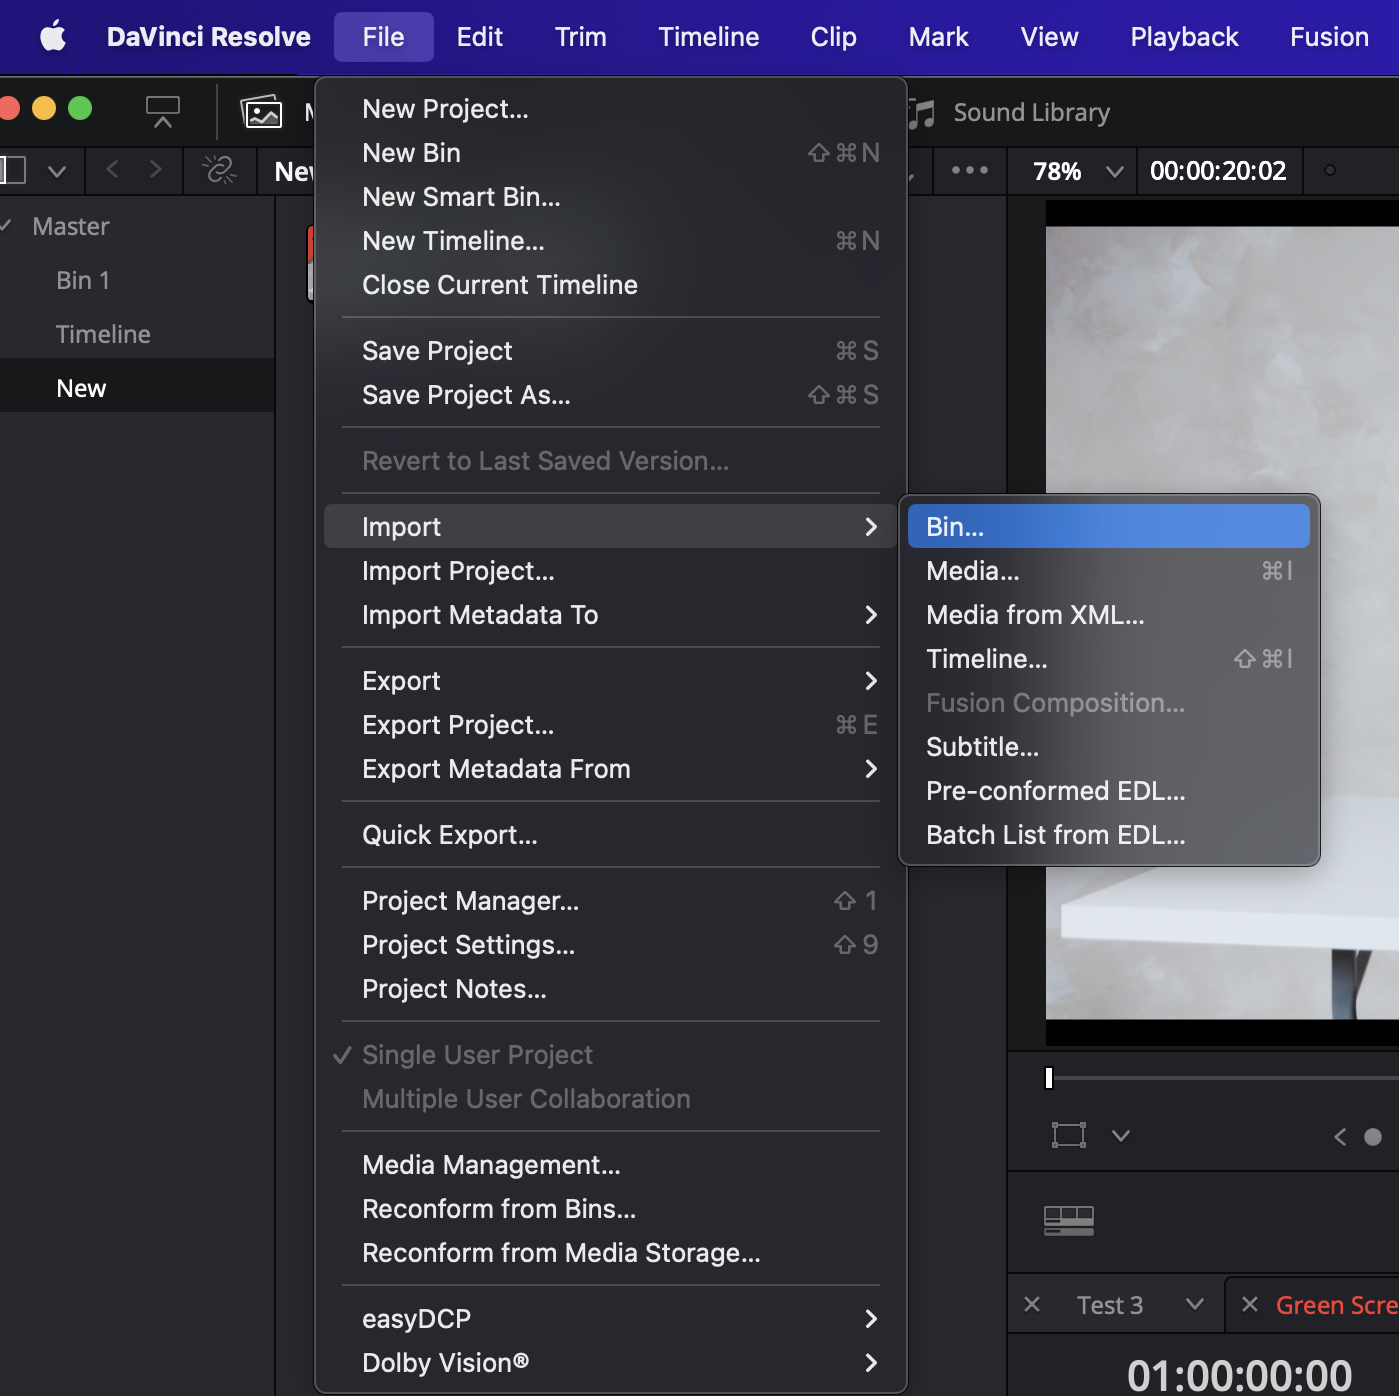
Importing green screen footage in Resolve is as easy as going to File > import > Media. This can also be done by clicking COMMAND+I on Mac or CTRL+I on Windows. You’ll then need to drag your footage into a new or existing timeline in the edit tab. From here, there are three main ways to remove your green screen.
How to remove DaVinci Resolve green screen
There are a few methods for removing green screen in DaVinci Resolve. Something to note is how you’ll want your timeline to be set up. You’ll want your backdrop placed underneath your green-screened footage.
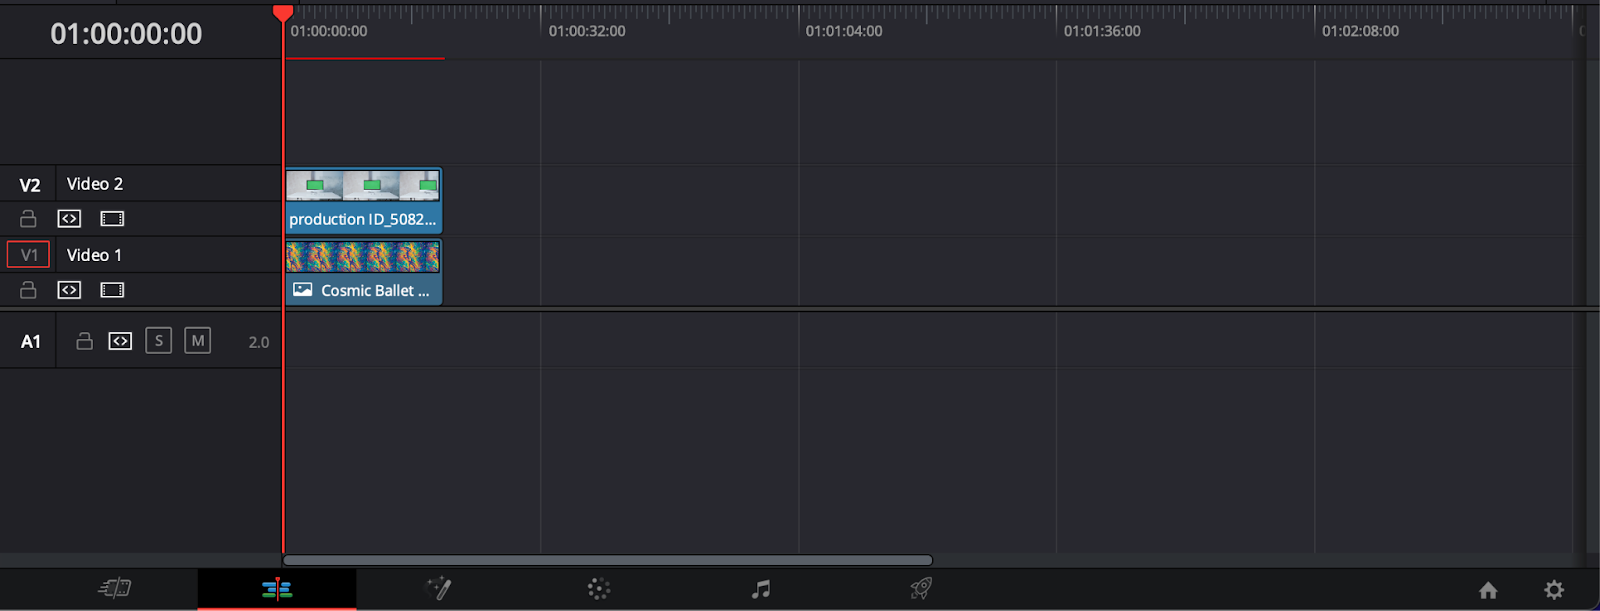
It’ll be hidden initially under the timeline, but once you chroma key the green out, your backdrop will finally appear. These methods will work in DaVinci Resolve 17 and DaVinci Resolve 18, but they may not work in DaVinci Resolve 16. In Resolve 16, the only method for green screening was in Fusion. These methods will also work for blue screens or really any type of solid-colored background.
Green screen vs. blue screen
Green and blue screens are the most common backdrops in VFX (visual effects) because they’re the farthest colors away from human skin tones. This means that they’re the two easiest colors to key out. Blue is technically the farthest away from our skin tones but is more common in everyday objects, which can make keying a nightmare.
The green color used for green screens, however, is far less prevalent in most objects. Blue screens are best used for dimly lit environments since the vibrance from the green reflects light and bounces onto subjects more. Like most things in media, there are a variety of different use cases for both backdrops. You just need to know which one works best for the environment that you’re in. It’s a huge time-saver when you move on to post-production.
Removing green screen with 3D Keyer tool
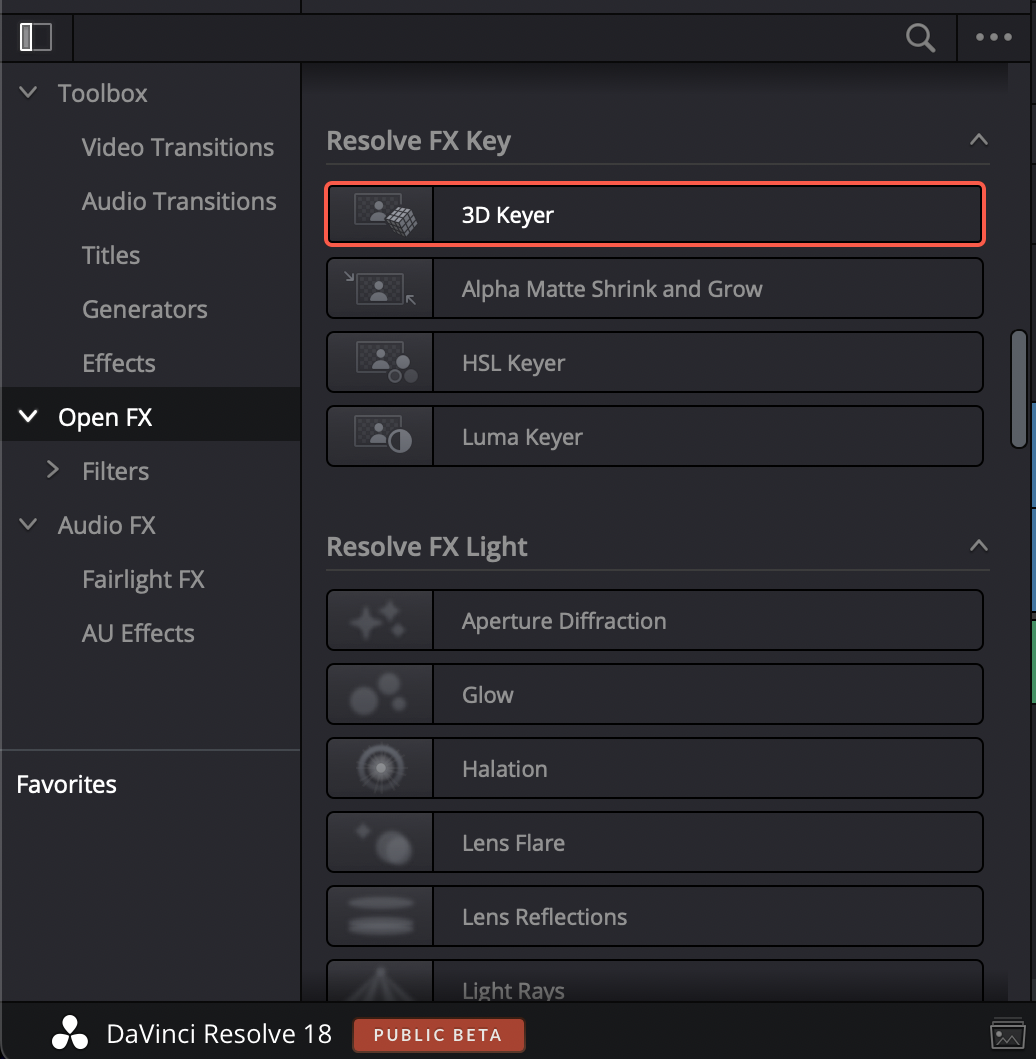
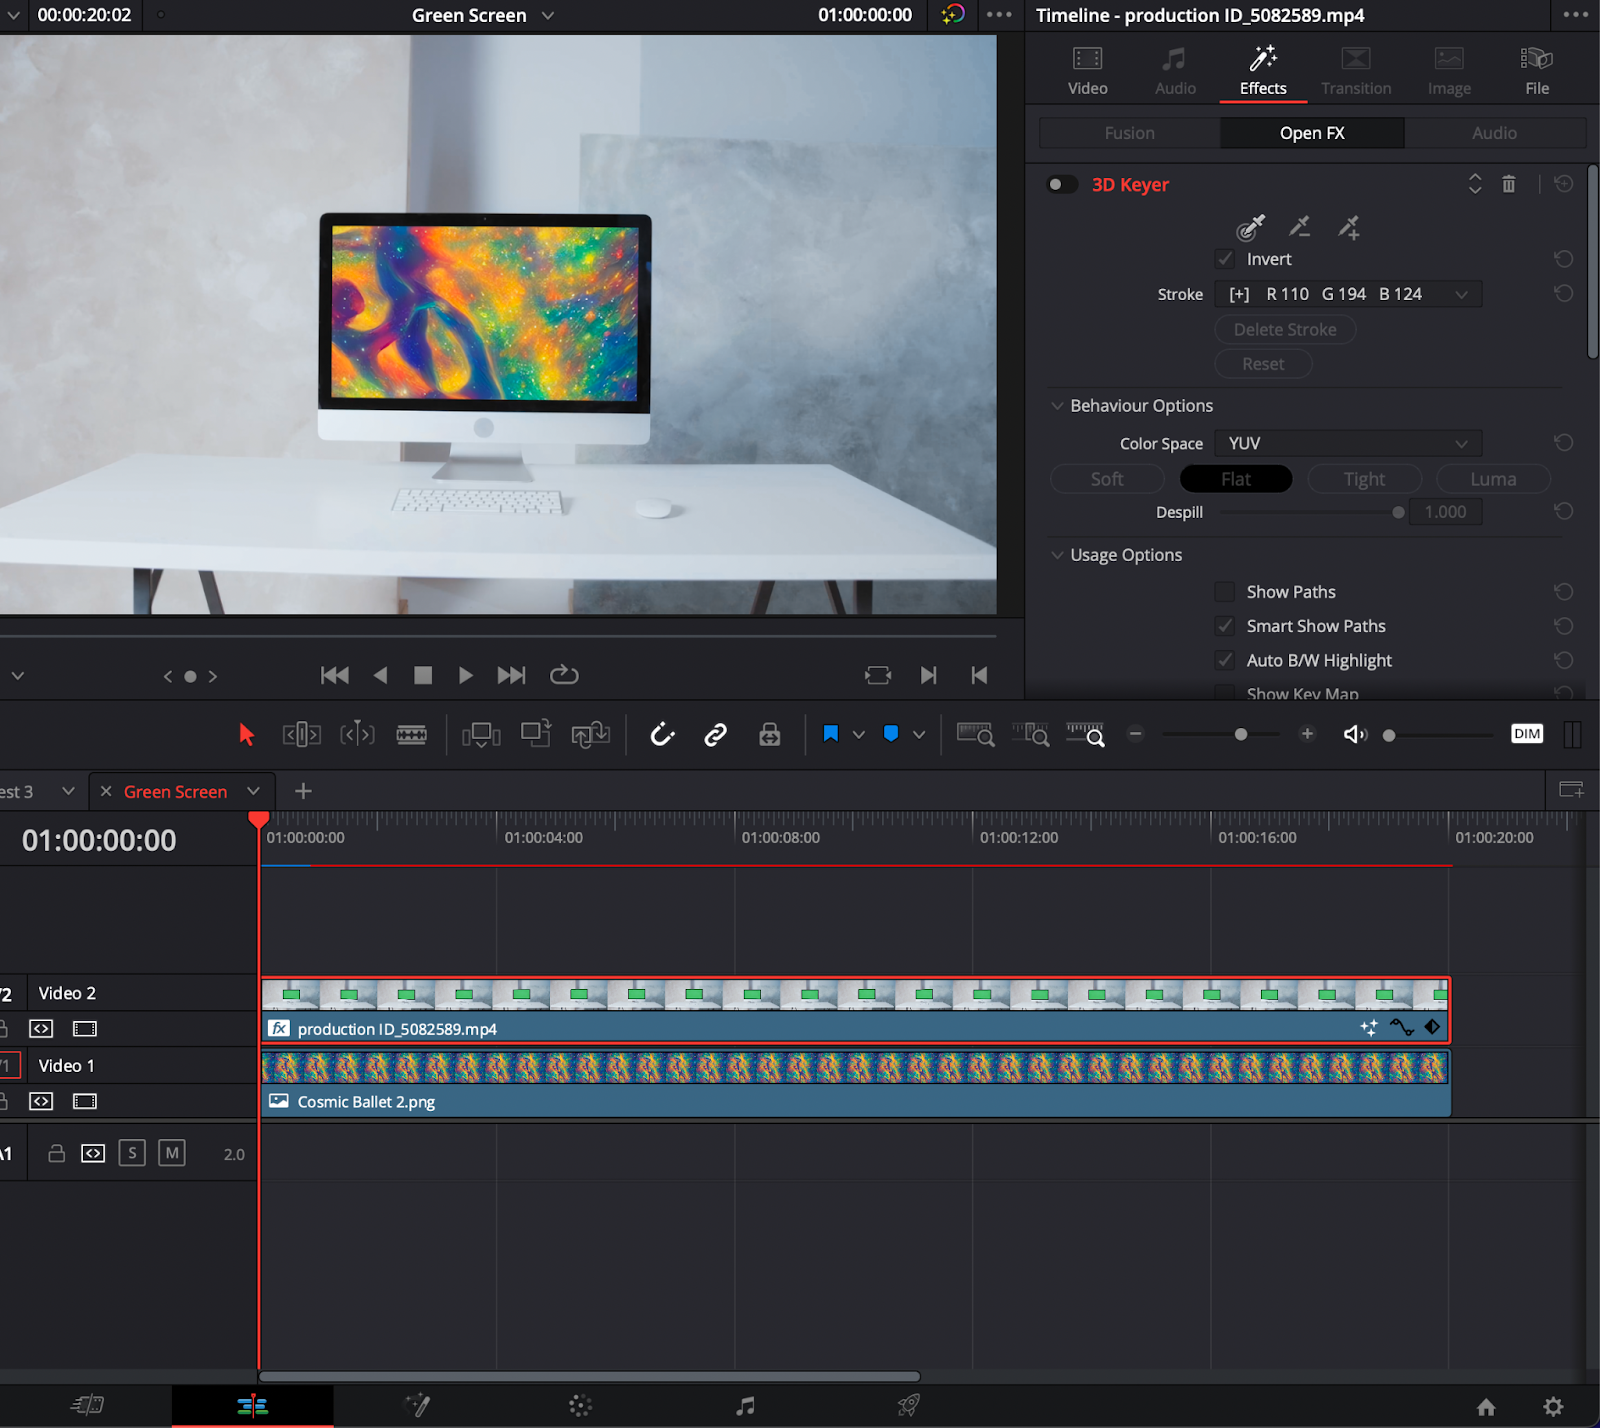
The first method of removing the green screen in Resolve is by using a simple Open FX effect called 3D Keyer. To get there, you’ll need to click on the Effects button in the top left-hand corner of the screen.
You’ll then want to go to the Open FX drop-down menu on the lower half of the screen and find Resolve FX Key. Under here should be an effect called 3D Keyer. Drag this effect onto your clip in the timeline. If you right-click on this effect, you can also add it to your favorites.
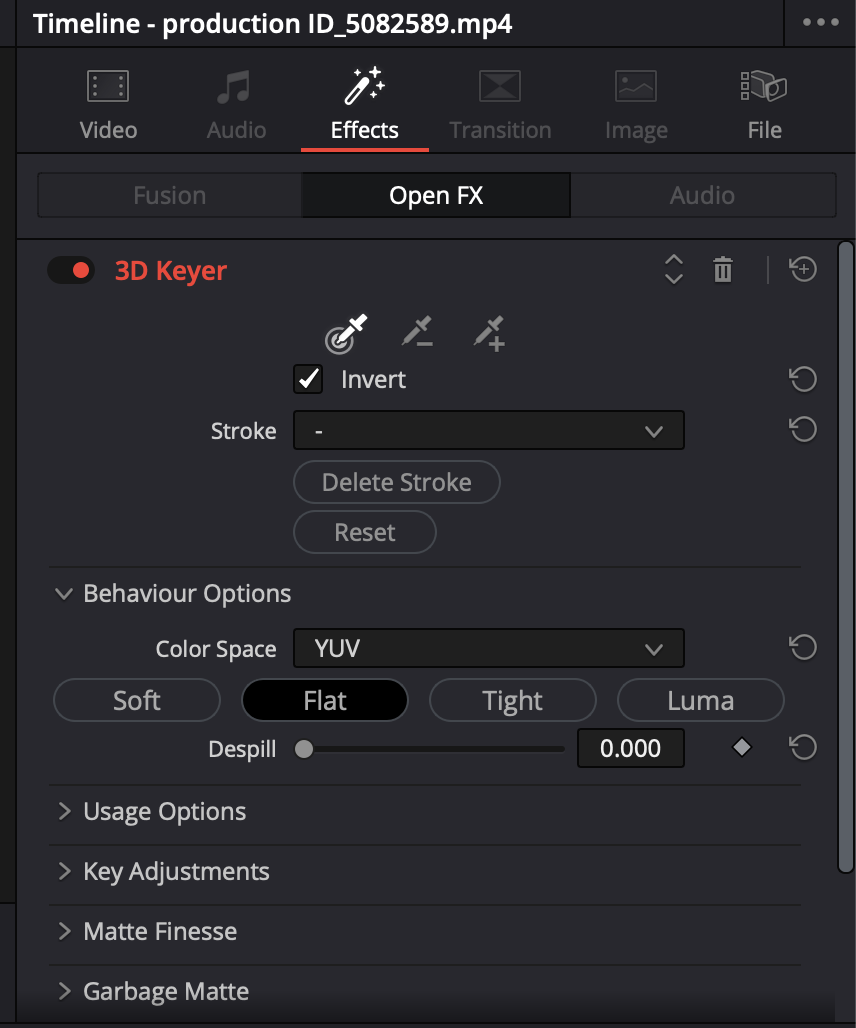
Clicking on the magic wand icon (effects) will bring you to the 3D Keyer effect that’s been applied to your clip.
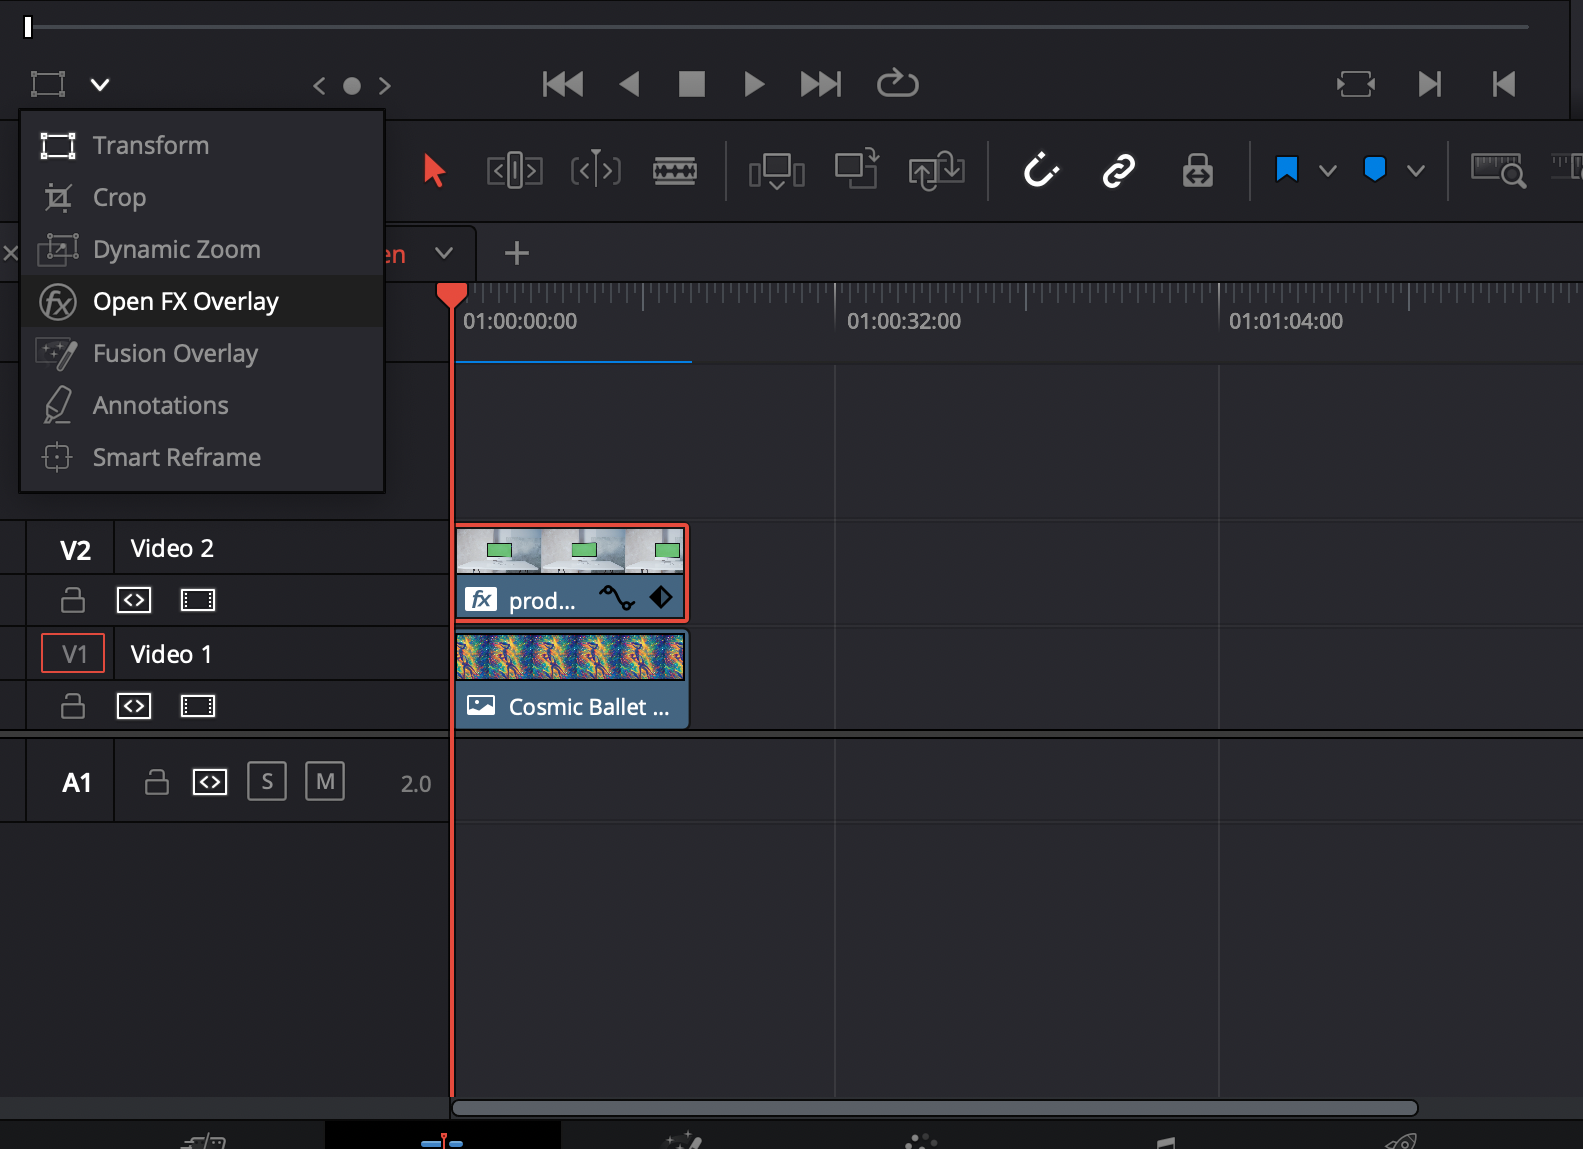
Before doing anything else, you’ll need to go to the drop-down menu on the left-hand side of your playhead and select Open FX Overlay. NOTHING will happen if you don’t do this first.
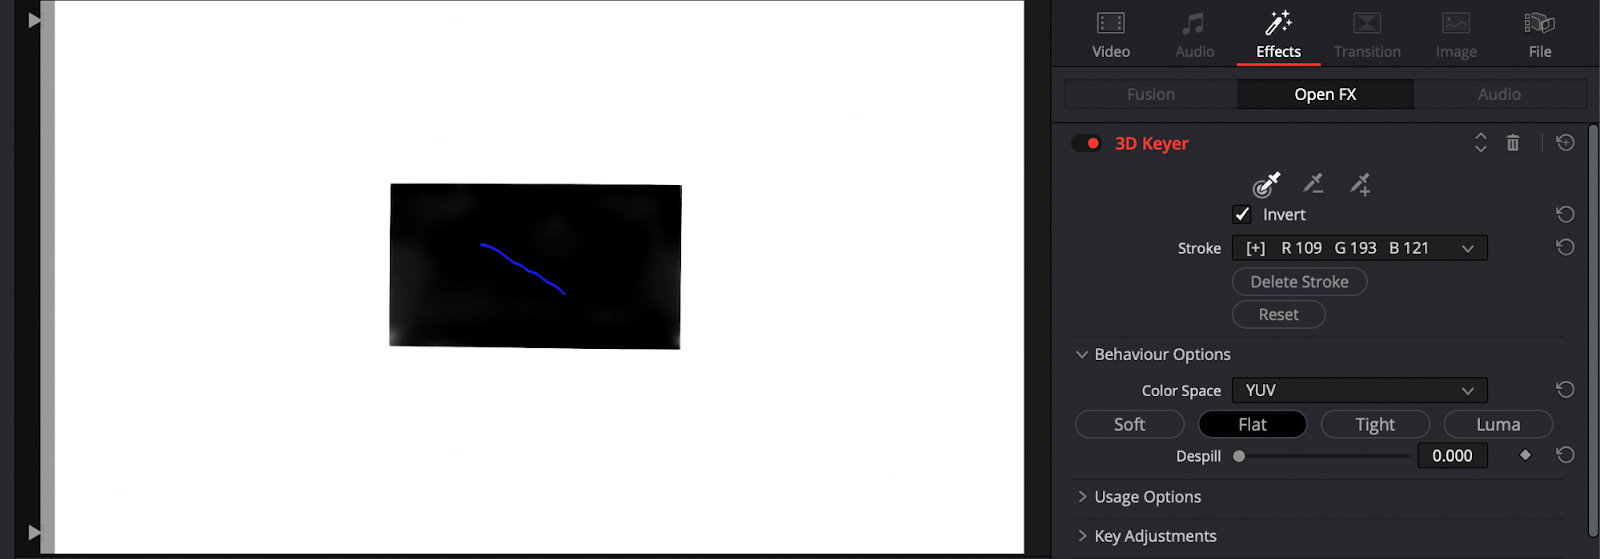
You’ll then want to click on the eye-dropper tool in your effects panel and select the portions of green that you want to key out. You can remove colors by selecting the negative eye-dropper tool and add colors by adding the positive eye-dropper tool. Dragging and clicking over the area of green will turn it white with a blue line indicating where your mouse is. Once you let go, your background will appear behind your green.
You’ll often need to make adjustments to the compositing and behaviors of the key. The 3D keyer gives you a few different options to play with.

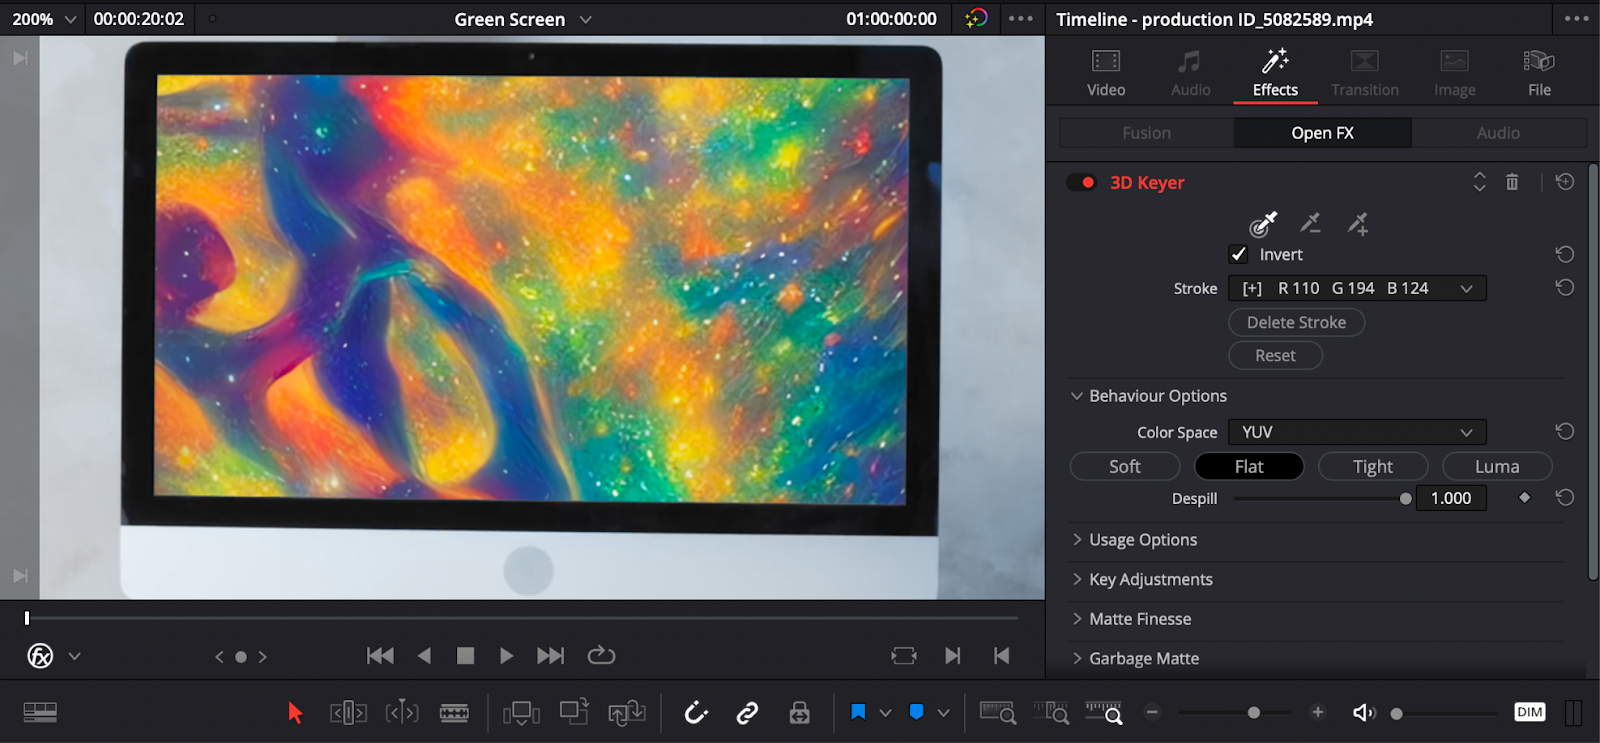
Turning the Despill slider up will get rid of the ugly green found around the edges of your video.
Below the Despill are a few more options that you can play with that help improve the overall key. What you need will be entirely dependent on how the footage was lit.
Changing settings such as black clip and white clip under matte finesse is a great way to dial in your key.
Removing green screen inside the Color tab
Another method of removing the green screen is by going inside the Color tab found at the bottom of the screen. Using the color page will bring you to a node-based workspace.

You’ll want to go to the Qualifier tab, turning your cursor into an eye-dropper tool.
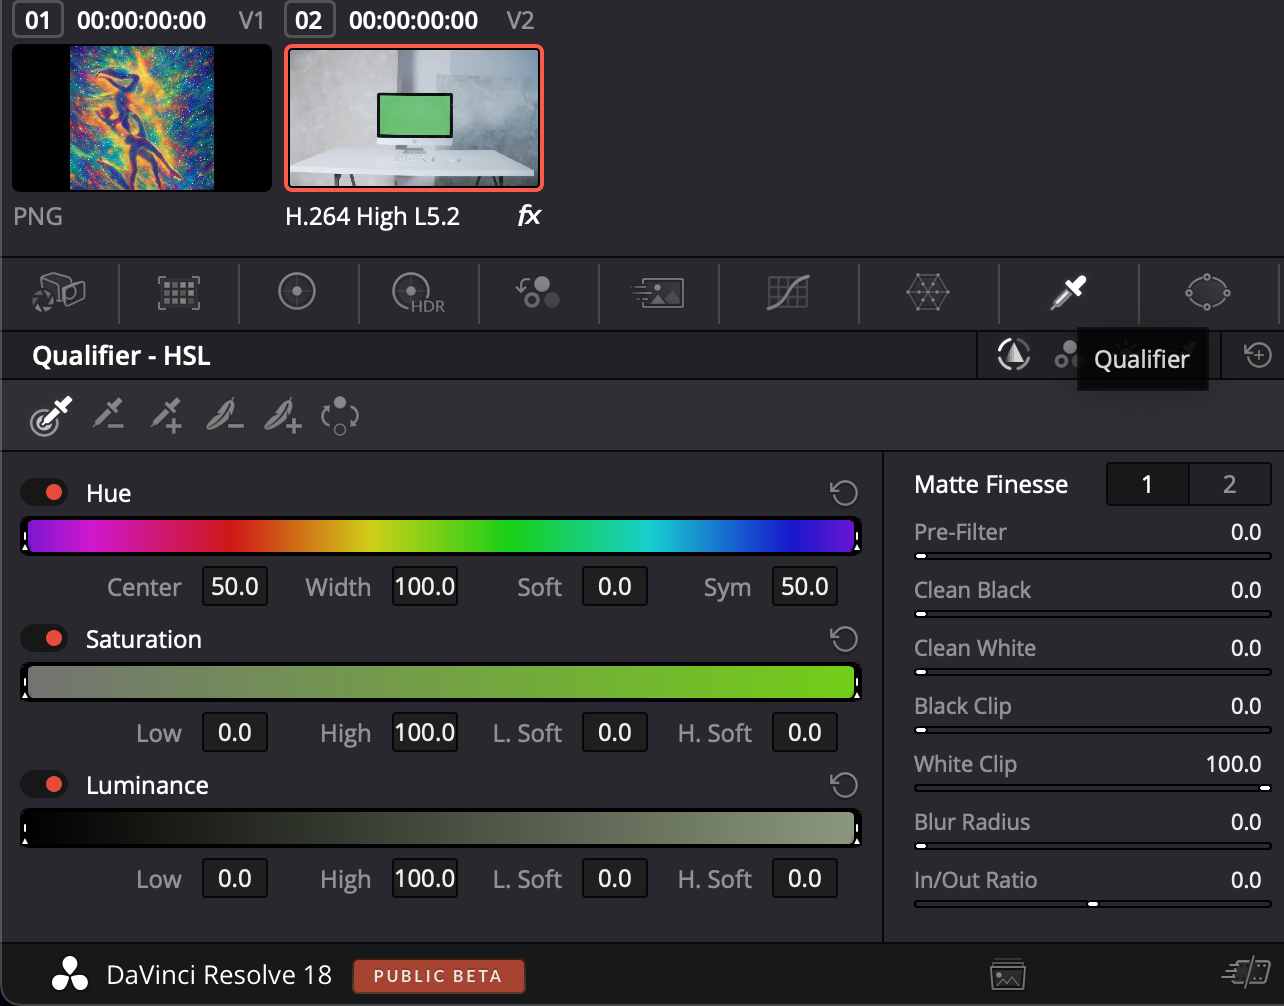
Click on the green you want to key out. Nothing will happen at first. Click on the Invert button at the top of the Color tab.
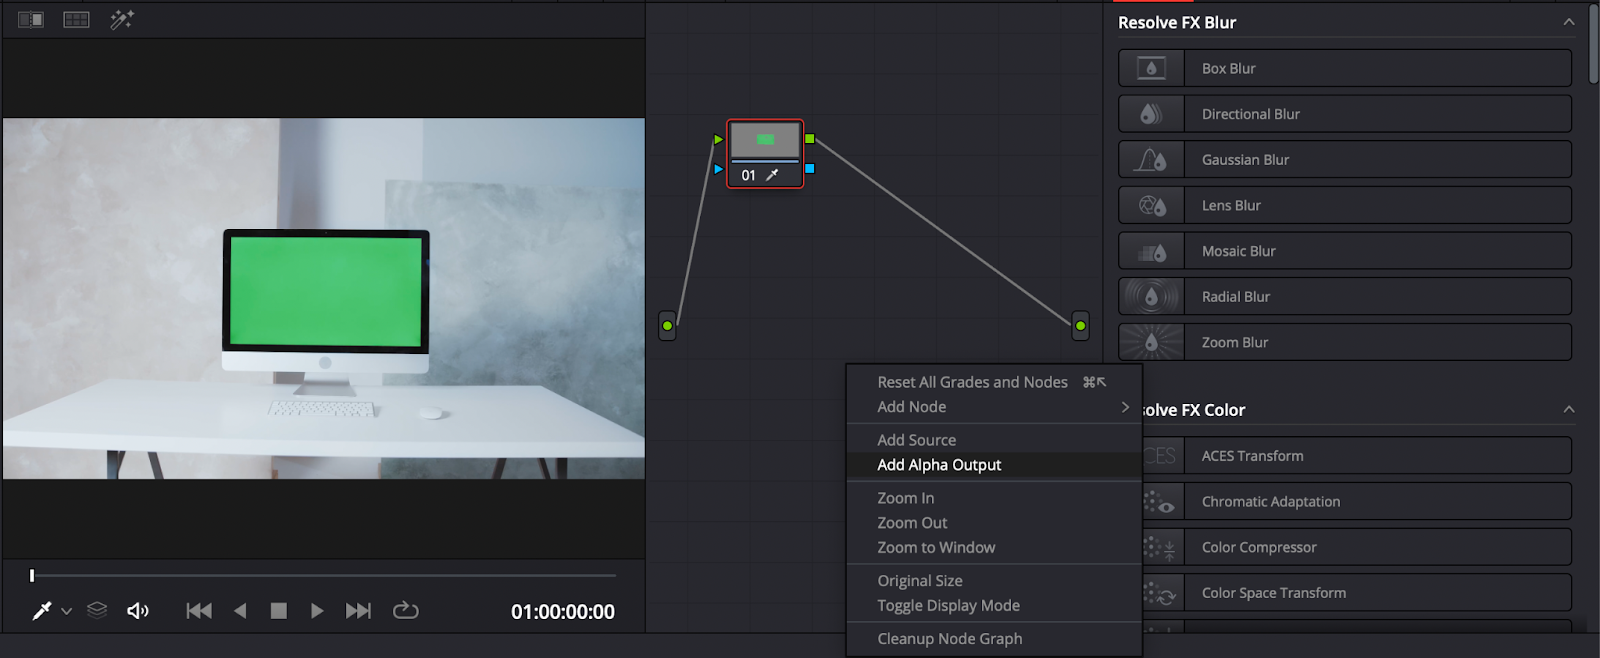
Then, right-click in the node tab and select add alpha output. Connecting the blue dot of your clip to the blue dot of the alpha output tab will remove the green from your image.
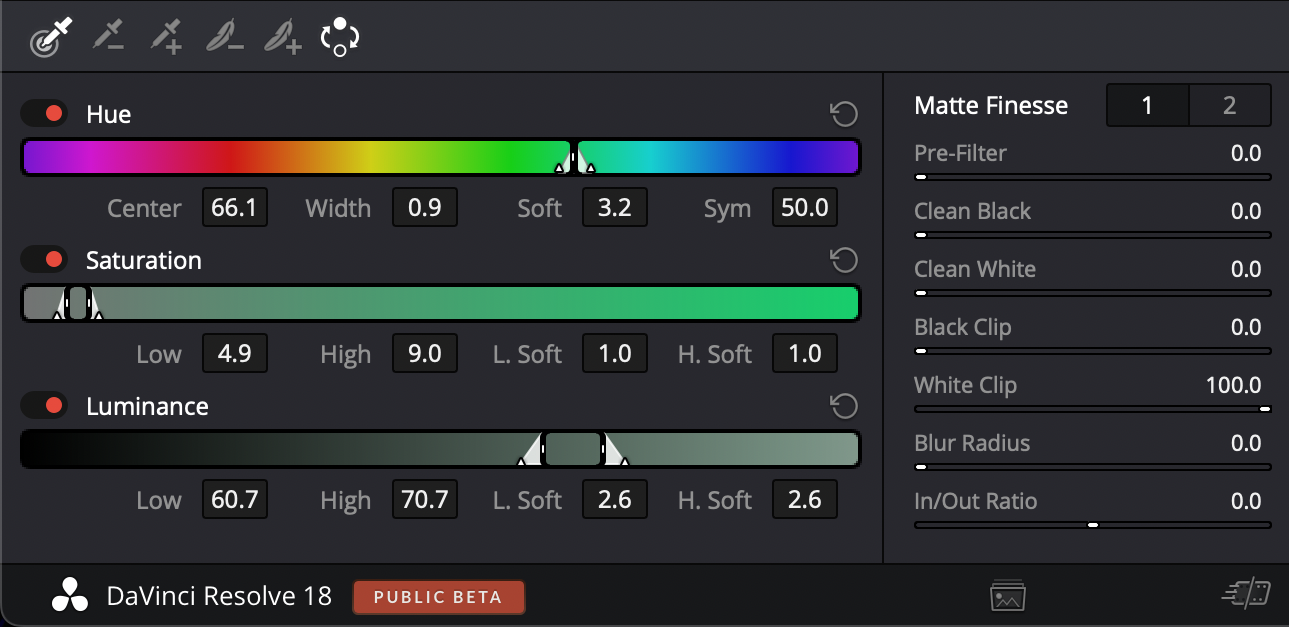
You can edit your key by clicking the add or subtract eye-dropper and using the Hue, Saturation, and Luminance slider. Using Pre-Filter, Clean Black, Clean White, Black Clip, and White Clip will remove the spill from your footage and help you further get a better key.
Removing the green screen with the Delta tool
The last way to remove the green area on your footage is by using Fusion. This is the one option that works for those still using DaVinci Resolve 16. Think of Fusion as being akin to Adobe After Effects.
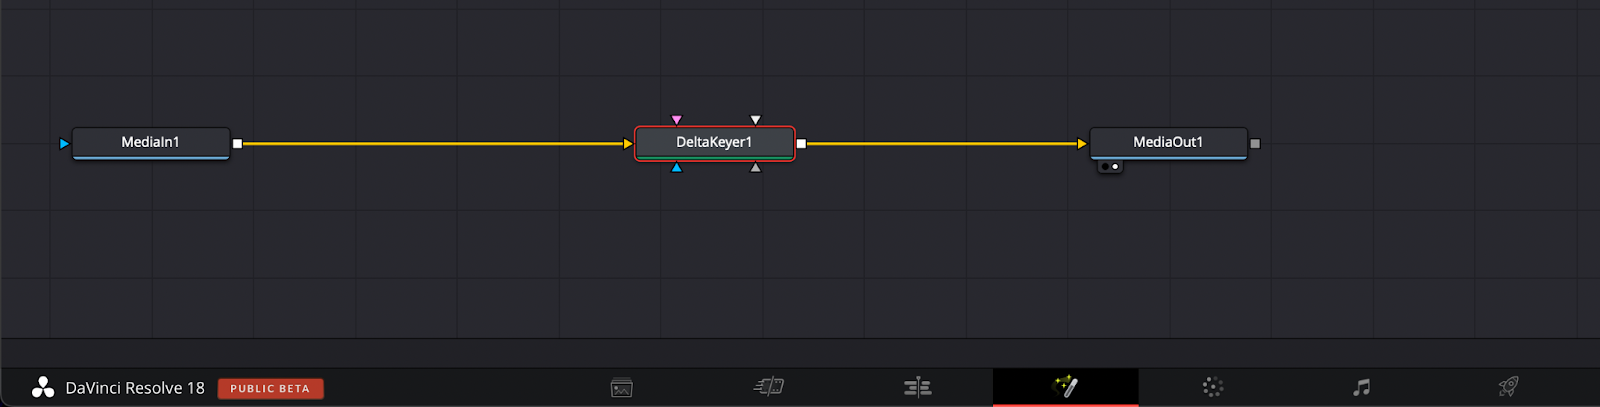
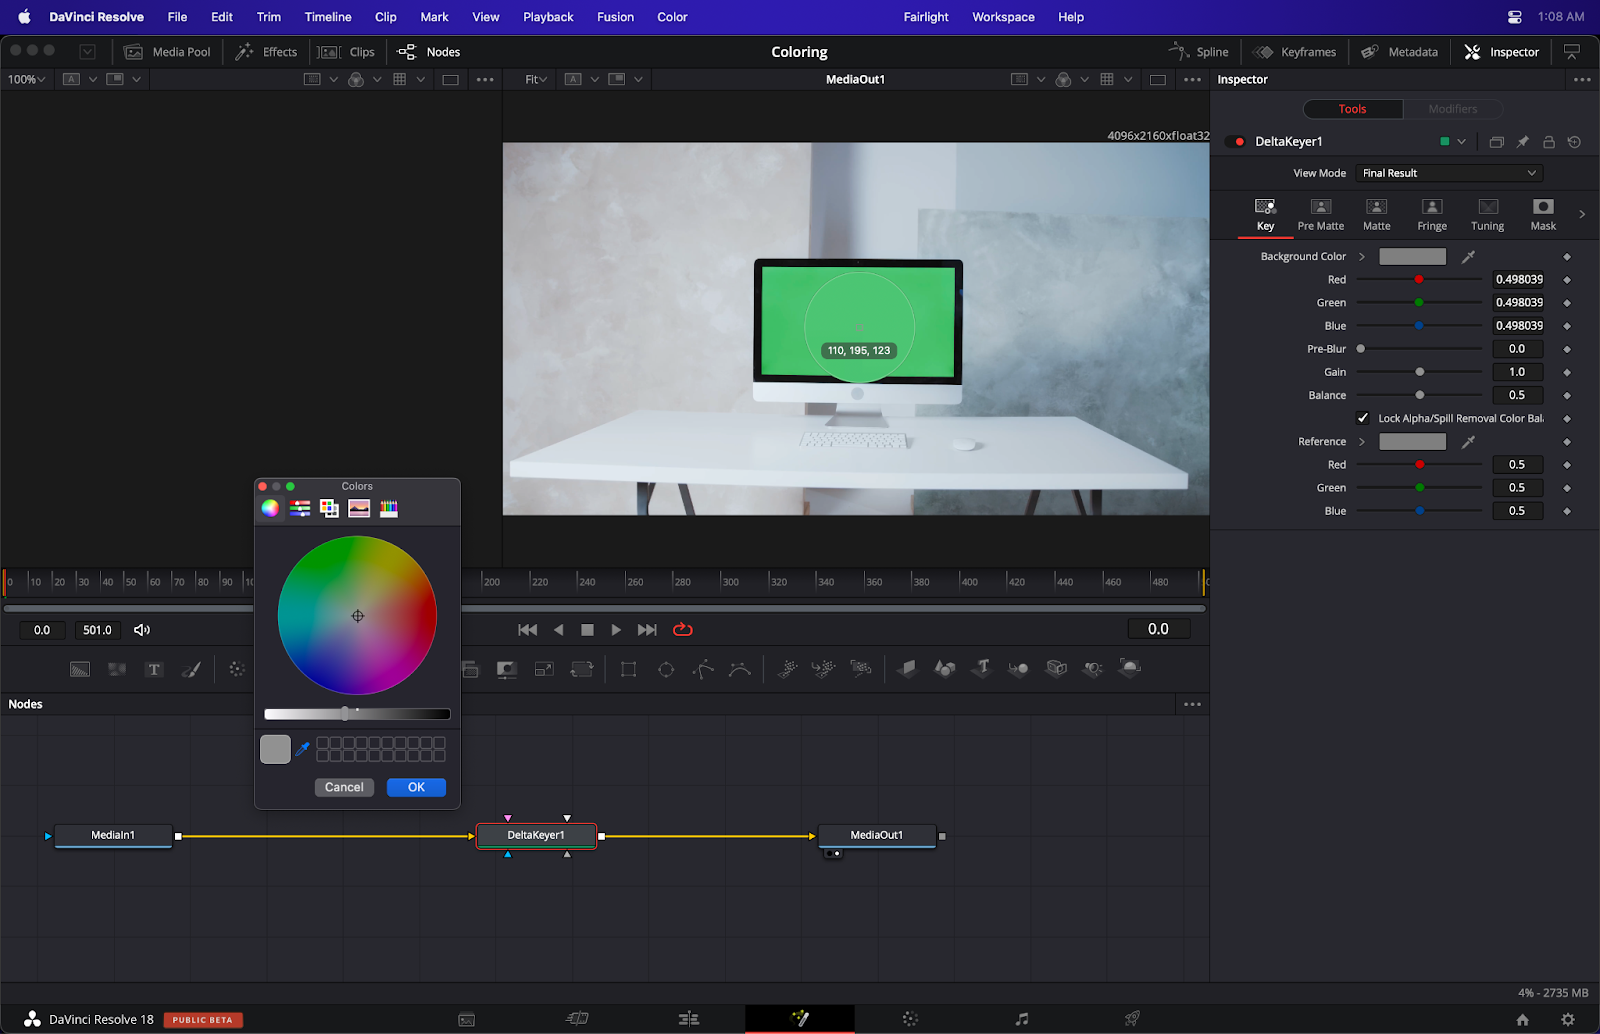
This program is built into DaVinci Resolve though and can be accessed by clicking on the Fusion tab at the bottom of the screen. Clicking Shift + Space Bar will bring up your Fusion toolbar. Typing in “delta keyer” will bring up your keying tool. Connect the delta keyer to the media in and the media out.
You’ll then want to click on the greyed-out square next to Background-color. Doing this will bring up a color wheel. Click on the green you want to key out. This will give you a keyed-out image that can be adjusted using the sliders on the right-hand side.
Your background image will not be visible until you return back to the edit page.
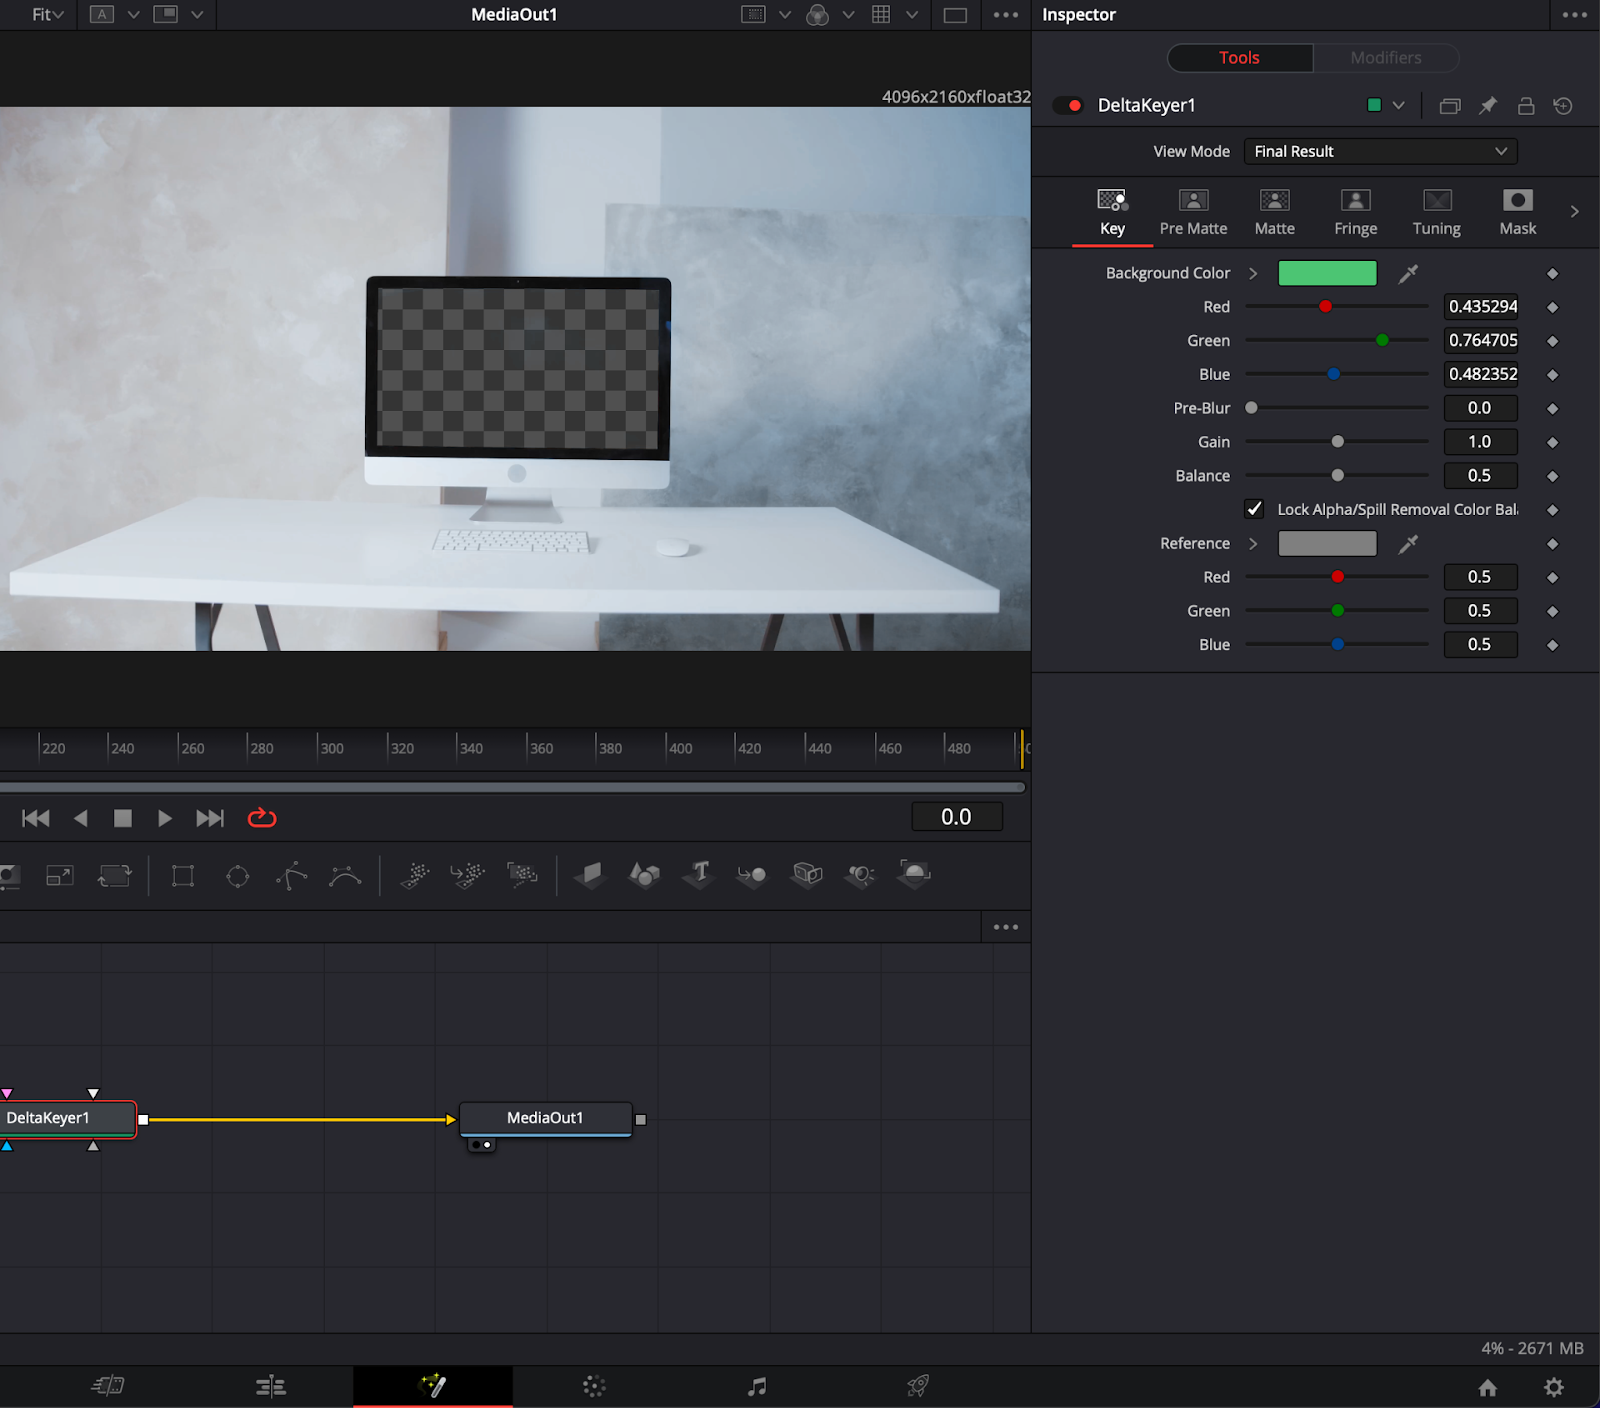
Once the settings are to your liking, go back to the Edit tab. The image below your footage will now be visible.
Summary
DaVinci Resolve is not just one of the best free tools for green screen footage but one of the best tools overall. Using Fusion, the Color Tab, and the 3D Keyer Tool are quick and easy ways to key out your green footage. Resolve provides you with so many options for working with your video clips.
Creating films, social media videos, and commercials has never been easier. Using green screens can add so much production value to your content, but just remember to use it sparingly. The use of VFX can add a lot of time during the post-production process, so it’s best to know when to utilize it. In the world of post-production, every second saved is an absolute gift.
There’s never such a thing as too fast in the world of post-production. Anything that can be done to speed up the process is essential. The small tips and tricks that we covered are essential when editing content for the sake of efficiency. The more time saved as a video editor the better. That’s why third-party extensions and plugins that help boost efficiency are so important in DaVinci Resolve and other NLEs.
With Simon Says you can transcribe footage natively within Resolve in 100 languages. Captioning videos is now more important than ever in the age of social media, and Simon Says simplifies this process, making Simon Says a must for all types of creatives out there.