How to use Assemble with Final Cut Pro
A guide to roundtrip media from FCPX to Assemble, bringing back a rough cut to FCPX
A guide to roundtrip media from FCPX to Assemble, bringing back a rough cut FCP Project (ie timeline/sequence) to FCPX
What is Assemble? Text-based video editing so you can highlight the transcript text of soundbites and then drag and drop them into the desired order to form the spine of your story. Learn more.
Notes:
- you can import in regular, multicam, sync and compound clips
- Make sure the clips are clean and don't have any existing metadata such as tags/ranges already attached to those clips or you will have DTD errors on relinking.
- Assemble doesn't support bringing in an FCPX project (i.e. timeline/sequence), editing it in Assemble, and then exporting back a timeline. The process should begin with importing clips.
Steps:
1 - Prep your media
Decide which clips in your event you want transcribed. If you’re using separately recorded audio, sync your media together with multicam or sync clips (whichever works best for your edit), and then select those clips. You can also import compound clips.
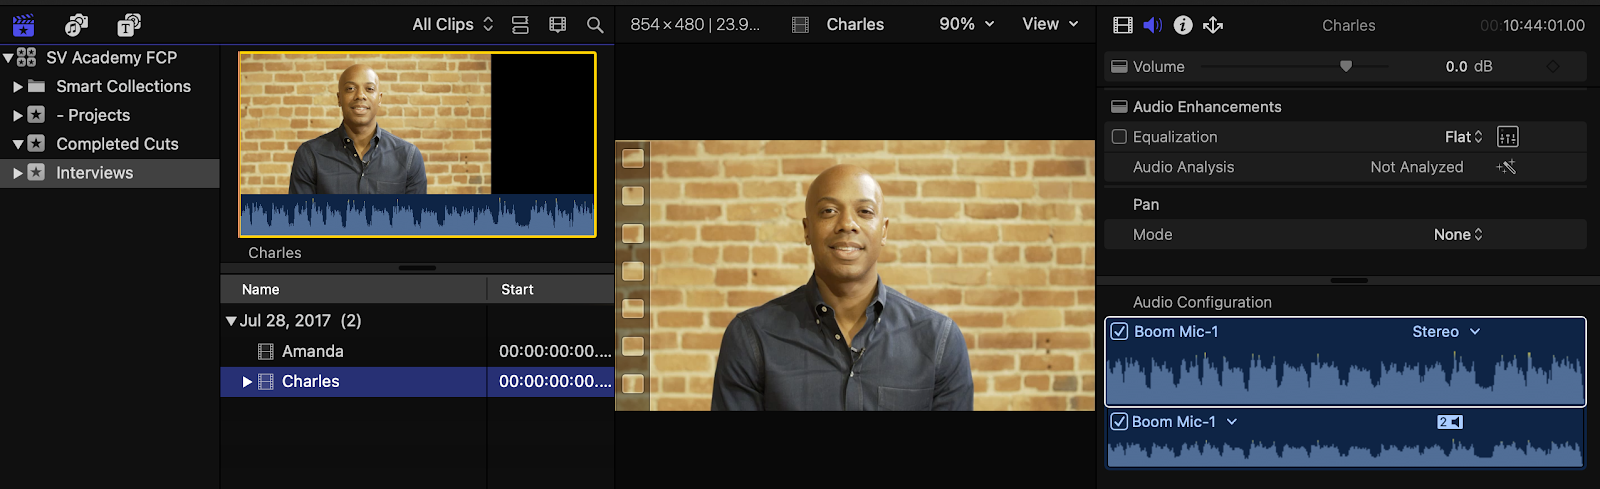
For best results, deselect any extraneous audio channels, isolating the clearest speaking audio. Often the in-camera mic or the recorder’s scratch mix will carry environmental noise that will make transcribing less accurate.
2 - Get the Simon Says App
Install the Simon Says FCP extension from the App Store, found here. Once installed, open it and sign in. You’ll also want to restart Final Cut if it was running.

2A - Open the Simon Says Extension
In the upper left-hand corner of Final Cut Pro, click on the extension button (looks like a puzzle piece) and select “Simon Says FCPX Extension”.

3 - Create a Simon Says Transcription Project
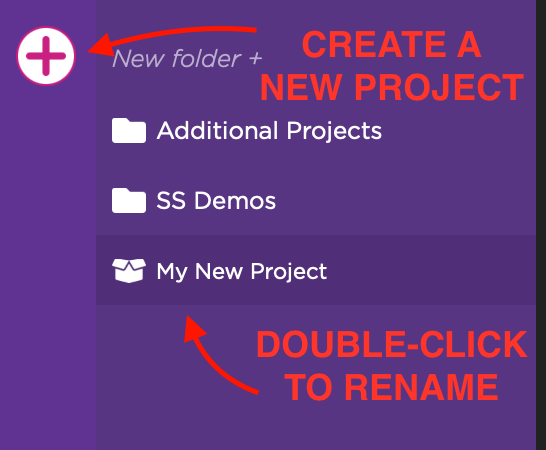
In the Simon Says App, click the plus sign in the upper left. This creates something called “My New Project”; so much better than Untitled (thank you, Software Guy!), but it will soon rename itself to match the name of what we bring over. You can also double-click to rename it as what you want, but wait until after the media has been added.
4 - Add media to your project
Now drag your selection from the Final Cut Pro browser directly into the Simon Says App’s dropzone. This will initiate a background process of transcoding your media to something small and will then upload it all to the Simon Says servers.
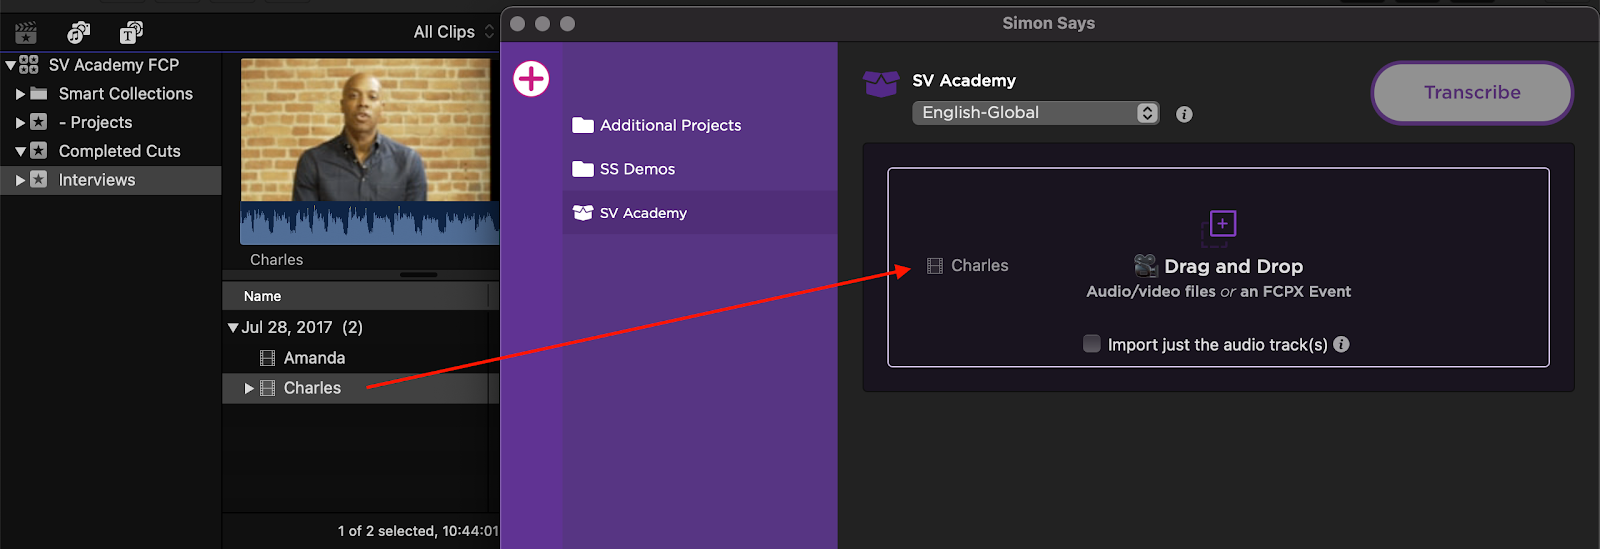
Keep in mind, dragging anything out of the Final Cut Pro browser initiates and XML export. Dragging one clip over to Simon Says will initiate an XML transfer for just that one clip; you’ll see Simon Says immediately start preparing the media from that XML for transcode and upload. If you drag multiple clips over, it will generate a single XML containing all clips and Simon Says Begin processing them all.
SS_2020-12-A01_Screenshot07 - Dragging several clips over
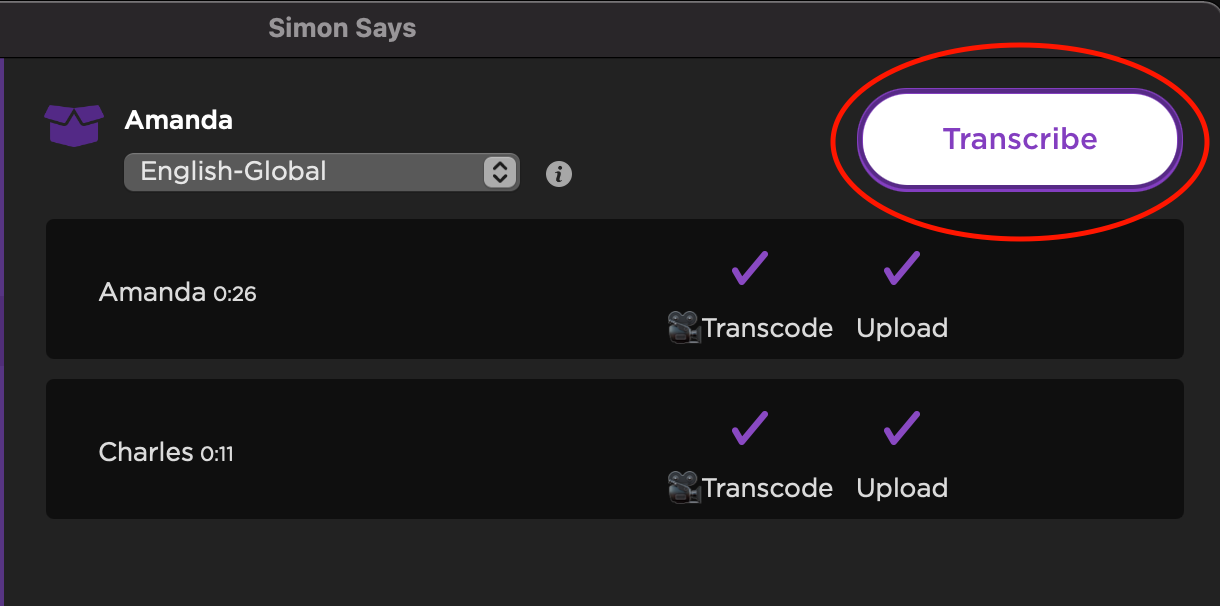
5 - Transcribe your media
Hit “Transcribe”. Easy, peasy.
And get that espresso. You’ve earned it.
6 - Simon Says Assemble
Once your project is transcribed, you can adjust your transcriptions and identify speakers either in-app or with the web. For now, let’s switch over to your web browser and go to SimonSaysai.com Log in and you’ll see your project listed in your account.
To get started with the Assemble editor, click on the button that says “Video Assemble Mode”. Or click here.

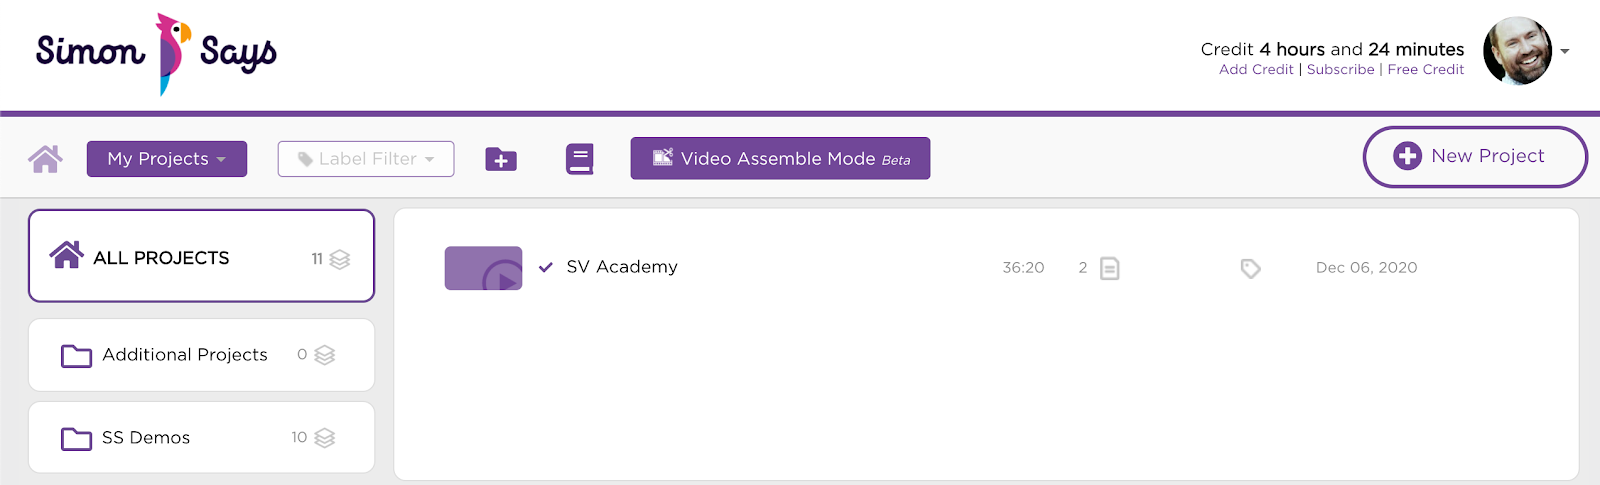
7 - Creating a new Assemble project
You'll now be in your Assemble dashboard. Create a new Assemble project:

Now you can double-click the title of your project at the top to name it. On the left-hand side, you’ll see three buttons.
- The Simon Says logo takes you to your Assemble dashboard where you can create a new project or select an existing one.
- “BIN” is where all of your media will be stored. Right now it’s empty.
- “IMPORT” is where, you guessed it, you can add media from your transcription projects.
Let’s go ahead and select our SV Academy project that we just transcribed.
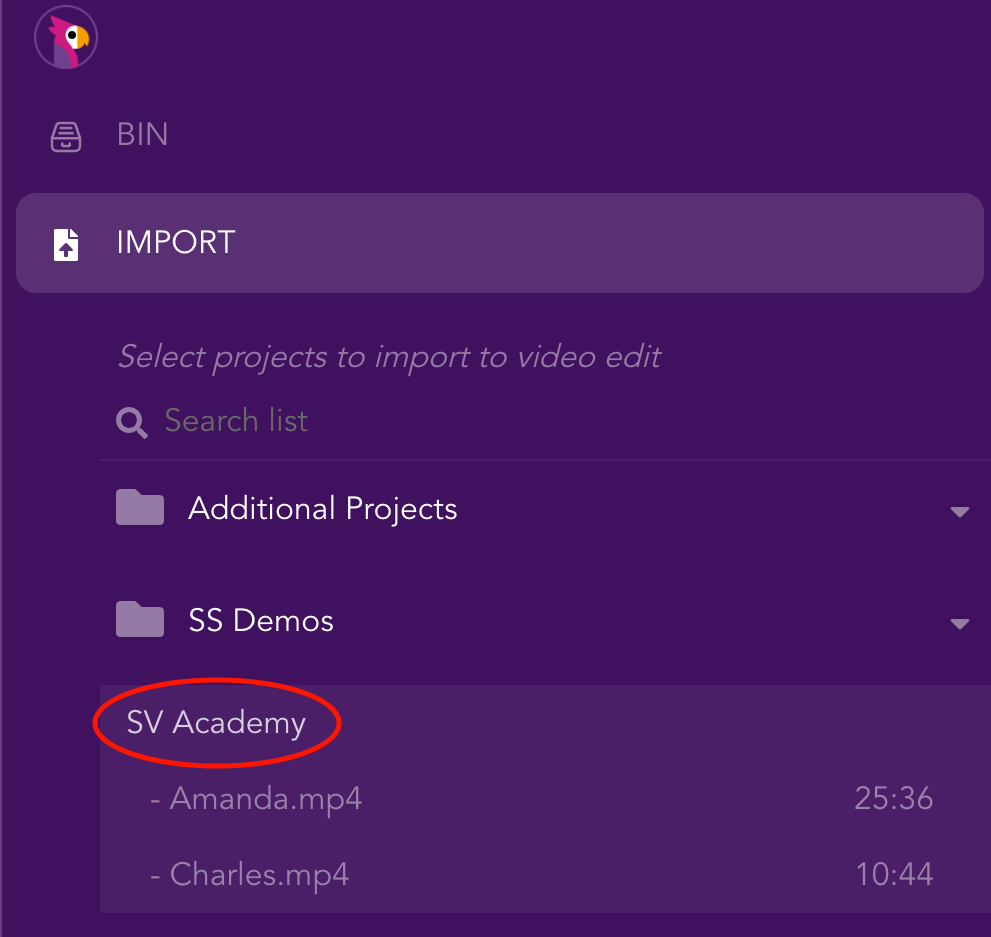
Important Note: Projects need to contain video; Assemble doesn't support audio-only projects at this time.
8 - Working with Media
Click on the Bin and choose the file you want to load into the bin player:

Your file's transcript will load on the bin/player side. Highlight soundbites and click the buttons to move it to the timeline side.
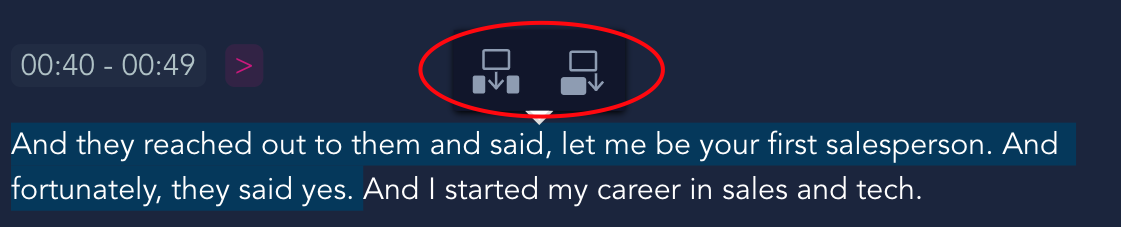
Drag and drop soundbites on the timeline side to order as you like. Use the Play/Pause and Stop buttons to advance the narrative you build. Click the thumbnail next to a soundbite to play your timeline from there.

9 - Sharing your project
Now for the good stuff. Click the team icon in the upper right-hand to get a link to share the project, or to invite people via email address directly. You can set the permissions level to either edit, comment, or to simply view.
10 - Commenting
Teammates with comment or edit access can leave notes on specific soundbites, by clicking on the empty note icon.
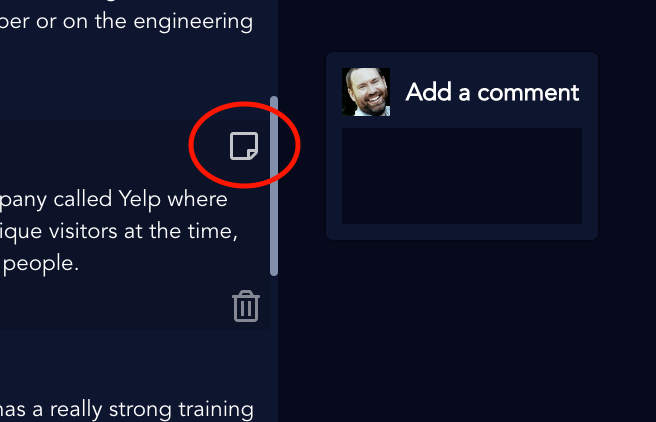
Click on any soundbite that has the solid note icon next to it to reveal notes left by others. You can also reply to comments left by others, and vice-versa. And yes, Gor. That really is the perfect soundbite.

11 - Export
Once everyone has agreed on the narrative you’ve built, you’re ready to drop it back into the edit! Click the export button, select Final Cut Pro X, and then click Download. This will initiate the download of an FCPXML file.

12 - Import back to Final Cut Pro and relink
Now that you have your FCPXML, head back into Final Cut Pro.
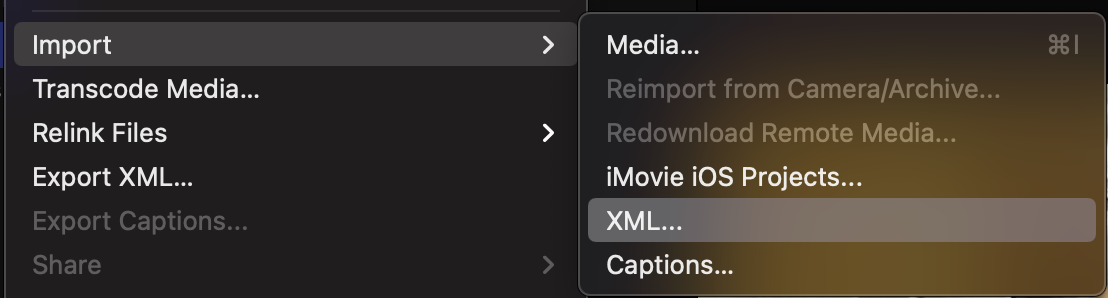
Go to File / Import / XML…
This will create a new event in Final Cut Pro with a sequence that needs to be relinked to your media. Select your sequence and go to File / Relink Files / Original Media
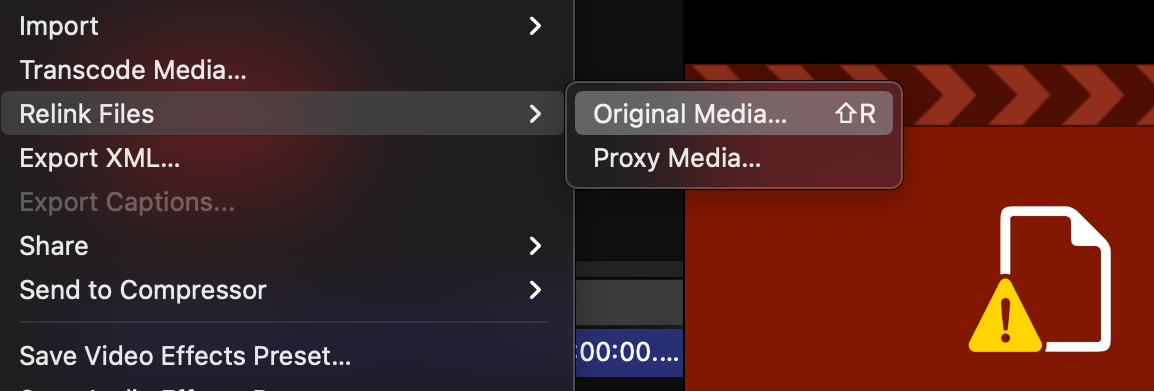
Then, relink your clips to the version of media you started with, and you’re ready to confidently build your project’s first rough cut!