

How to Export Videos From Final Cut Pro
Apple’s Final Cut Pro has had a long history in film history. Since its conception, it has been the quintessential editing software for both post-production professionals and amateurs alike. While Final Cut Pro X (now simply called Final Cut Pro) had a rocky startup that left many old software users disgruntled, it still continues to be a pillar of the editing industry besides programs such as Adobe Premiere Pro.
While editing in Final Cut Pro is known for being snappy and intuitive, none of that would mean anything if its exports weren’t just as fast. With the introduction of Apple Silicon back in 2020, Apple has made exporting in Final Cut faster and easier than ever, especially for those working in a prores workflow.
This Final Cut Pro tutorial will go over everything needed for beginners to start exporting amazing, cinematic content to the web through Final Cut Pro.
Exporting in Final Cut Pro
Lucky for all of us, FCPX has the easiest exporting process out of any of the traditional video editing programs. While FCPX isn’t as robust as some of its competitors when it comes to exporting, it’s still perfect for social media content with options to directly export videos to both YouTube and Facebook (unfortunately exporting directly to Vimeo isn’t supported yet).
Step 1: Select the project you want to export
The first thing any editor should do when exporting a project is to make sure that the timeline is to their liking. Make sure that all of your transitions, keyframes, footage, color grading, plugins, and subtitles are perfect; there’s nothing worse than having to re-export a project after catching a mistake (although this problem isn’t as bad in FCPX as it is in other post-production software).
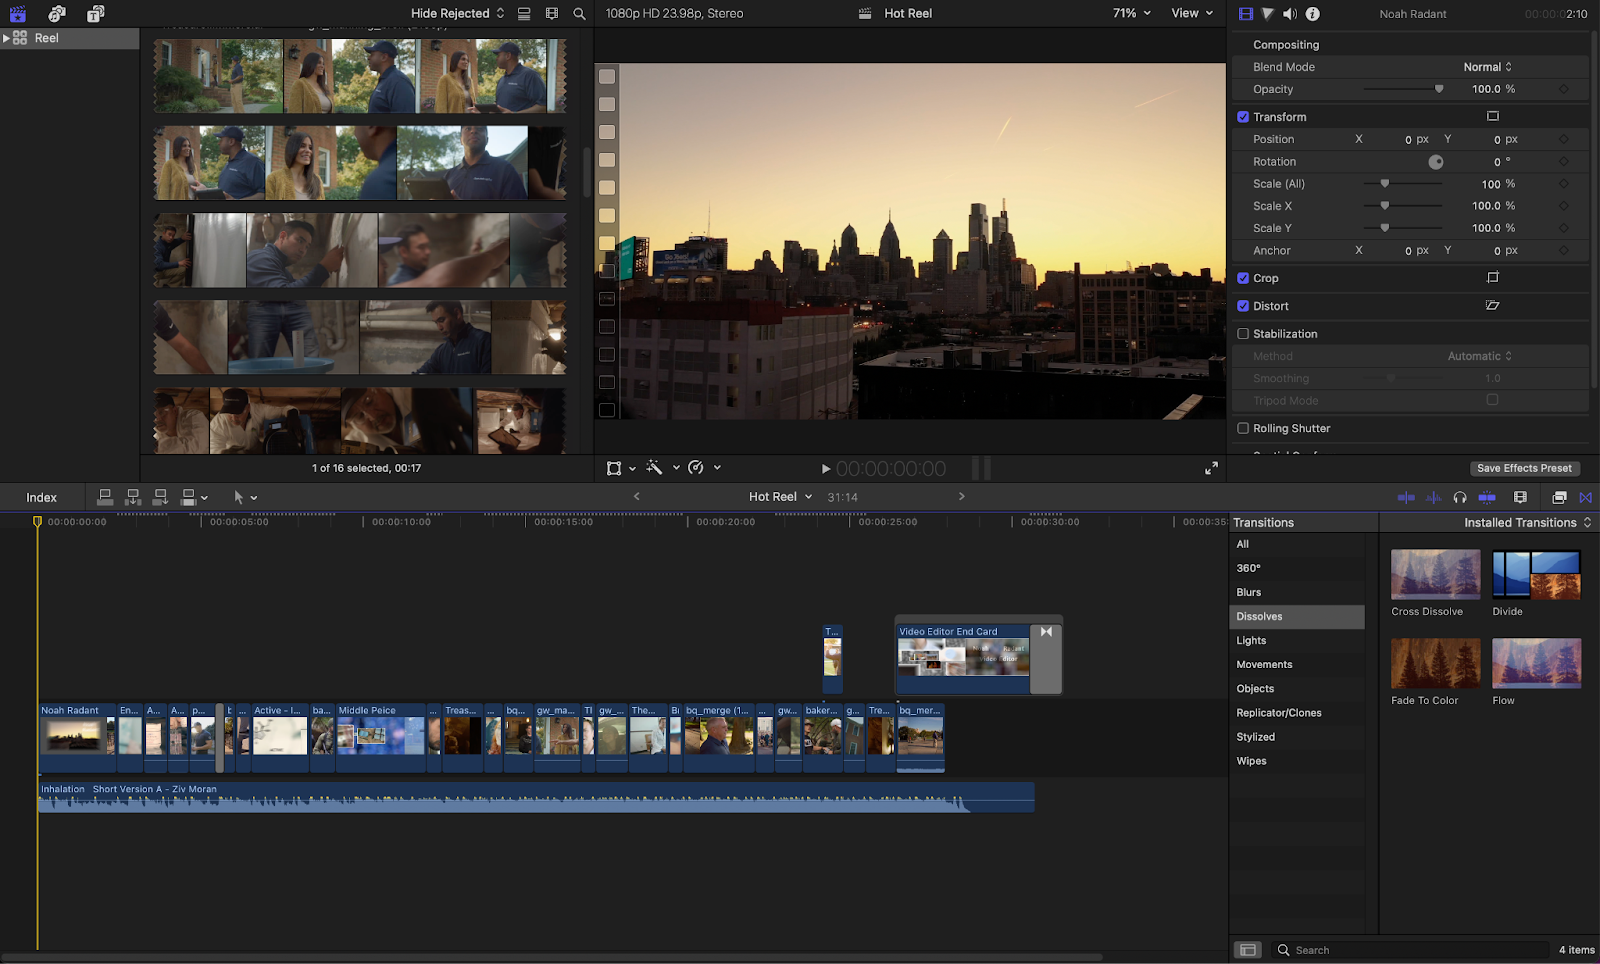
As an editor, it’s important to try and make the editing process as easy as can be whenever possible. Thankfully, there are a wide array of plugins supported by FCPX. Social media content in particular often requires a lot of subtitles which is something that can be tedious and time-consuming for an editor.
Simon Says is a great transcription tool that’s a one-stop shop for captioning and is a great software to alleviate the more tedious areas of editing.
Step 2: Open the export window
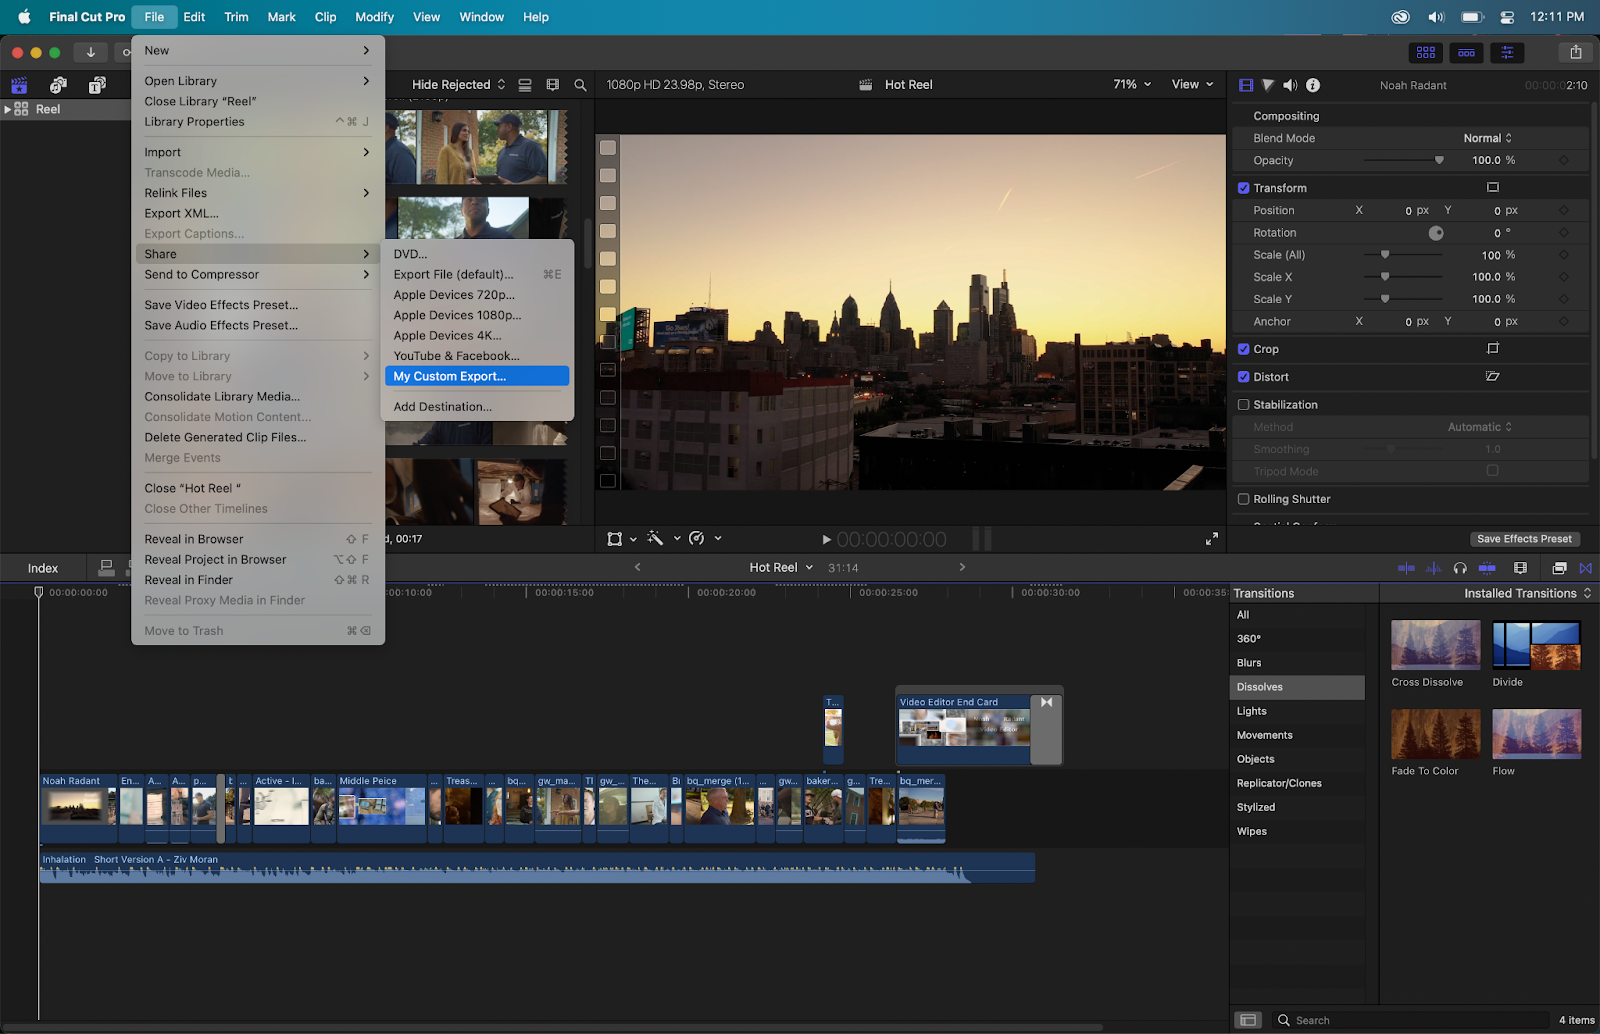
After everything in your project is shined to perfection, it’s time to open up the export window. This can be done by going to the top left corner menu bar and clicking file>share>export file or by clicking command E on the keyboard.
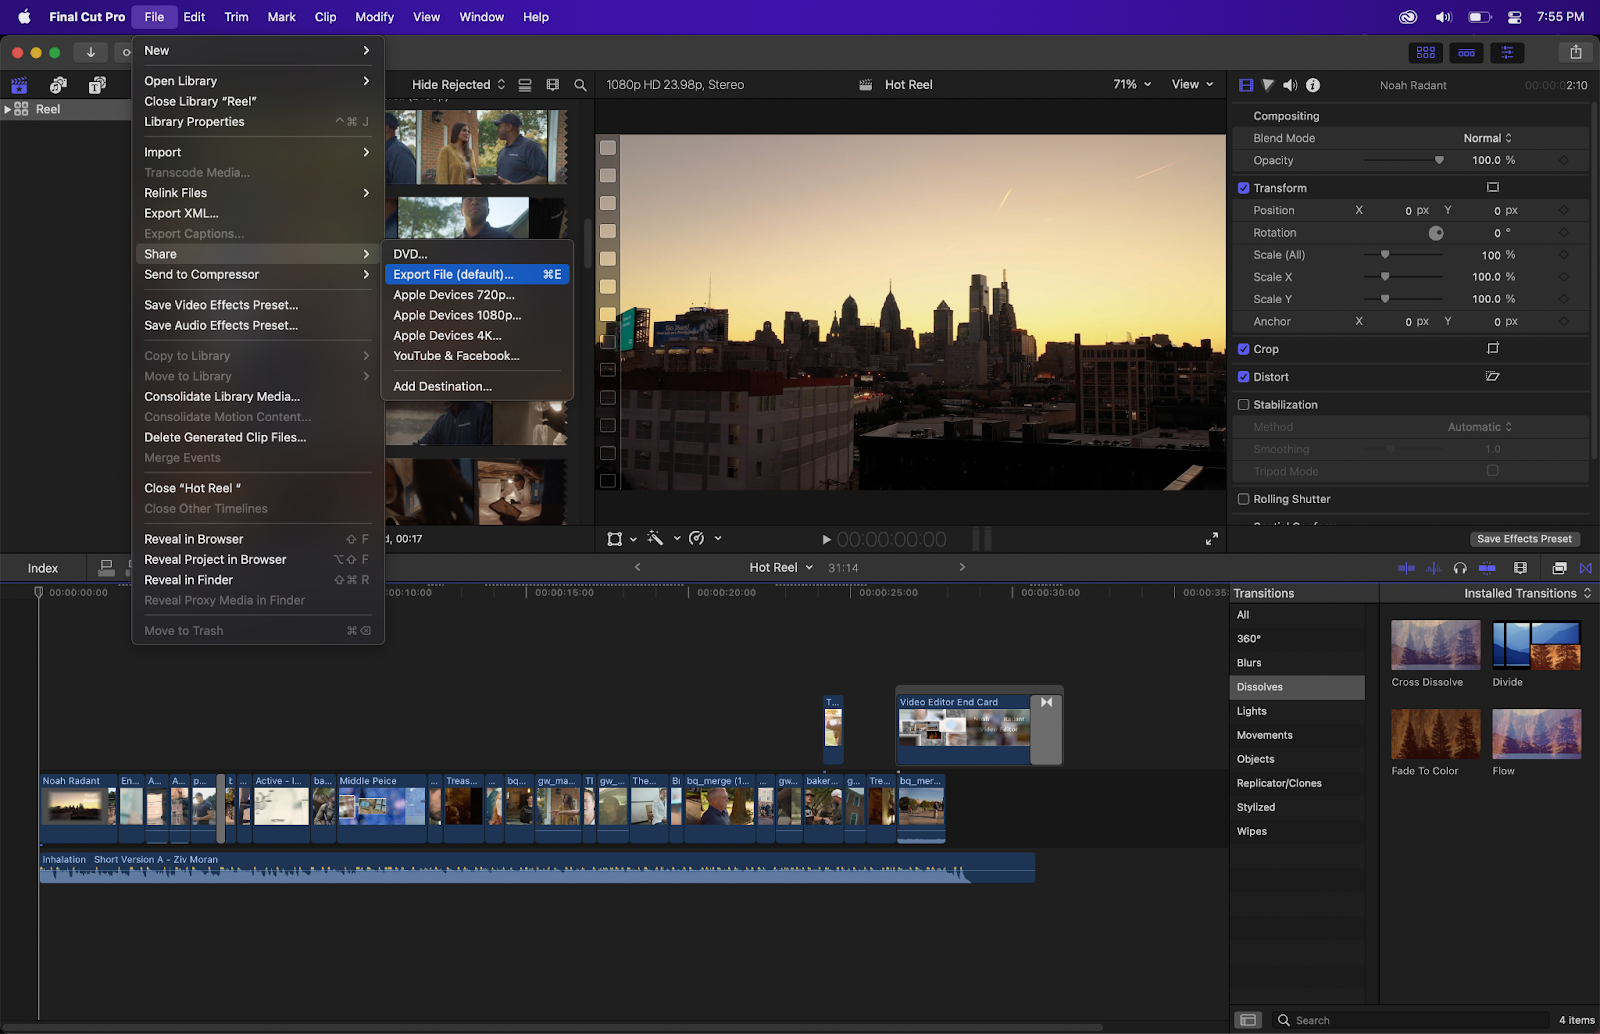
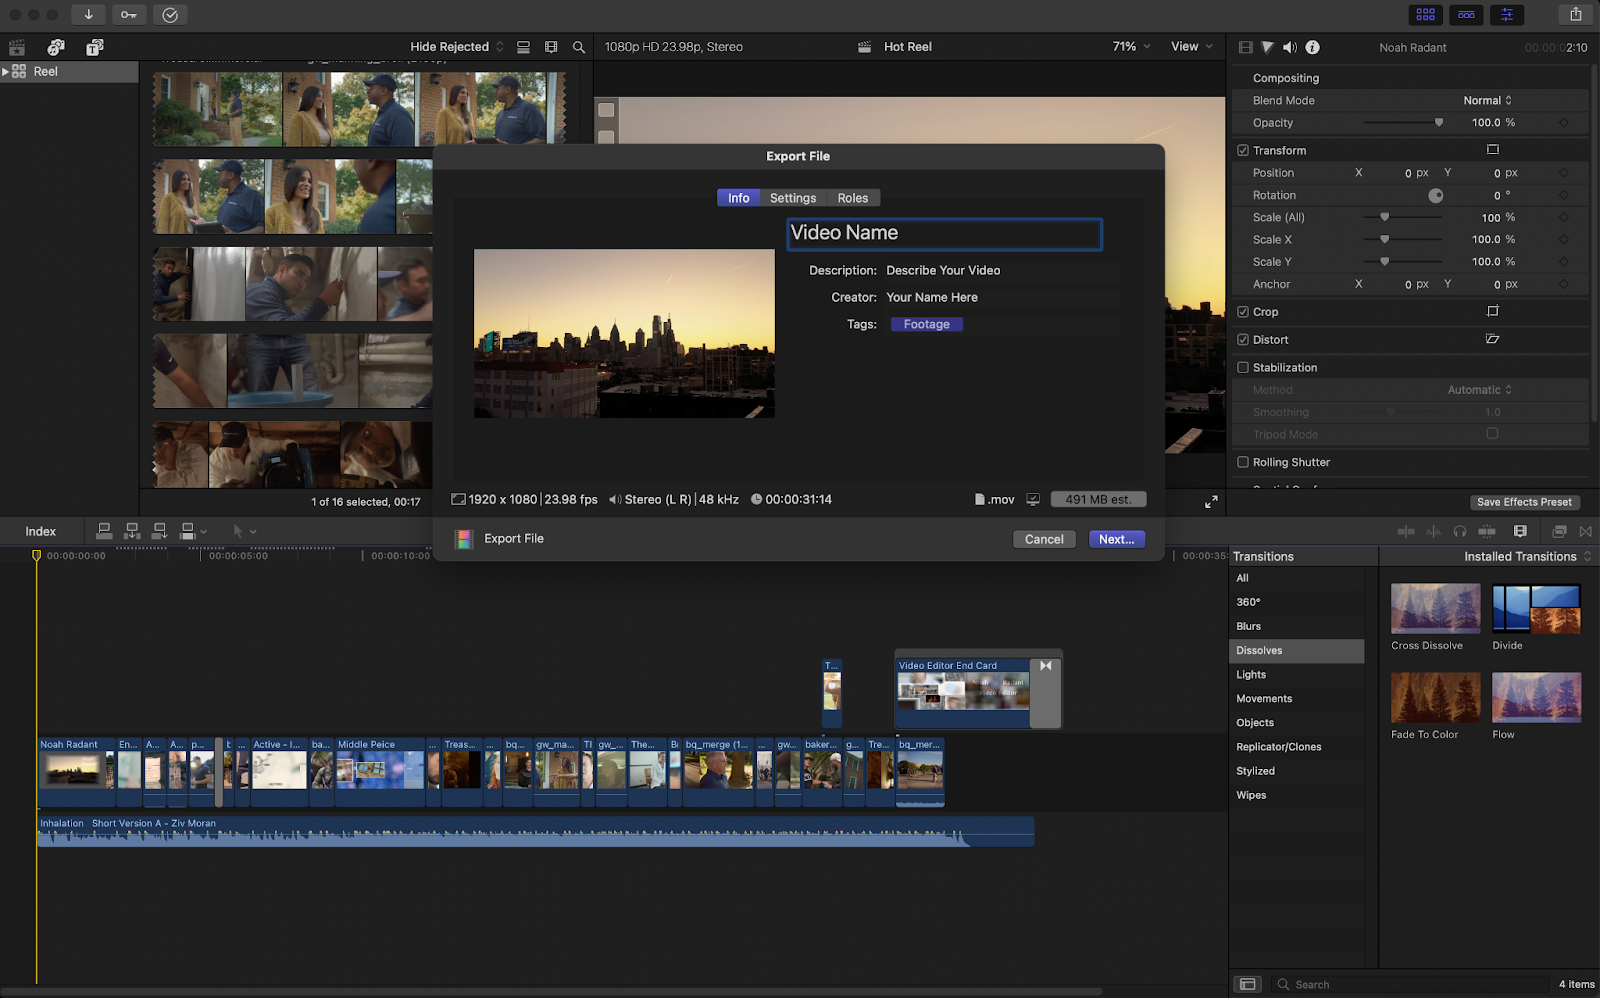
A pop-up master file window will then appear with three separate tabs. If you’d like, a share icon is also present in the top right corner. Like before, clicking export file in this drop-down menu will also bring you to the master file.
Step 3: Choose your export settings
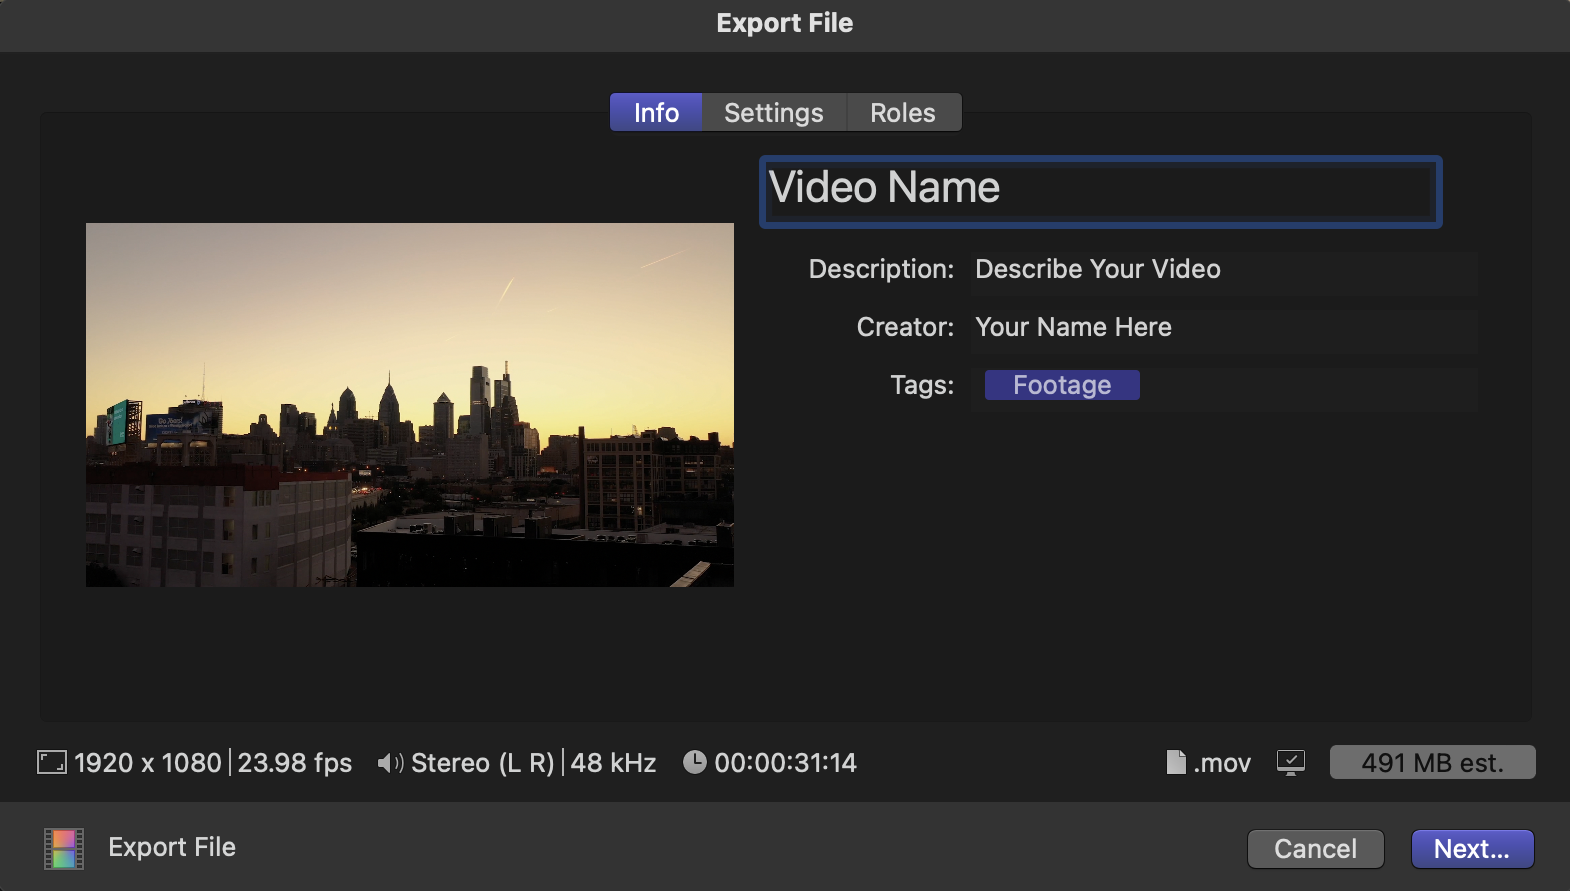
By default, The Final Cut Pro’s master file starts you off in the info tab. Here, you can edit some of the metadata pertaining to your export including video description, video creator, and tags so that macOS can better sort it.
Present on the left side is also a small playback window where you can scrub through your timeline in real time. Always present at the bottom of the pop-up master file window that displays the: current resolution and frame rate of the export, audio channel data, length of the video, video extension, and file size estimate.
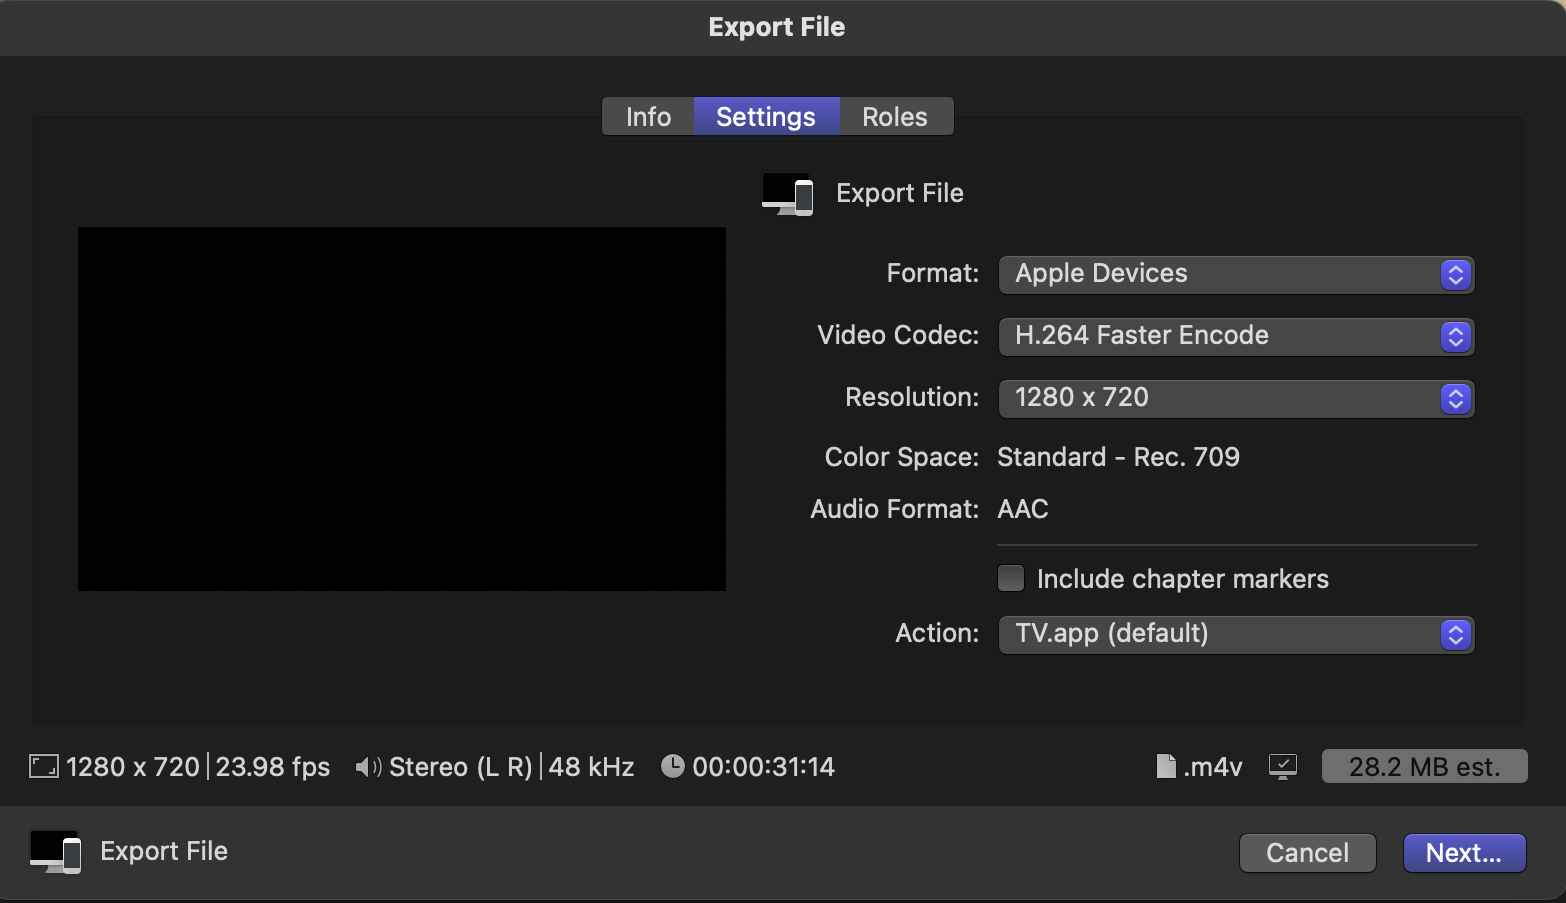
The settings window contains all of the encoding information for your export. Here, you’ll find options for video format and video codec. Below is information pertaining to the resolution, color space, and audio format.
At the bottom is a checkbox asking if you’d like to include chapter markers in your video and an action pop-up that gives options as to what app you’d like Final Cut Pro to automatically open up your video with once it’s done exporting (you can change this to save only if you don’t want it to do that).
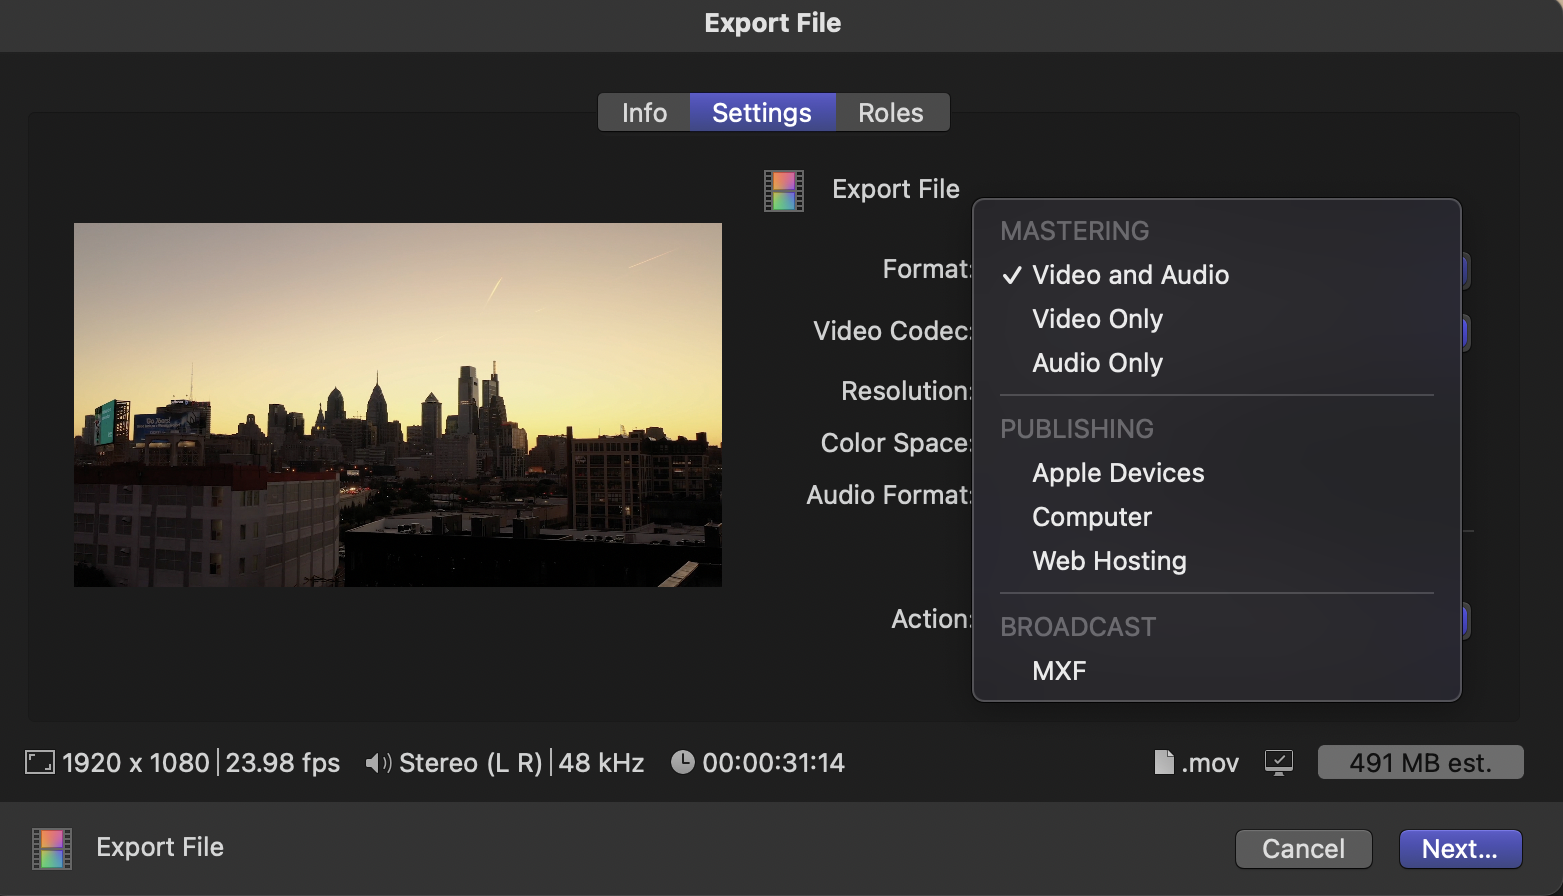
The format drop-down window has a lot of different options. The pop-up window itself is broken up into three sections: Mastering, Publishing, and Broadcast. In Mastering, you get to choose if you want video and audio exported together, just video on its own, or just audio on its own.
Choosing any category under the mastering section won’t allow you to change the resolution of the export. The video codec available is also limited as well with ProRes and H.264 being the main two. All file extensions will also be .mov by default.
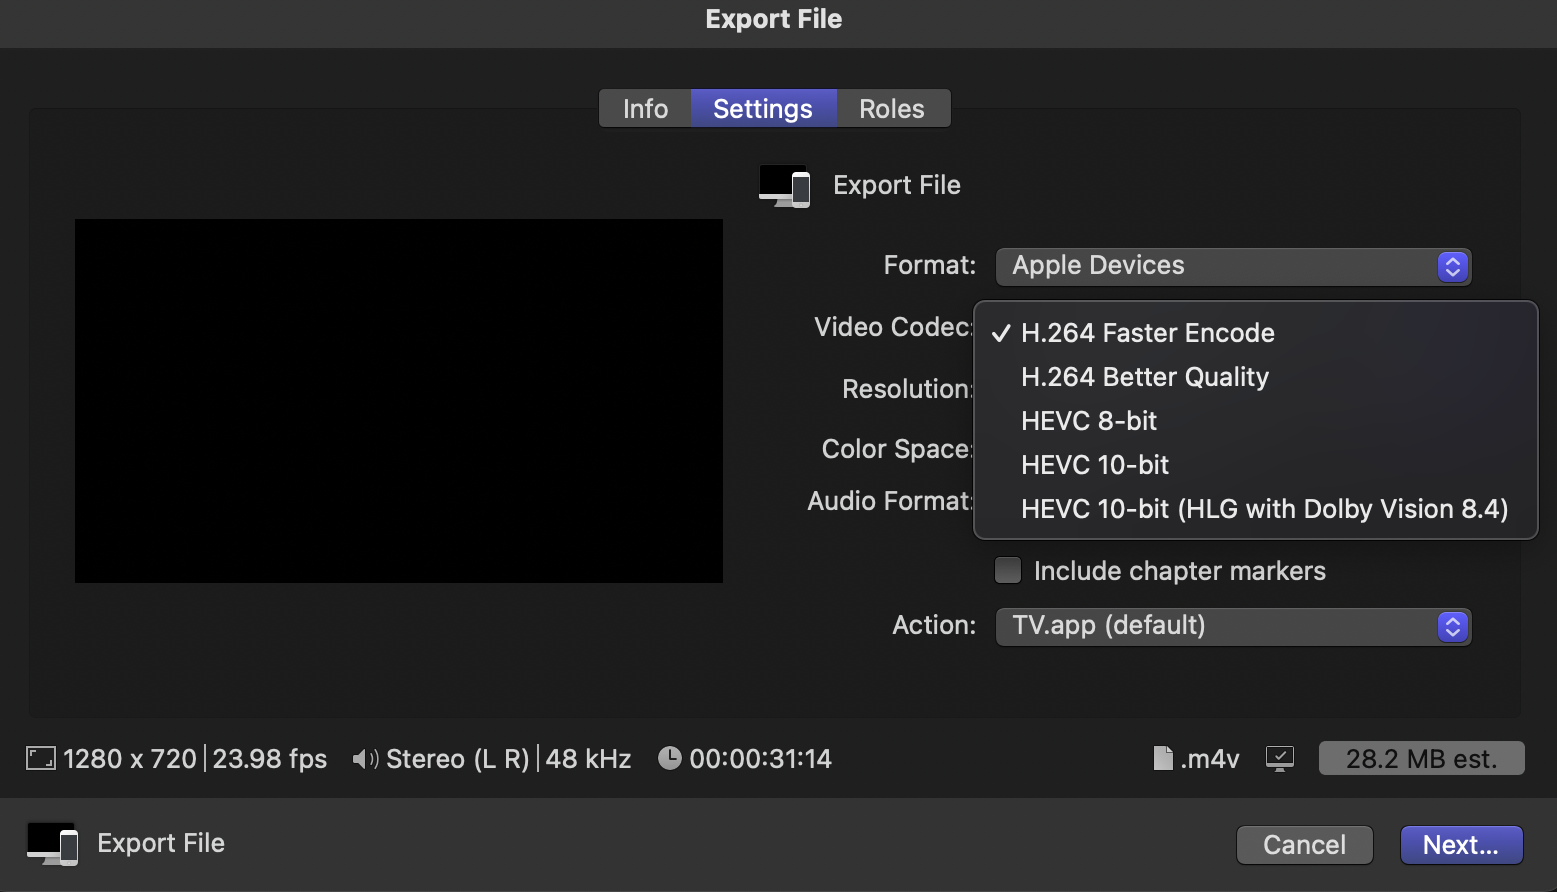
In publishing, you get to choose between Apple Devices, Computer, and Web Hosting. Unlike the mastering section, choosing any option in publishing allows you to change the export resolution as well as give more codec options. The codec options under Apple Devices include different variants of H.264 and HEVC. The file extension will be set to .m4v.
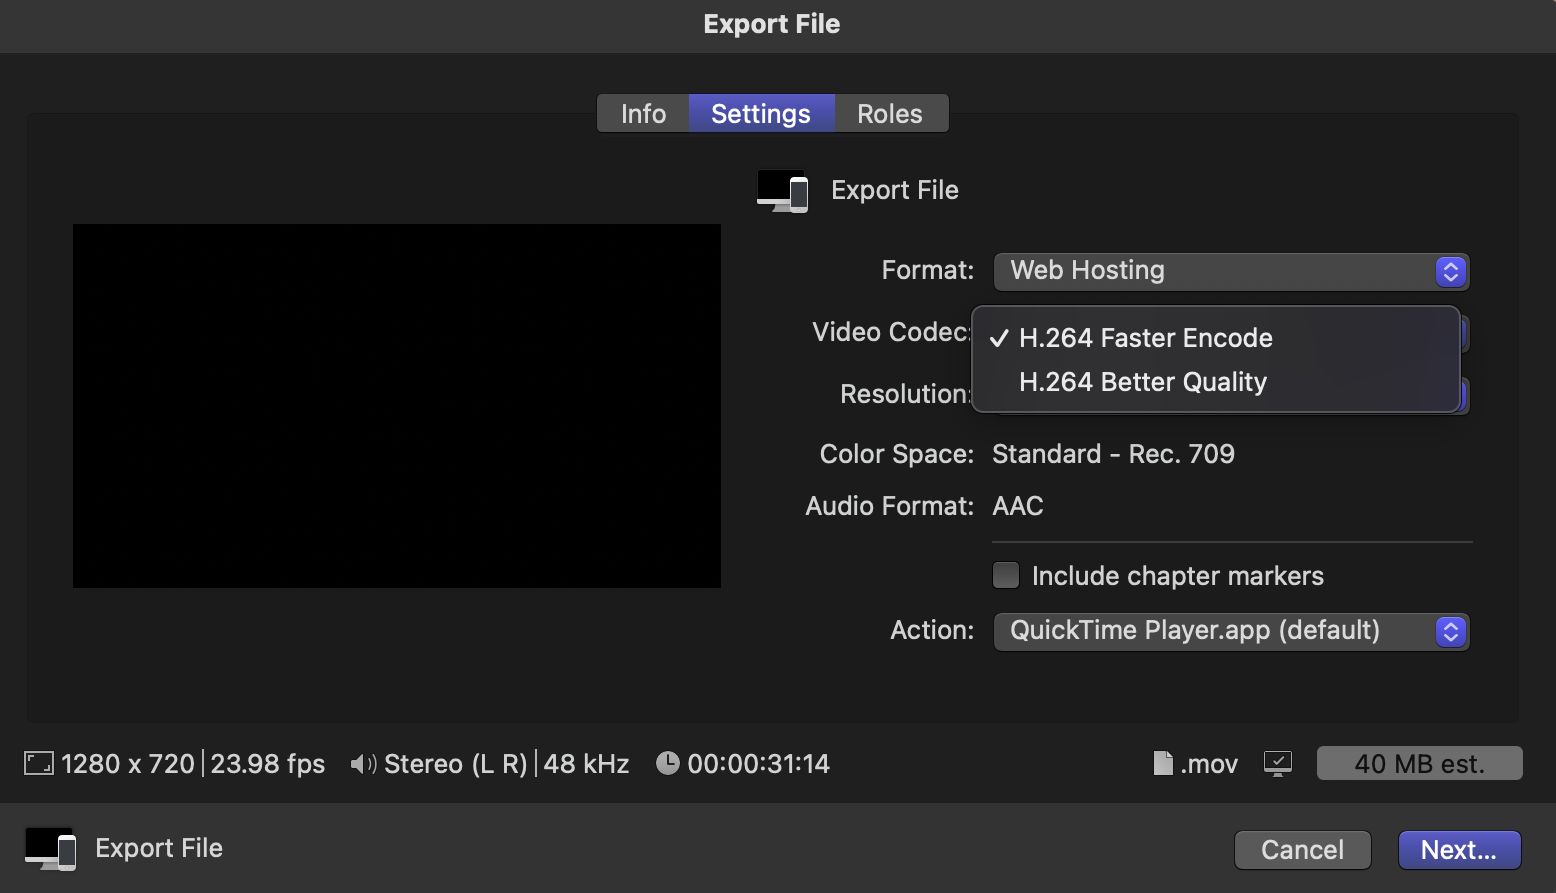
Choosing the Computer format will only give you two different variants of the H.264 codec. The file extension here will be set to .mp4. Choosing Web Hosting gives the same options as the Computer format with the only difference being its .mov file extension.
Finally, under Brodcat there’s a single option titled MXF. Much like the mastering section, you’re unable to change your export resolution and are given similar codec settings. The only file extension available here is .mxf.
The third and final tab in the master file is the roles tab. This allows you to edit even more metadata and export settings depending on the format options you chose in the settings tab. You can do everything from telling the renderer to export video and audio on separate files to adding audio tracks. You can save all of these options as presets as well.

Step 4: Select your file destination
Once your settings are to your liking, click next in the bottom left-hand corner of the master file pop-up window. This will bring you to the finder window where you can choose where on your hard drive you want to export your video.

The pop-up window will then go away, and in the top left corner next to the key icon, a circle icon will begin to slowly fill up. Once it’s completely filled, your export will automatically begin playing in the macOS QuickTime movie player.

Final Cut Pro Export Options
Final Cut Pro also has a Send to Compressor option located in the file drop-down menu. This is a more advanced way to export your content, allowing for a plethora of more advanced options than the built-in exporting tool in Final Cut Pro.
It can encode a lot, including videos shot on the iPhone 13 using cinematic mode. For those familiar with Adobe Premiere Pro and the Creative Cloud, think of it as Adobe’s Media Encoder app. Unfortunately, Apple’s compressor is NOT free and requires a $49.99 purchase on their app store.
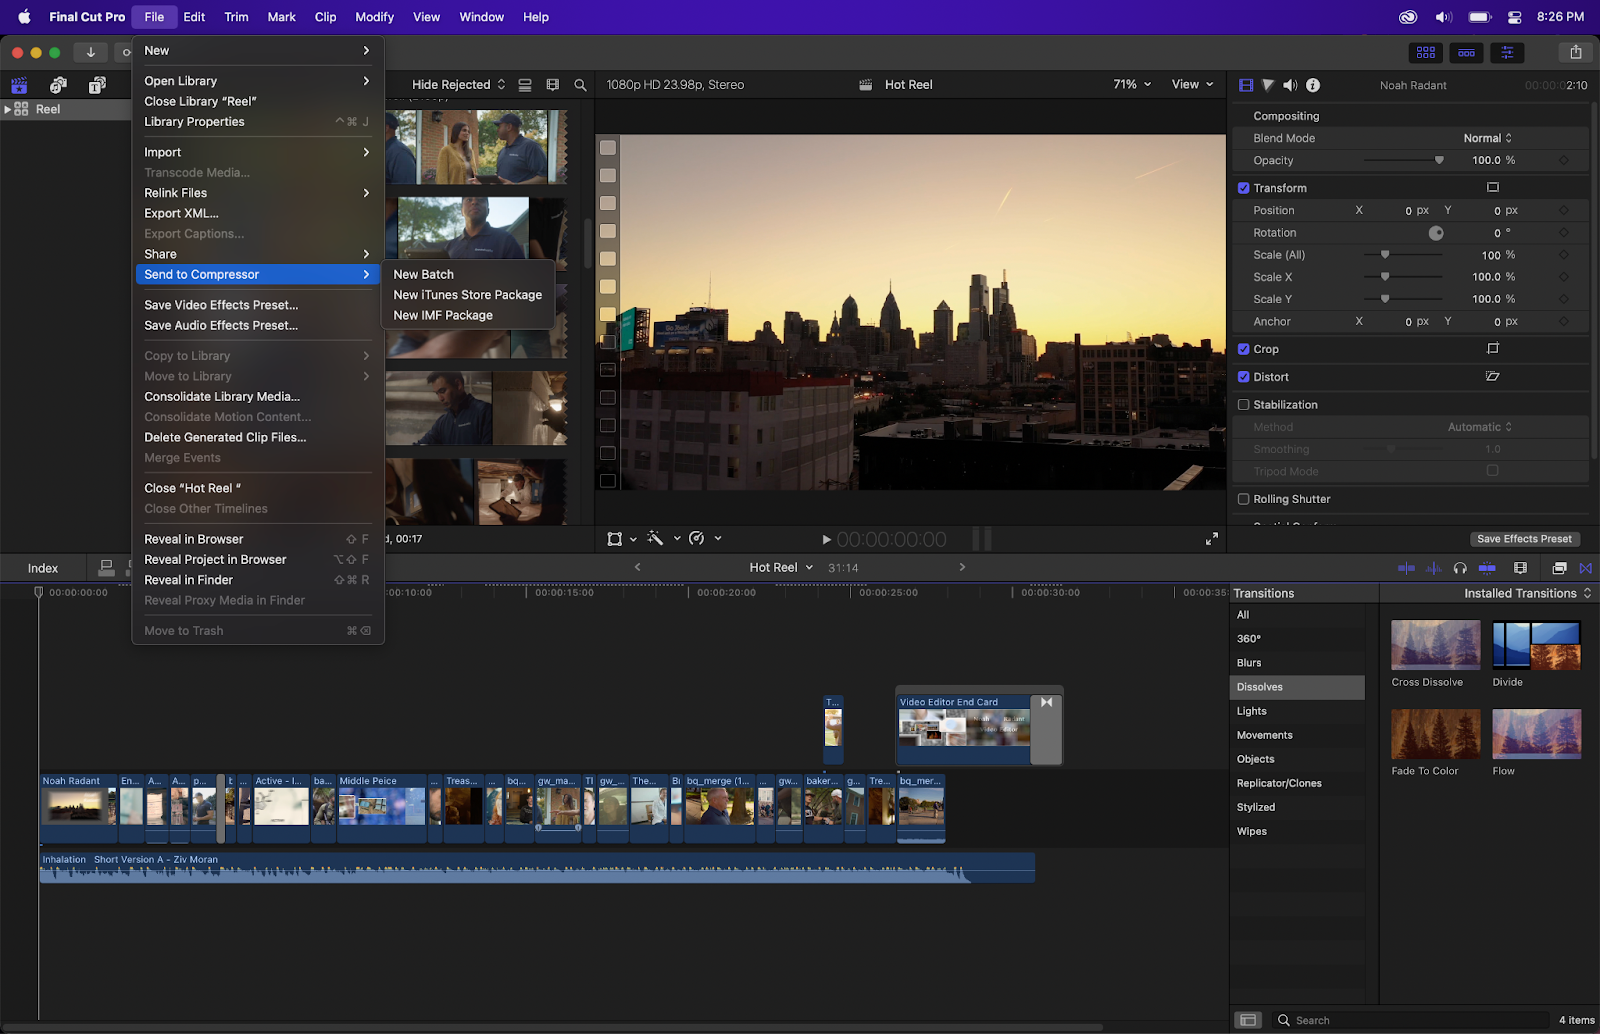
In the File drop-down menu, there’s also an option to export your entire project as an XML file under Export XML. Unfortunately, Final Cut Pro doesn’t allow for as many XML options as most other post-production software. The project will be saved as a .fcpxmld file extension. You can then take this file and open it up in most post-production software of your choosing (with some limitations). Things such as transitions, multicam clips, and other blend modes are not preserved.
Tips for Exporting From Final Cut Pro
Final Cut Pro has the fastest export times out of any post-production software, especially if you’re planning on exporting in ProRes. There are a few things you can still do though if you want to make this process even faster.
Save your export settings
Final Cut Pro has a great way to organize and save all of your export settings as templates. To do this, start by clicking the share icon in the upper right-hand corner. You’ll want to click on add destination from the drop-down menu.
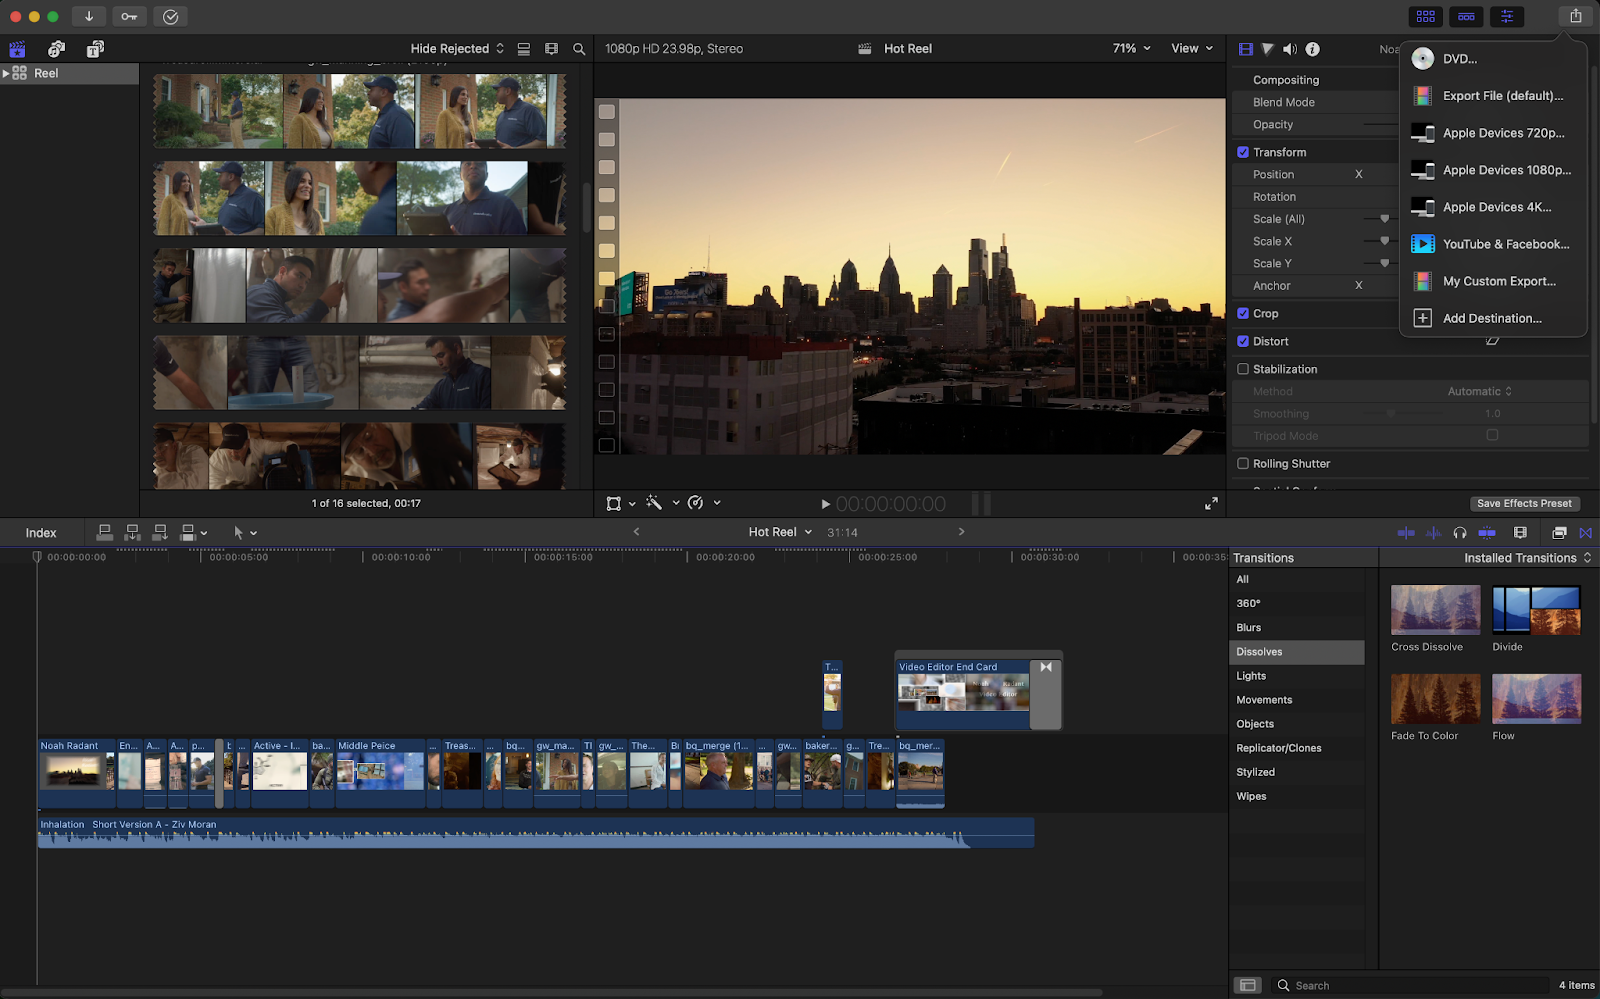
A pop-up window will appear displaying a variety of different options.
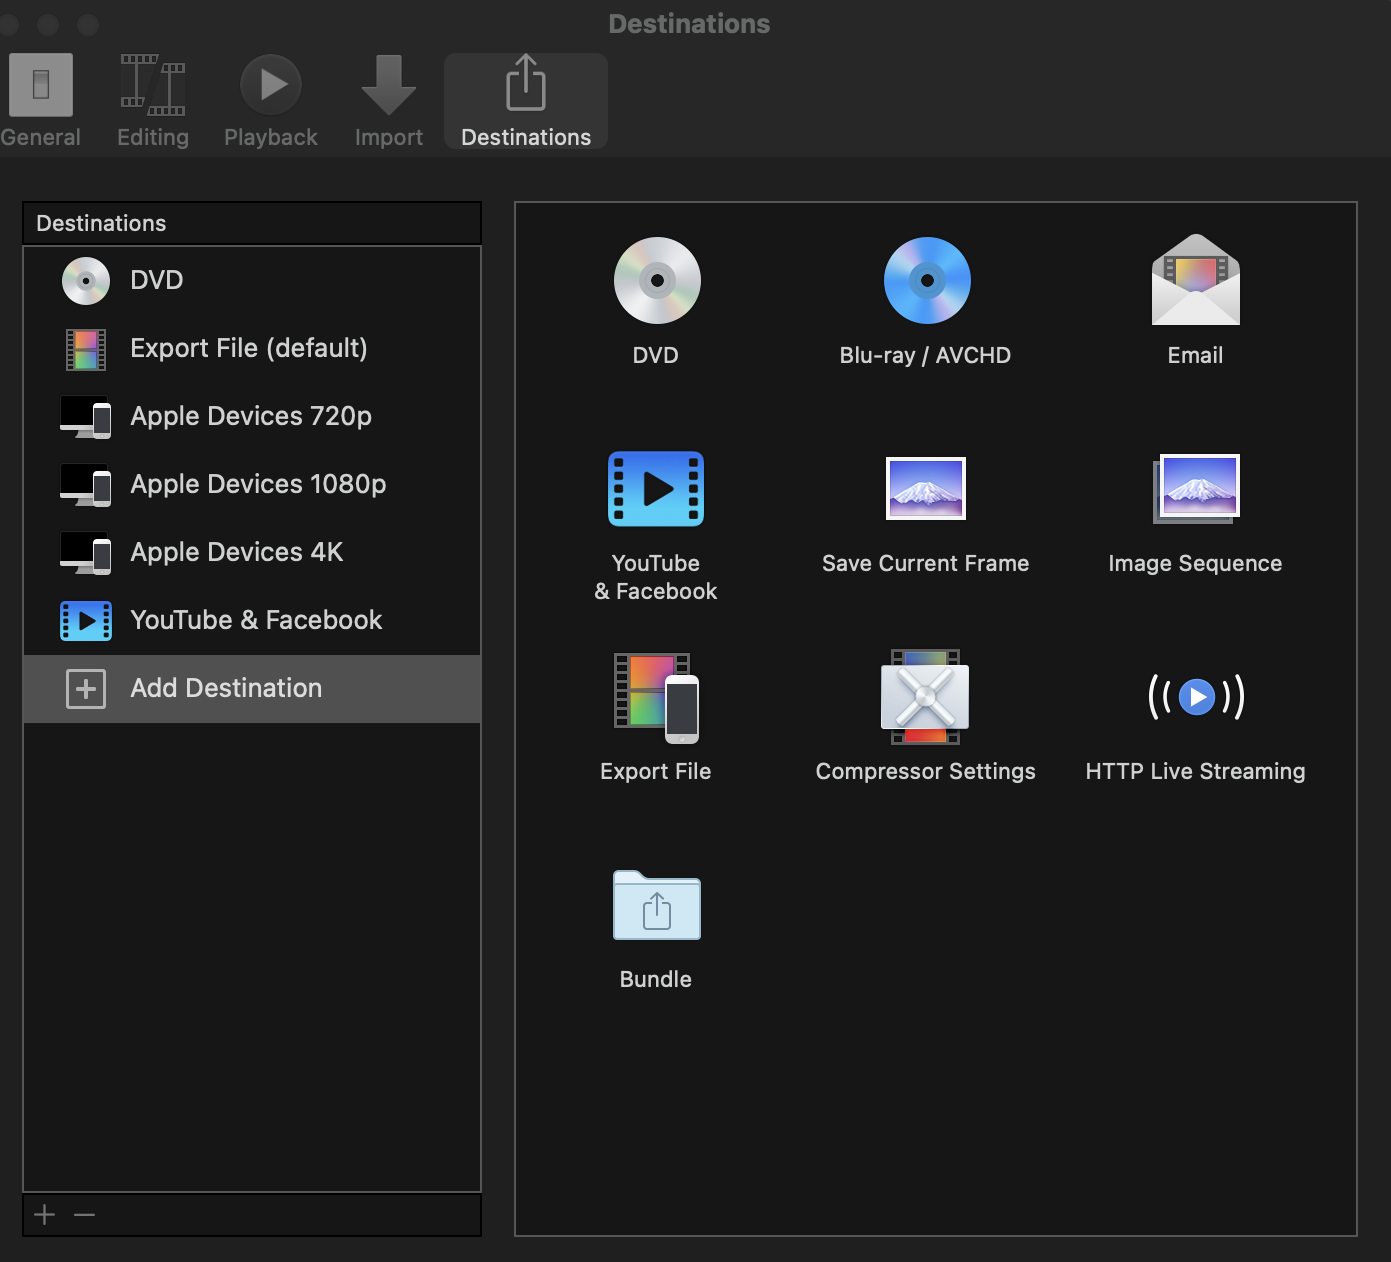
Click on the Export FIle button and drag it over to the column labeled destinations.
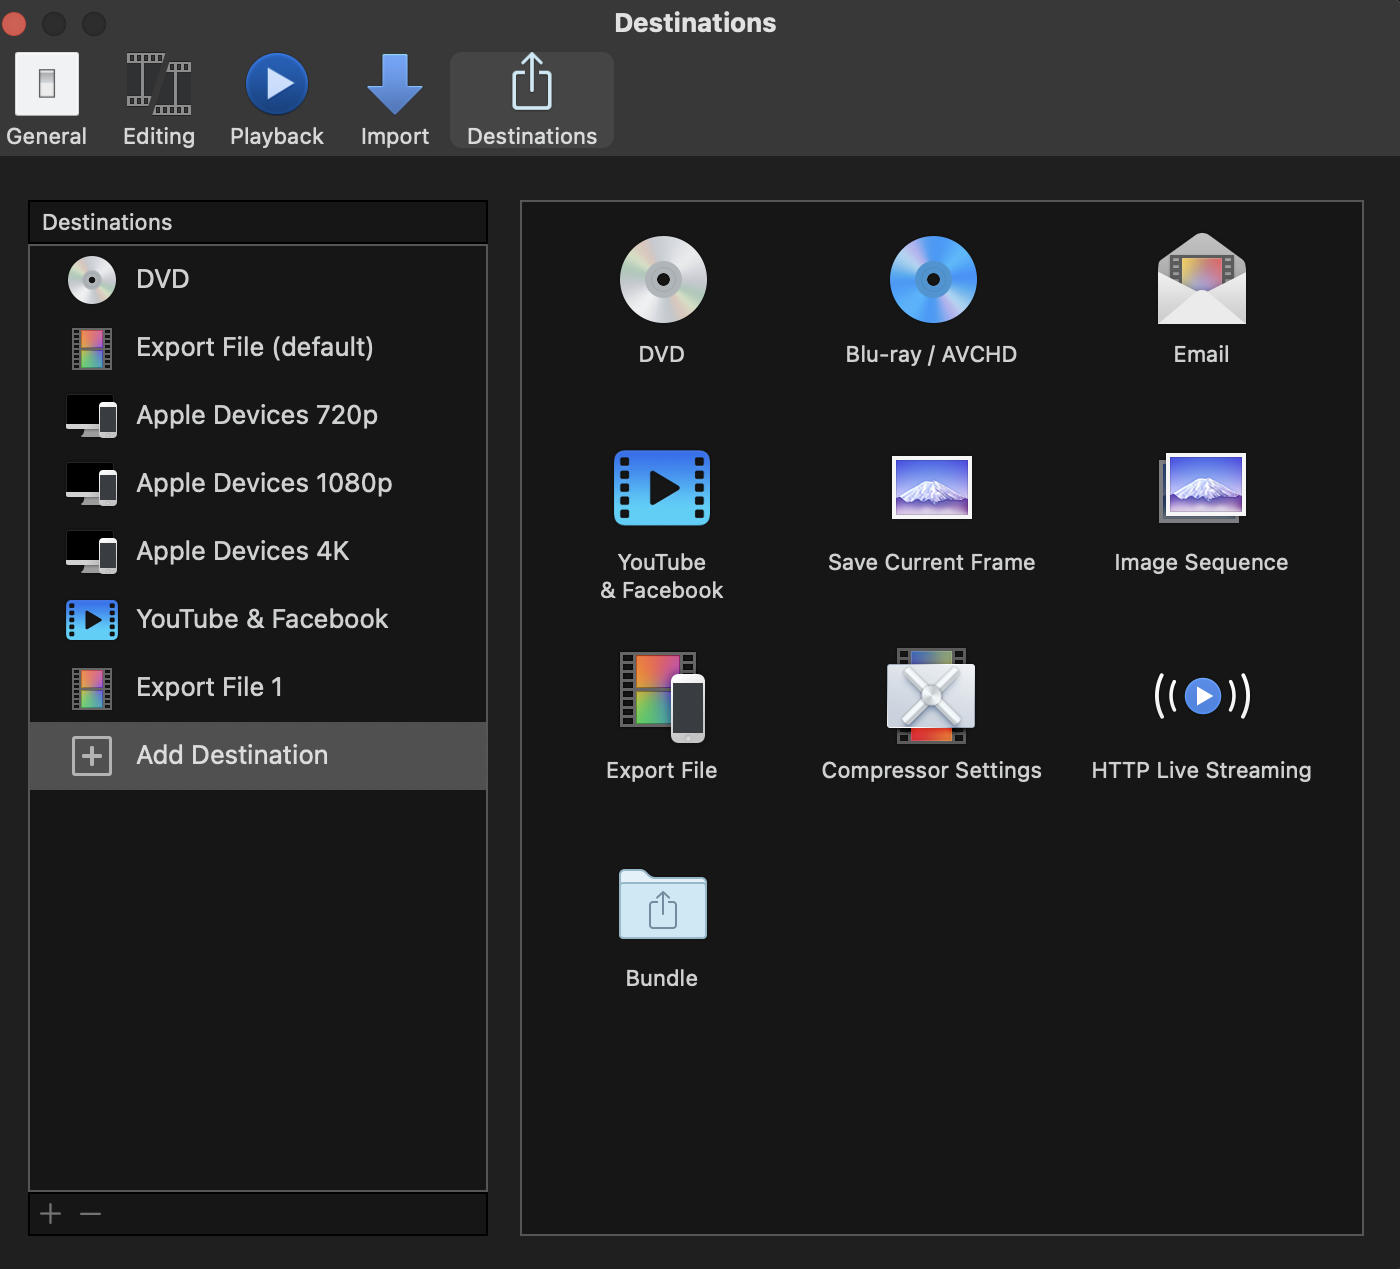
Here, you can edit all the settings to your liking just like in the master file pop-up window, choosing the best settings that work for your video. If you double-click on the export file button, you’ll also have the option to rename it, allowing for even better organization.
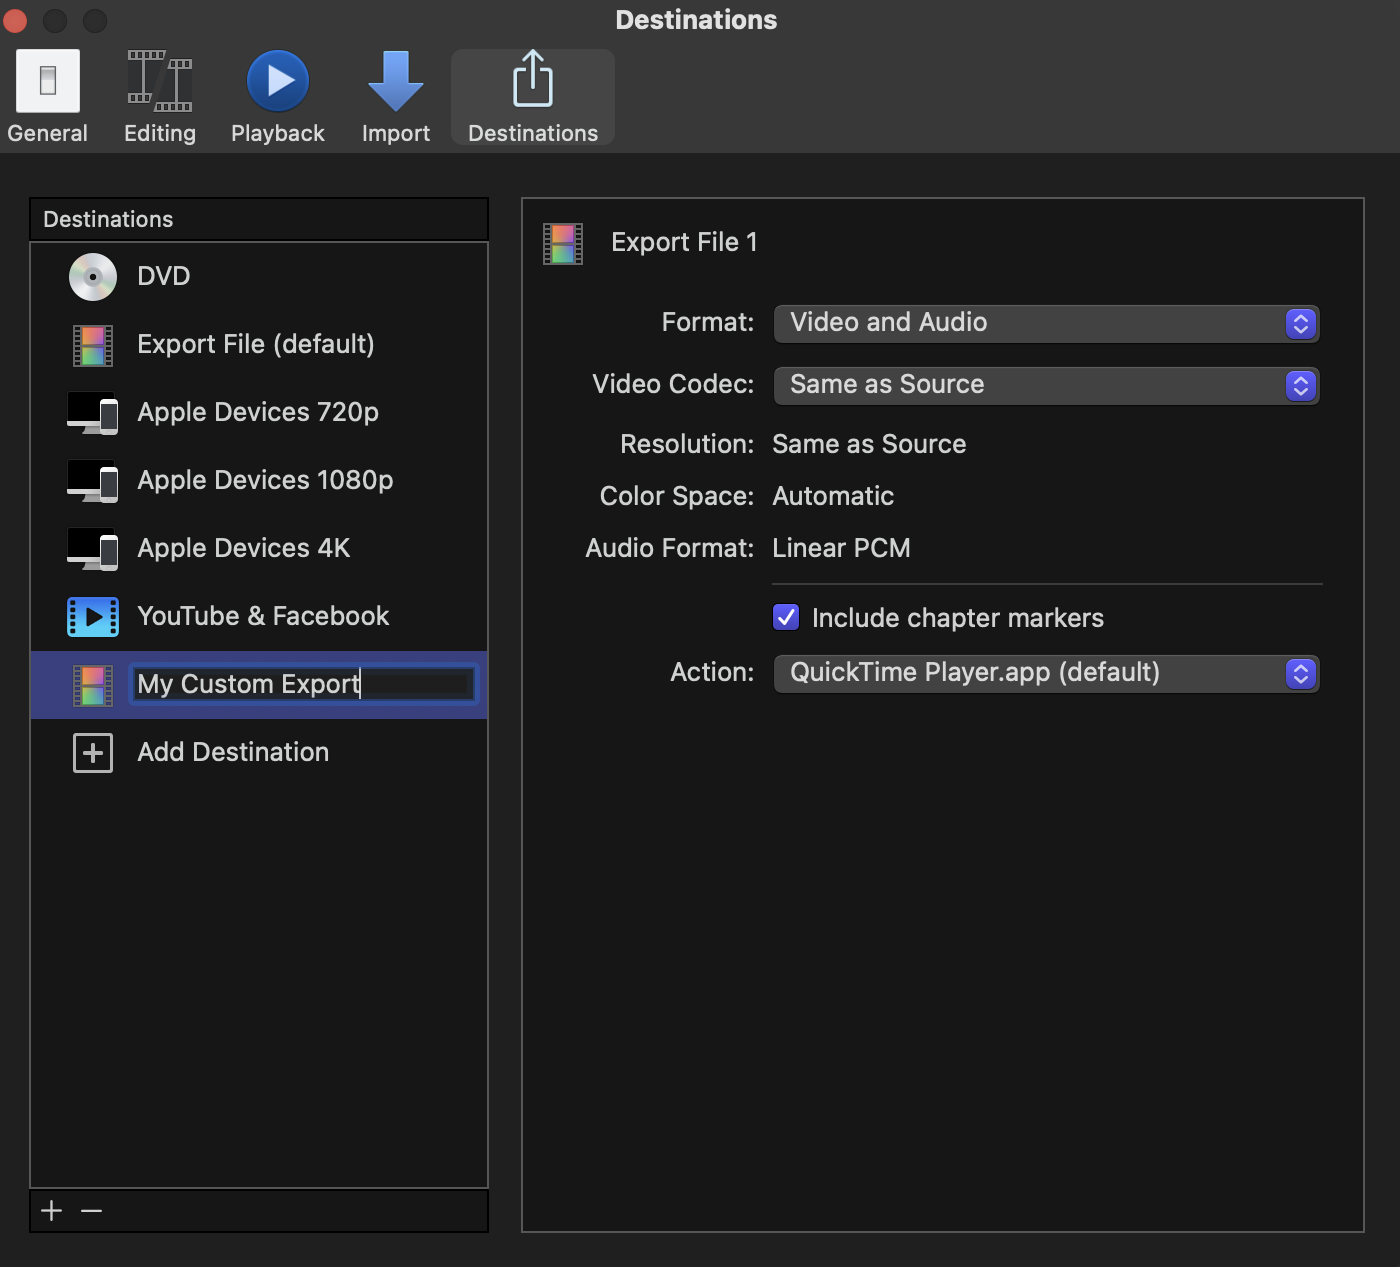
Now, when you the share drop-down menu, your custom export settings will be there. Clicking on it will bring up the master file pop-up window so that you can continue with the export.
Speed up your export times
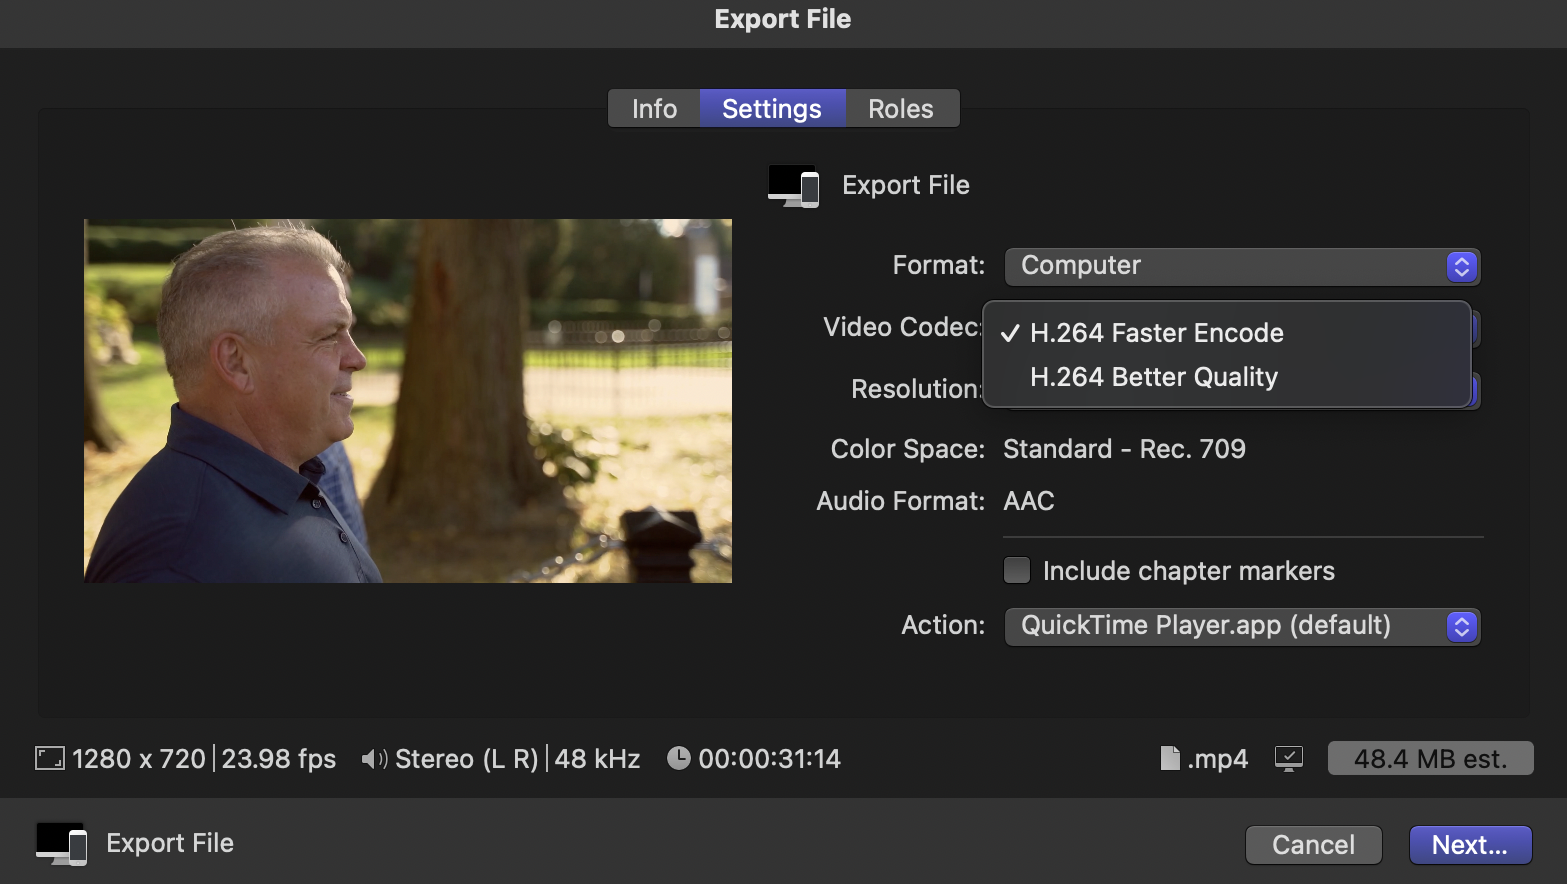
The main way to speed up this process in Final Cut Pro is by choosing a less demanding codec and a smaller video file size. H.264 has two options. There’s H.264 faster encoding and H.264 better quality.
Choosing the faster encoding option will speed up export times. If you’re exporting in a ProRes codec, choosing ProRes 422 LT and ProRes 422 Proxy will export your footage in an instant at the cost of a lower-quality image.
Wrapping up
Final Cut Pro is a great post-production tool for amateurs and professionals alike. Its easy-to-use and snappy interface makes it great for those starting out, while its lightning-fast export times are wonderful for content creators who have content they need to get out on a tight deadline. It’s no wonder that Final Cut has been a mainstay in the industry for over twenty years.
Too fast doesn’t exist in the editing world though, and editors are always looking for ways to speed up their process. More of the mundane and tedious things such as subtitles can be gotten out of the way with 3rd party extensions and templates.
Programs such as Simon Says are great and affordable ways to add an extra layer of ease and professionalism to videos.


