How to Crop Video in DaVinci Resolve
In a world of high-cost subscription services, Blackmagic’s DaVinci Resolve is a breath of fresh air. In 2011, Blackmagic released both a paid and free version of DaVinci Resolve (with DaVinci Resolve Studio being the paid $295).
Immediately, DaVinci Resolve offered an incredible value, especially given the performance of the program. While DaVinci Resolve was mostly synonymous with a color grading and color correction program at first, it soon became known as an incredibly capable video editing software as well.
NLEs like Resolve have helped simplify video editing techniques that were once incredibly complicated. Among these is the cropping of videos. In the past, cropping in on a subject would have to be done in the production phases, entirely in-camera based on the aspect ratio. Now, cropping a video clip can be done right in post-production.
Note: Adding captions to your videos is another great way to make your social media content stand out, given that many viewers watch videos without audio. With Simon Says, you can quickly add captions to your content directly in DaVinci Resolve.
Cropping a video in DaVinci Resolve
Cropping videos in DaVinci Resolve only takes a few simple steps and it doesn’t require any sort of cropping tool. This step-by-step tutorial will go over everything you need to crop your videos for both macOS and Windows devices. These methods will work for both DaVinci Resolve 17 and DaVinci Resolve 18.
Importing Clip to DaVinci Resolve
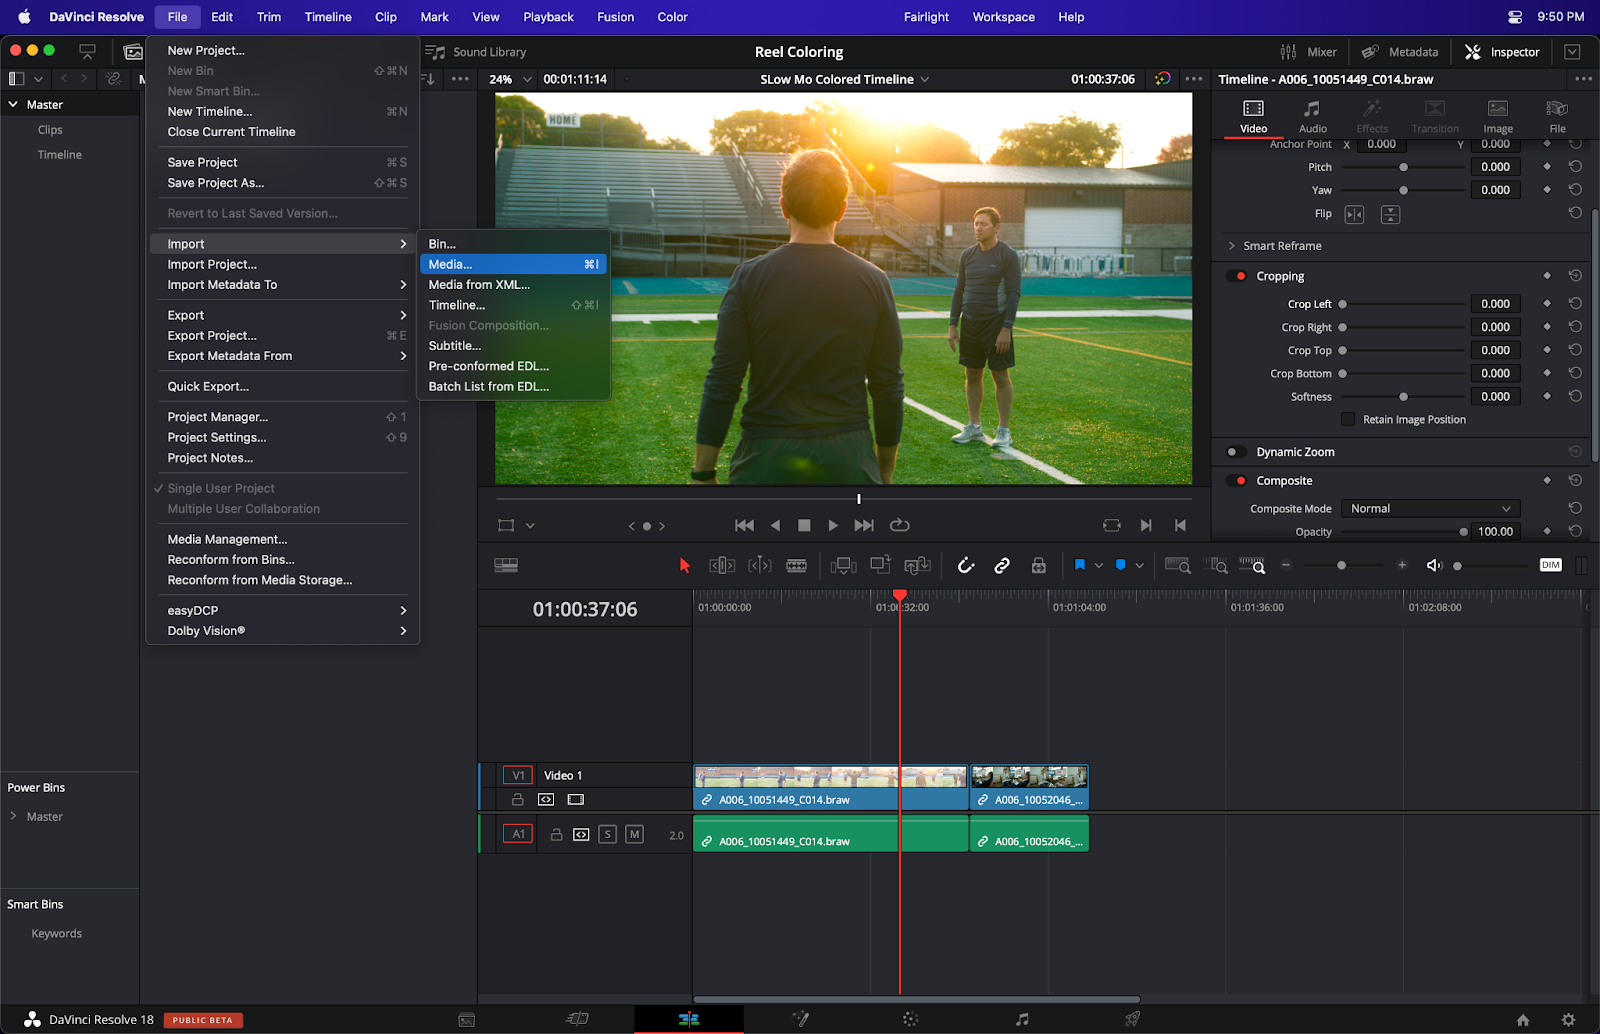
The first thing you’ll want to do after opening up DaVinci Resolve is to import your clip into your time. This can be done by going to File > Import > Media or by using the shortcut Command+I or Ctrl+I on your keyboard. You’ll then need to drag your clip into the timeline.
Cropping
After that, you’ll want to go over to the Video tab on the top right side of the screen. This will give you a whole slew of resizing options for your footage. In this menu is a drop-down menu labeled cropping.
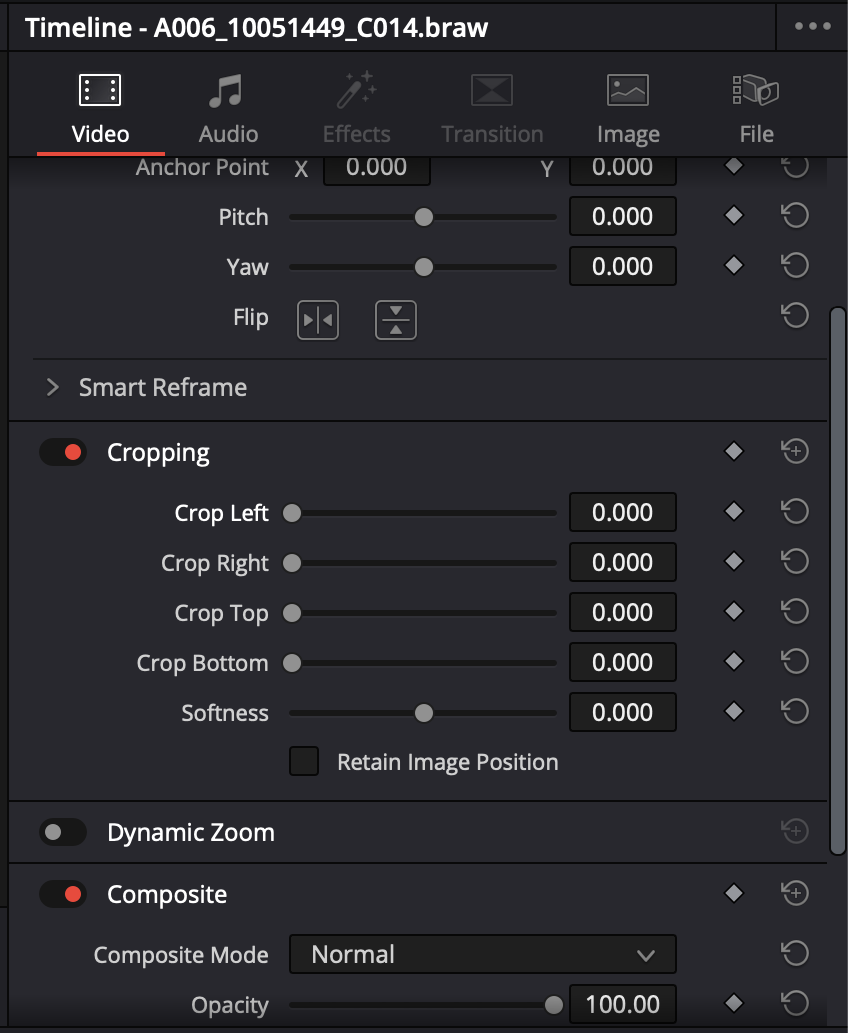
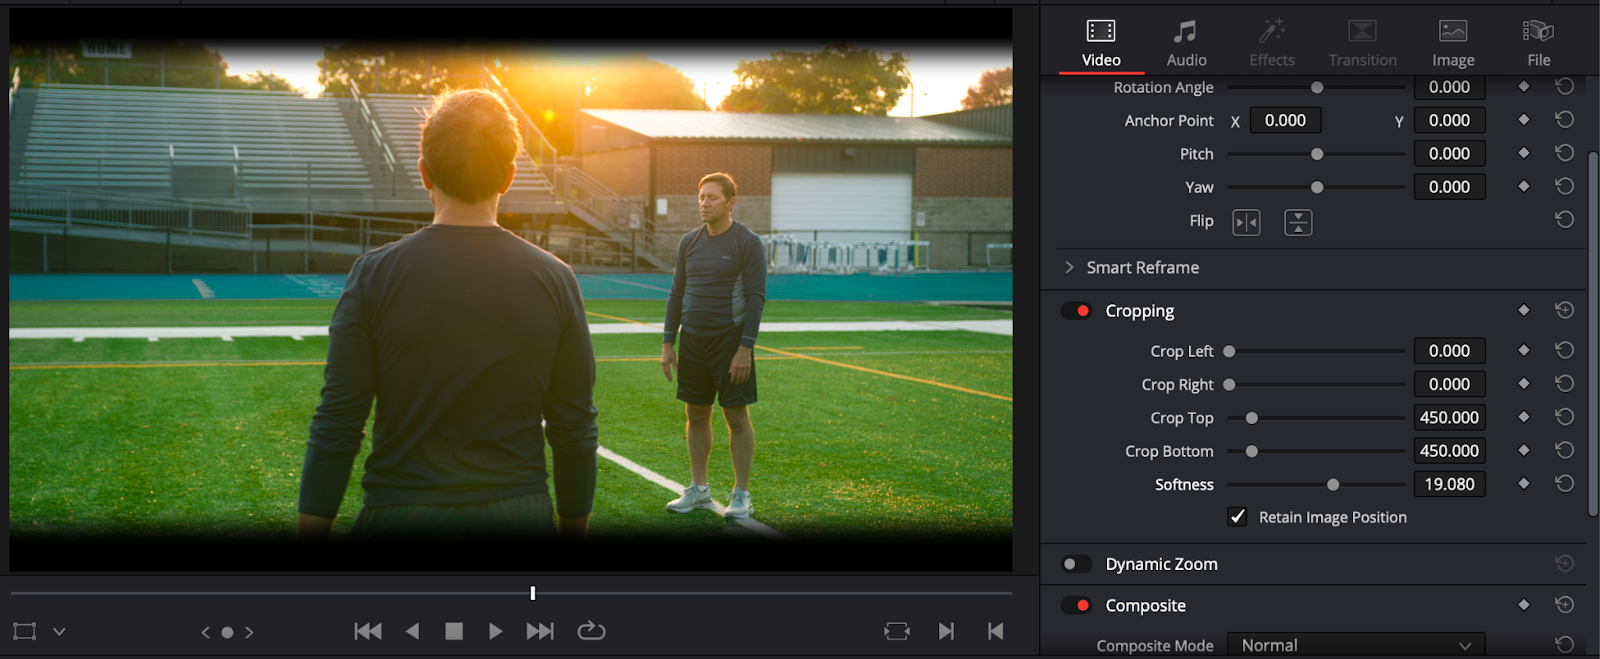
Here, you’ll have options to Crop Left, Crop Right, Crop Top, and Crop Bottom. Changing these values will crop the bottom and the sides of the video. For example, changing the top and bottom values to 450 in the crop settings will cut off the top and bottom of the video. This will give your video a set of black bars.
One thing you might notice though is that if you change the position of your video, the entire clip will move. If you click on Retain Image Position though, changing the position will simply change the framing of the video clip.
You can also change the softness of the crop. What this does is creates a sort of gradient in your crop, feathering the hard edges.
Shape Cropping
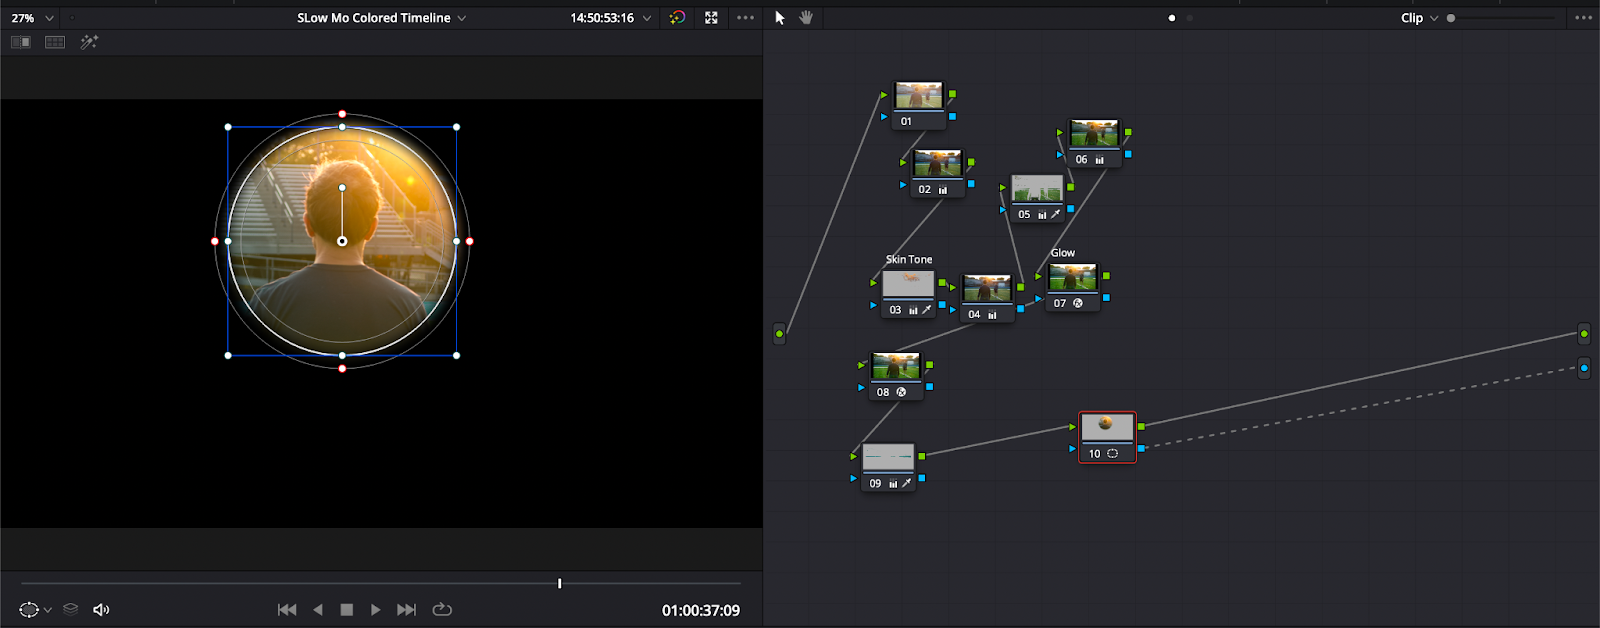
Cropping using shapes is a way to add a lot of character to your video. This is done using the Color window that can be accessed at the bottom of the screen. This will bring you to a large node window. Nodes are how effects and color are applied in DaVinci Resolve.
You’ll first want to right-click inside the Node panel and go to Add Node > Corrector. Connect this node to the input and output. You’ll then want to go to the Window panel at the lower half of the screen and click on any one of the shapes. An outline of that shape will appear on your footage.

You’ll notice that nothing is actually cropped in yet though. To fully crop in on your footage, you’ll need to connect the alpha input and output channels on your node.

Your footage will then be cropped into the area that was selected.
How to keyframe crop in DaVinci Resolve
Some workflows require a bit more complicated techniques though. This is where the keyframe crop comes into play.
- Go to the Edit page
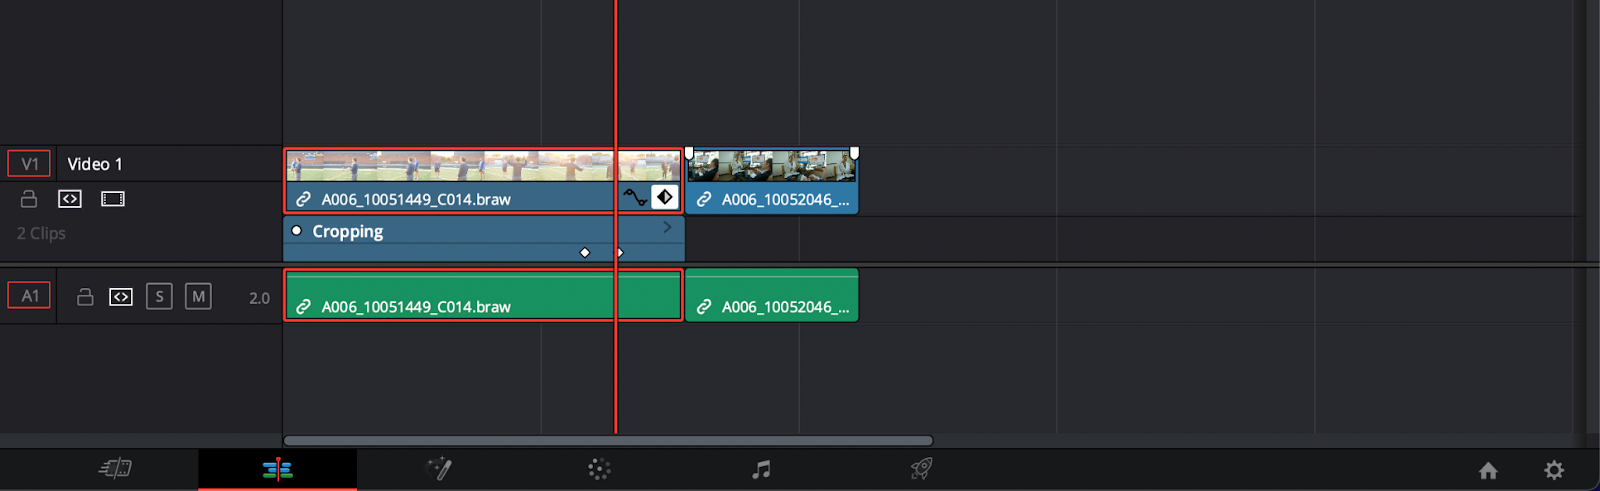
- Go to the video page and open up the Cropping sub-menu
- Click on the keyframe icon (the diamond). It will then turn red, indicating that a keyframe is now on your video clip

- Move the playhead forward a few frames and then change the values of your crop. The keyframe icon will turn red again, indicating a new keyframe.
- At any point, you can click the diamond icon on your footage in the timeline to view where your keyframes are at.
- Once the cropping is to your liking, you’ll then have an animated crop. Playback with the full video will show you your finalized animation
How to crop video in Resolve using Dynamic Zoom
Another way to crop your video is by zooming into your footage. This is, once again, done in the Video window in DaVinci Resolve. The first drop-down menu item that you’ll see is the Transform menu. Changing the numbers next to zoom will crop into your image. This is incredibly handy if the aspect ratio of your video file is different than the aspect ratio of your timeline.

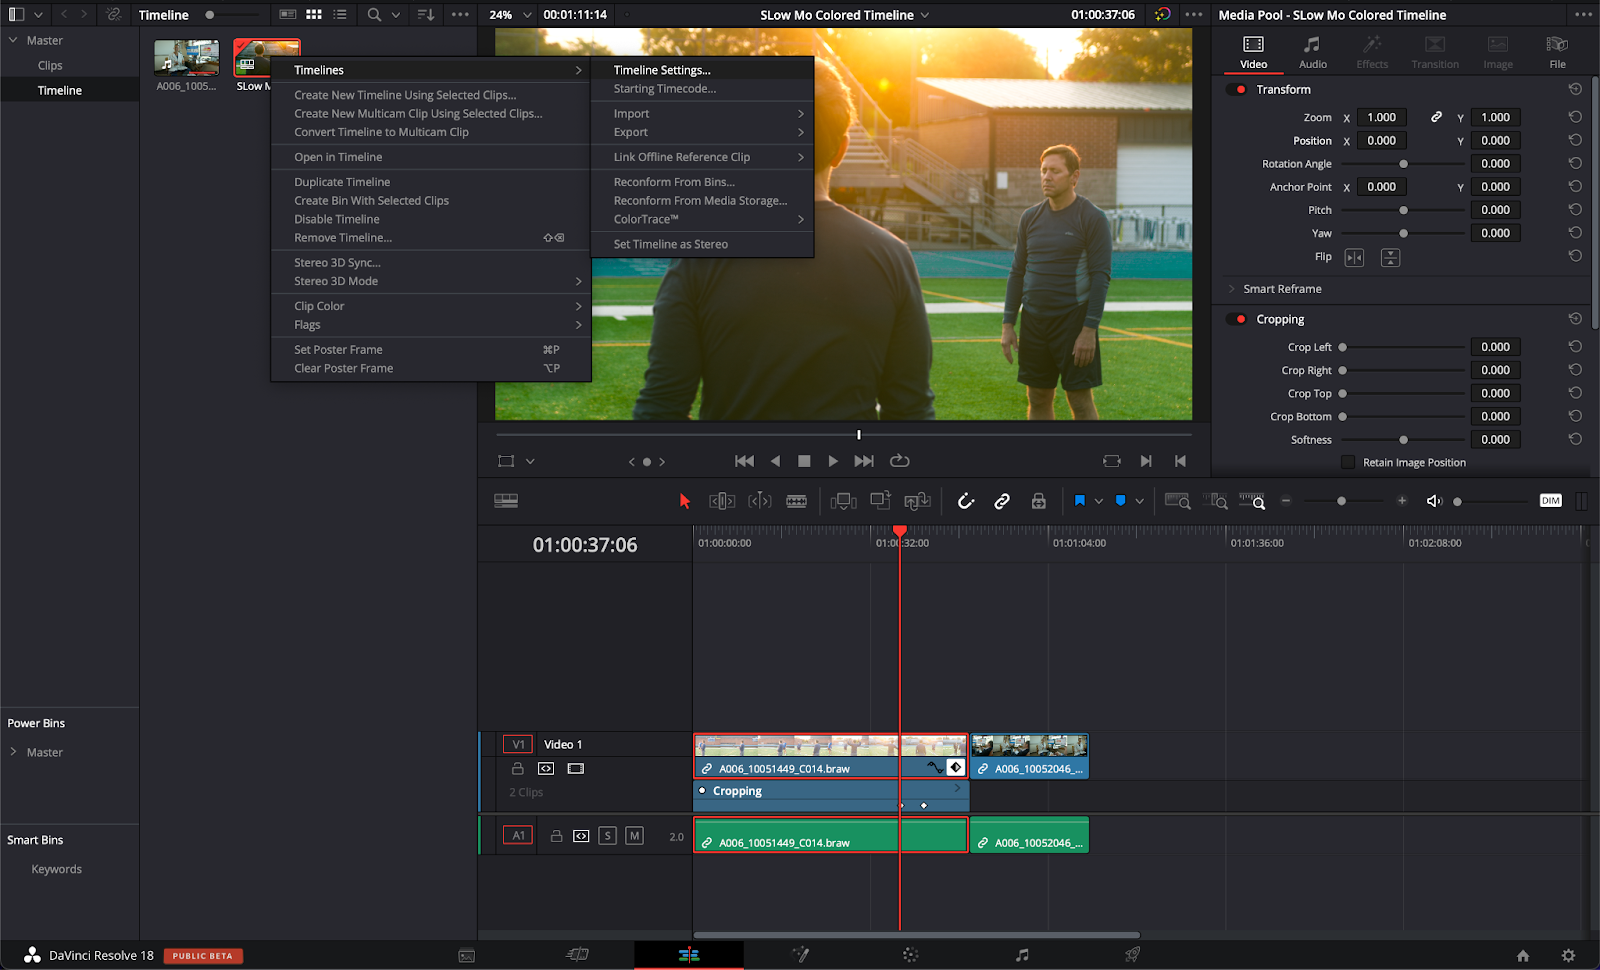
Changing Sequence Size
Sometimes changing the aspect ratio of your sequence is required in certain circumstances. This can be done by right-clicking on your timeline and clicking timeline settings. A pop-up window will appear where you can change the horizontal and vertical pixels of your sequence.
Conclusion
Strategic cropping in apps such as DaVinci Resolve is a simple yet effective way to add production value to your content. It’s tips such as these that can really elevate your content to the next level and make it stand out.
Another way to streamline your video editing workflow is to use powerful extensions and plugins. With Simon Says, you can rapidly transcribe and caption Resolve video content in 100 different languages, all directly within the platform.