

How to edit videos in a team
Transitioning from solo video editor to a fully-fledged editing team can be exhilarating. You can leverage specialized talent - like VFX artists, colorists, and sound designers - share the workload to meet deadlines, and improve the overall finished project through creative collaboration.
But it's not exactly a straightforward task. From sharing files to sharing notes, there's a lot to consider when establishing a smooth post-production workflow. In this guide, we'll show you how to prepare your video project and edit effectively as a team.
Finding the right shared storage solution
The first hurdle of any video editing team is figuring out how to properly store and share media files. You need a way to securely handle large video files, without slowing down your team's workflow. Many editors are also working remotely from home now, which adds another layer of complexity.
With that in mind, let's have a look at some options.
Cloud storage
Mainstream cloud solutions like Dropbox, Google Drive, Box, Microsoft OneDrive, can be a simple and cost-effective option for smaller team editing projects.
Editors could be working in completely different parts of the world but can all access the same files within the cloud. Teams using Adobe Creative Cloud can also leverage Adobe's cloud storage as well as Adobe Teams to stay in sync.
Cloud storage's only drawback is that upload/download speeds can become impractical, especially for large 4K or 8K video files.
Network-attached storage (NAS)
NAS is one of the most popular storage solutions for professional small to medium-size video editing teams.
You may have heard of QNAP or Synology? Both are devices containing multiple hard drives (typically in a RAID array) that multiple editors can connect to via a Thunderbolt or Ethernet cable for in-studio editing.
You can also configure NAS so that the team can access it remotely and securely via the internet. However, you can usually only hook up a handful of editors using NAS before performance starts to take a hit.
Storage area networks (SAN)
Not to be confused with NAS, SAN is a network of storage devices connected by a combination of Fibre Channels and Ethernet. This is a pricey, high-performance, high-maintenance solution that's better suited for larger enterprise teams.
Similar to NAS, editors can access SAN remotely from home via internet connection and VPN. Some popular SAN providers include Avid Nexis, Facilis, Studio Network Solutions EVO, and ProMax.
Editing videos faster with proxies
Even with a robust shared storage solution, it may not be feasible for your team to work directly with raw footage due to large file sizes.
This is especially true if the team is working remotely, where their home equipment may not be as powerful as the studio. The solution? You can use a proxy editing workflow, also known as 'offline editing’.
Proxy editing involves converting raw footage into a lower-resolution codec, so that files are much more compressed and faster to work with. This should be done at the start of the post-production process, before color grading begins.
Once the edit is done, you can relink the media files back to the original camera files for the colorist. Most non-linear editing (NLE) software, including Final Cut Pro X, Premiere Pro, Avid Media Composer, and DaVinci Resolve makes switching between files a cinch.
Getting in sync with your editing team
The bin locking system
Your video team should always have a bin locking system in place, no matter what storage solution you go for.
Bin locking requires the project to be broken down into smaller sequences and assigned to a team member. This allows editors to lock their sequence in the shared storage and prevent any accidental overwrites.
Both Avid and Adobe have in-built ‘bin locking’ mechanisms that signal to the team when an editor is working on a specific sequence. However, any team, in any editing software, can use this system by simply renaming files with an editor's name.
File naming and structuring
This brings us to another important step for seamless video editing collaboration: file naming and structuring conventions.
It's not the most exciting thing in the world, sure. But no one wants to trudge through hundreds of files or spend hours fixing missing media links. So always take time to set up a standardized naming and file structure system for your team to use.
Creating assembly edits
Once rushes are uploaded to your shared storage, the next step is creating a rough cut version of the project - otherwise known as an assembly edit.
This is useful as a solo editor, but it's especially valuable for teams editing in real-time. It ensures that everyone in the team, including key stakeholders, such as producers or clients, are all on the same page. It also prevents your team getting stuck in those dreaded, infinite feedback loops later down the line. Lastly, it's a great way to seamlessly assign tasks and initiate the bin locking system mentioned above.
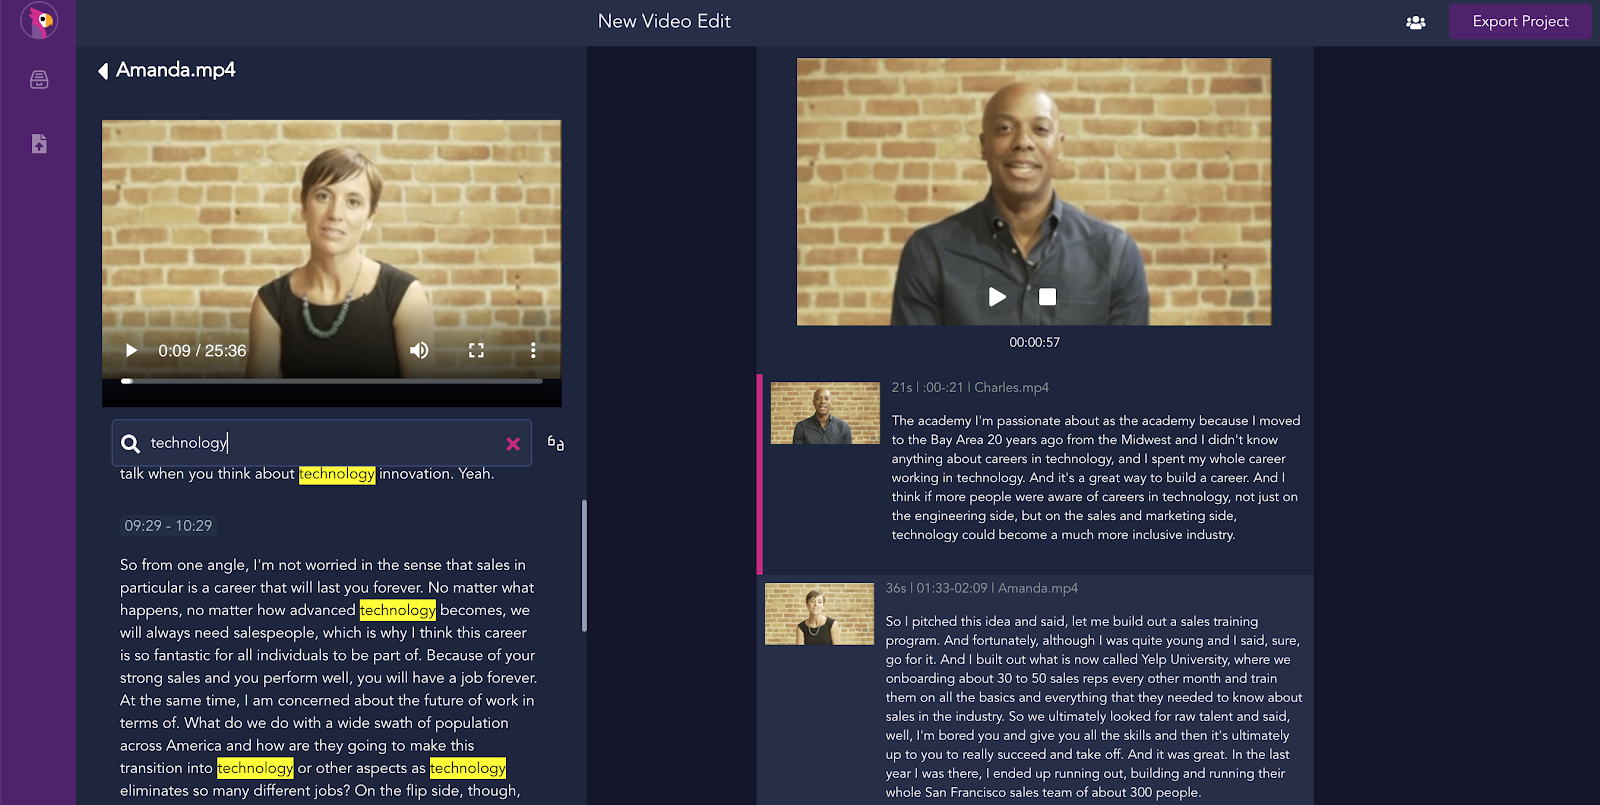
Creating an assembly edit doesn't have to be a time-consuming task. The fastest and most efficient way to produce assembly edits is with Simon Says text-based video editor which is facilitated by its AI transcription.
All you need to do is upload your recordings and footage and Simon Says will automatically generate time-coded transcripts. From there, you can construct and trim your edit by simply highlighting and rearranging soundbites from the transcript.
For easy collaboration between editors and producers, you can also invite team members to make comments and assemble the edit together. You can even add emojis to specific sections of the edit to visually communicate thoughts and ideas. Once the team is happy with the assembly edit, simply export to your preferred NLE software — Adobe Premiere Pro, FCPX, DaVinci Resolve, Avid Media Composer, and so on. For a detailed, step-by-step guide, have a read of this.
Video editing with metadata and transcripts
The assembly edit should already put your team in a great place to collaborate and produce their best work. But metadata and transcripts help boost team communication and efficiency even further.
Metadata
Metadata, such as markers and keywords, are bits of information associated with media clips and sequences. They can be used to streamline your team's editing workflow and communicate without relying too heavily on emails, phone calls, or instant messages.
You can use metadata to:
- Tag and organize clips for quick and easy identification
- Leave editing notes and tasks for the team.
Transcripts
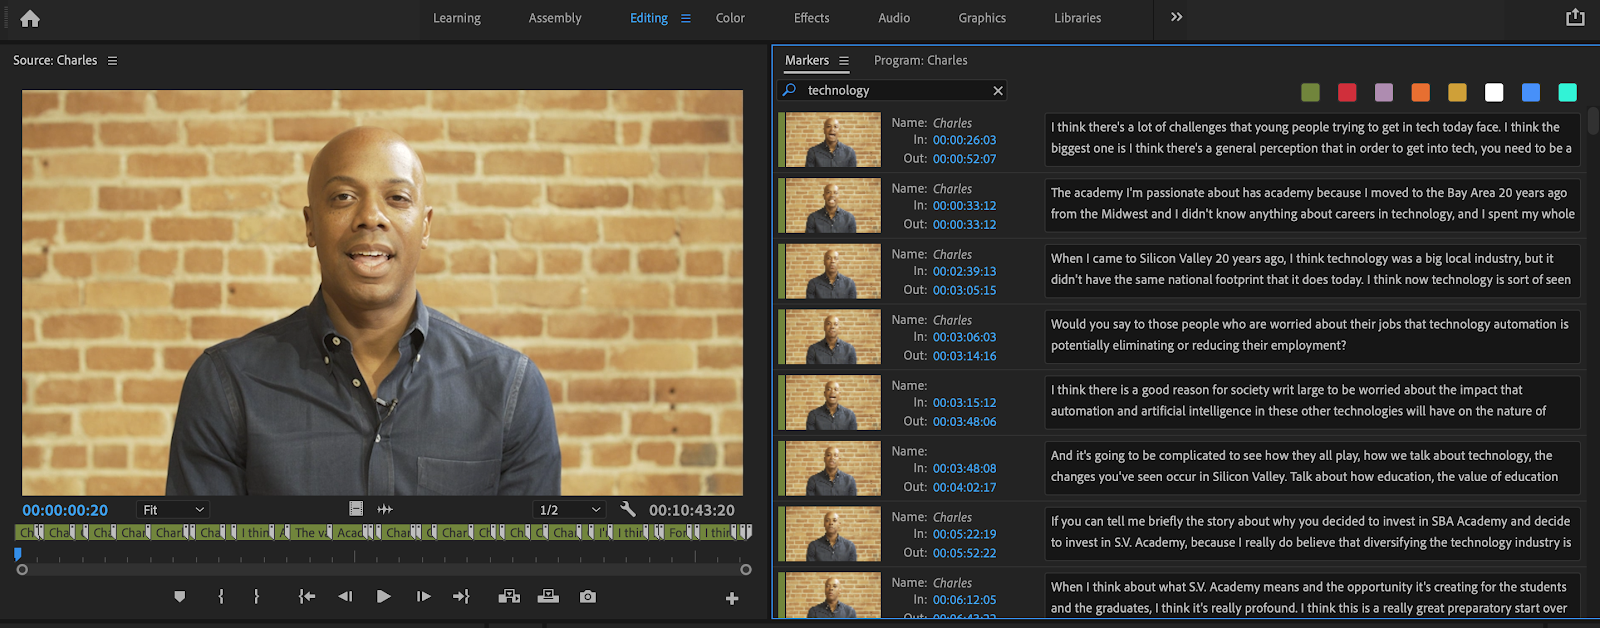
Transcribing media clips makes team editing a hundred times easier. Transcripts can be imported to your NLE software as metadata, empowering everyone to locate clips and soundbites at lightning speed.
Producing transcripts is quick and easy with the right software. Simon Says can auto-generate time-coded transcripts and format them for your preferred editing tool in minutes. Find your transcription workflow here.
Reviewing rough and final edits
Finally, we have the review and approval process.
In most cases, producers and clients will give their feedback remotely. Rather than trying to decipher long email chains, you can use a web-based solution like Framer or Motion Array to share time-coded notes with multiple people at the same time.
Both Framer and Motion Array also have iOS and Android apps, so busy producers and clients can preview edits on-the-go.
Ready to upgrade your team's editing approach?
Today, video editing in a team isn't just possible thanks to new technology like Simon Says - it's way more effective, as well. From shared storage solutions to A.I.-generated assembly edits and transcripts, you can be confident that your team will be producing great work.


