Guide to Color Correction in Final Cut Pro
Color is not only an integral part of how we see the world but how we see film and video as well. Different colors can convey a certain feeling or can draw the audience’s attention to a specific point on the screen.
The introduction of NLEs has helped to simplify video editing techniques that were once incredibly complicated. Color used to be based entirely on the lighting and film stock during production. Now, color correction and color grading can be done entirely within your video editing software of choice in post-production.
While programs such as Adobe Premiere Pro and DaVinci Resolve offer incredible color grading options, no program is quite as popular for video editors as Apple’s Final Cut Pro X.
Final Cut Pro offers a wonderful array of features for colorists and dynamic syncing with a slew of different amazing color grading presets. This step-by-step Final Cut Pro tutorial will go over coloring for video production inside the software, perfect for those looking to up their coloring workflow.
Note: With Simon Says, you can simplify your workflow even more with native subtitles and captions for 100 languages in Final Cut Pro.
Color correction in Final Cut Pro
The Color Inspector in Final Cut Pro is where you’ll find all of your color grading and color correction tools. These color grading tools can also be accessed by going to Window > Workspaces > Color and Effects to view all of your color settings.
The Color Inspector is located on the right-hand side of the screen and contains a few different submenus (Color Board, Color Wheels, Color Curves, and Hue/Saturation Curves).
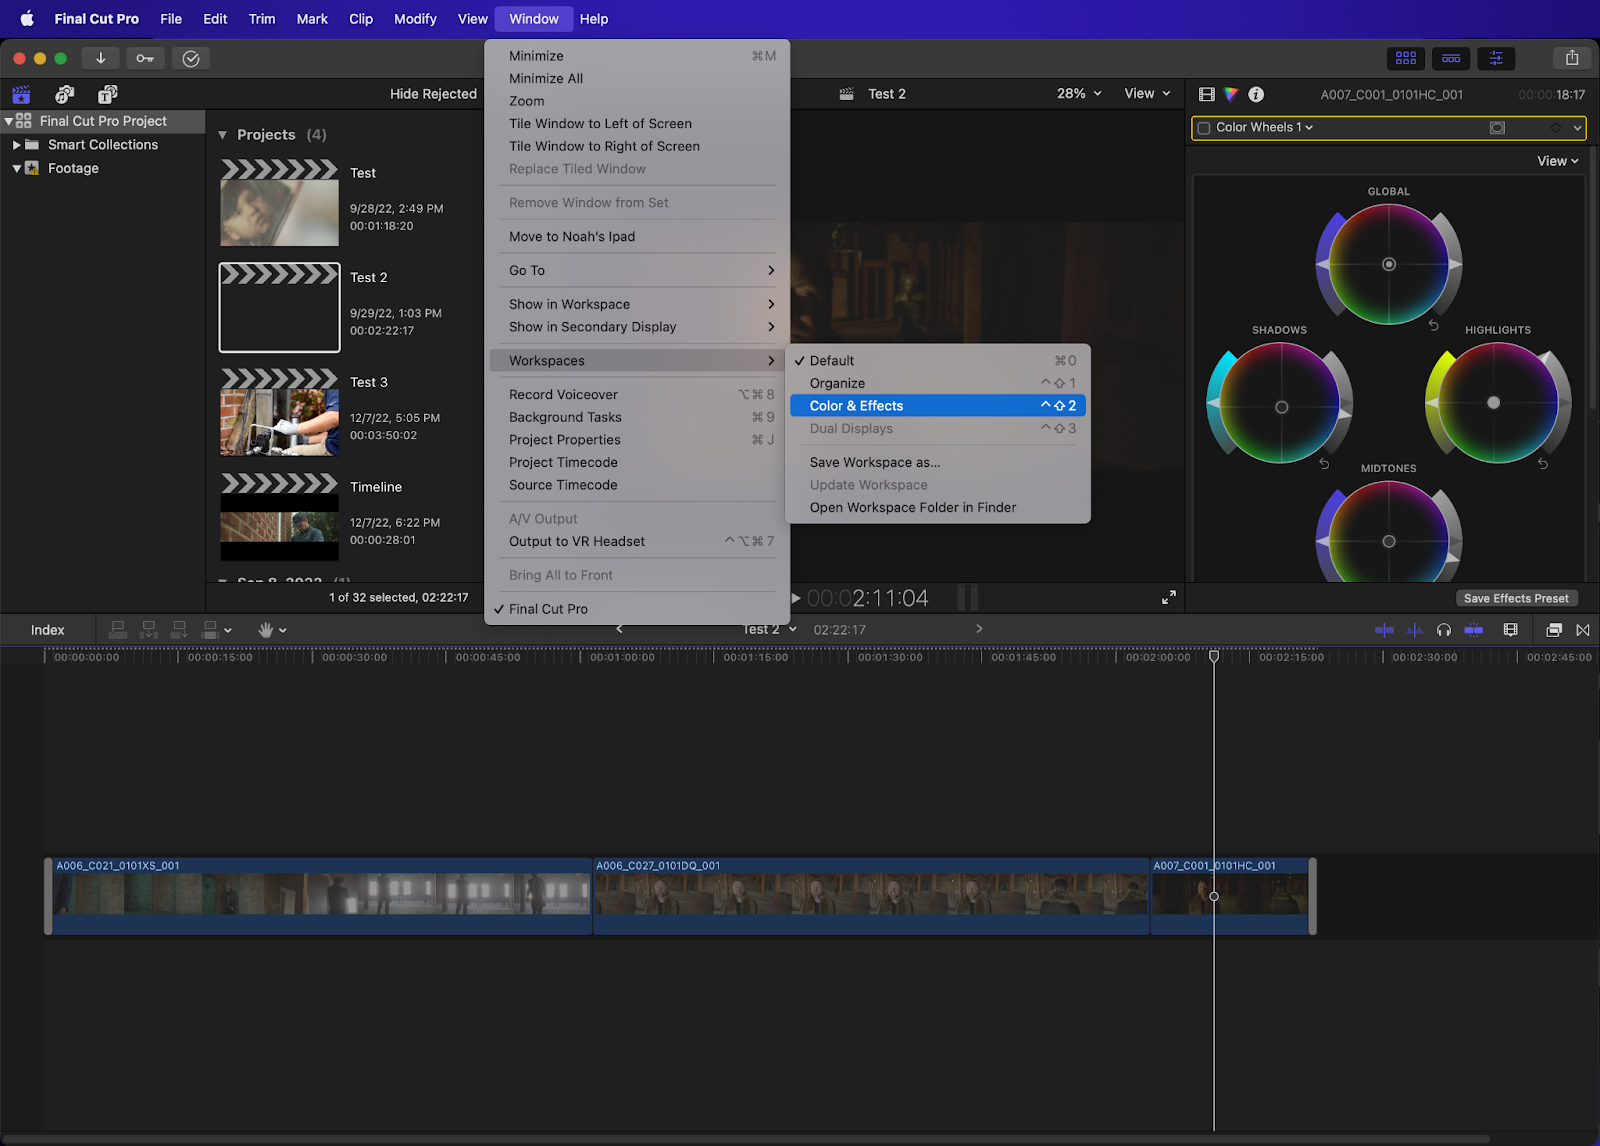
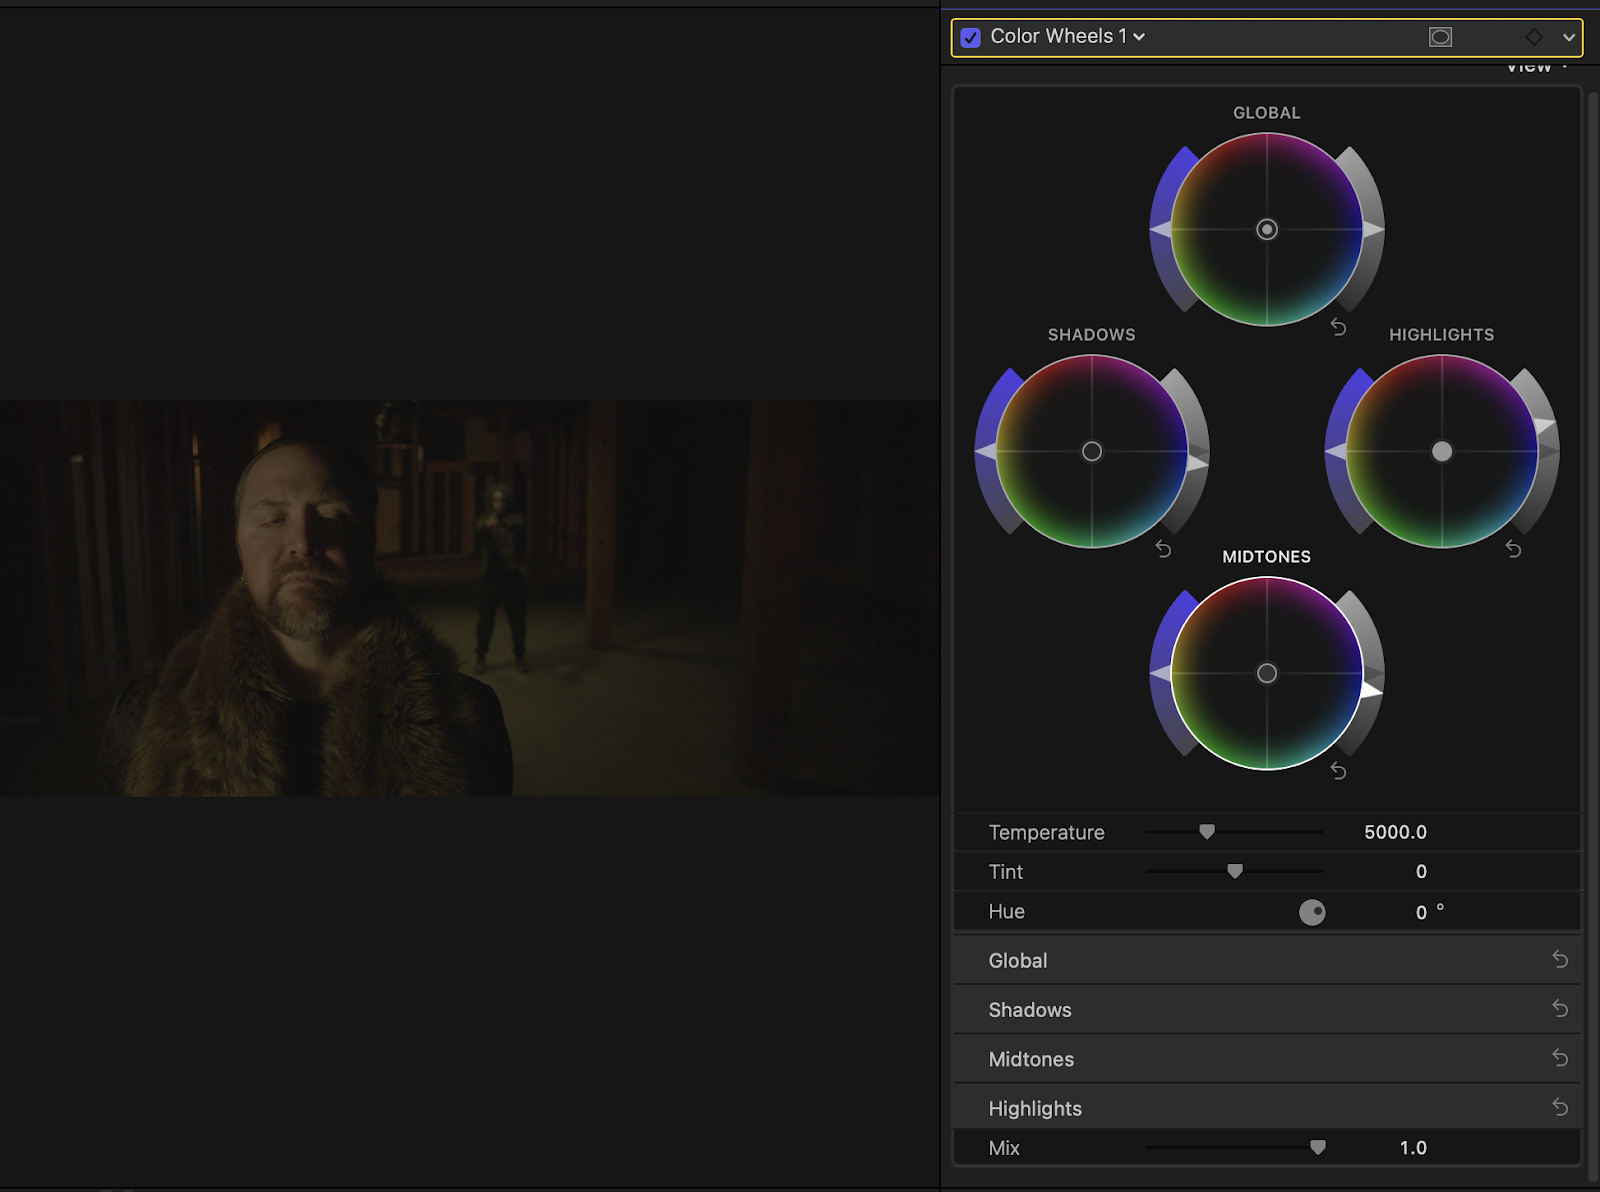
Color Wheels
Color Wheels are one of the most universal ways to color your image. The Highlight Wheel adjusts the intensity of your highlights, the Shadow Wheel will adjust the intensity of your shadows, and the Midtone Wheel will adjust the intensity of your mid-tones (which is pretty much everything in between your highlights and shadows).
There are also options for temperature (perfect for adjusting white balance), tint, and hue in the color wheel panel. You can also adjust the color, saturation, and brightness of your footage from here.
Color Board
The color board lets you change the color, saturation, and exposure of your clip’s highlights, mid-tones, and shadows. The color board is pretty unique to Final Cut and is adjusted by moving around a series of circles on a board at the top of the screen.

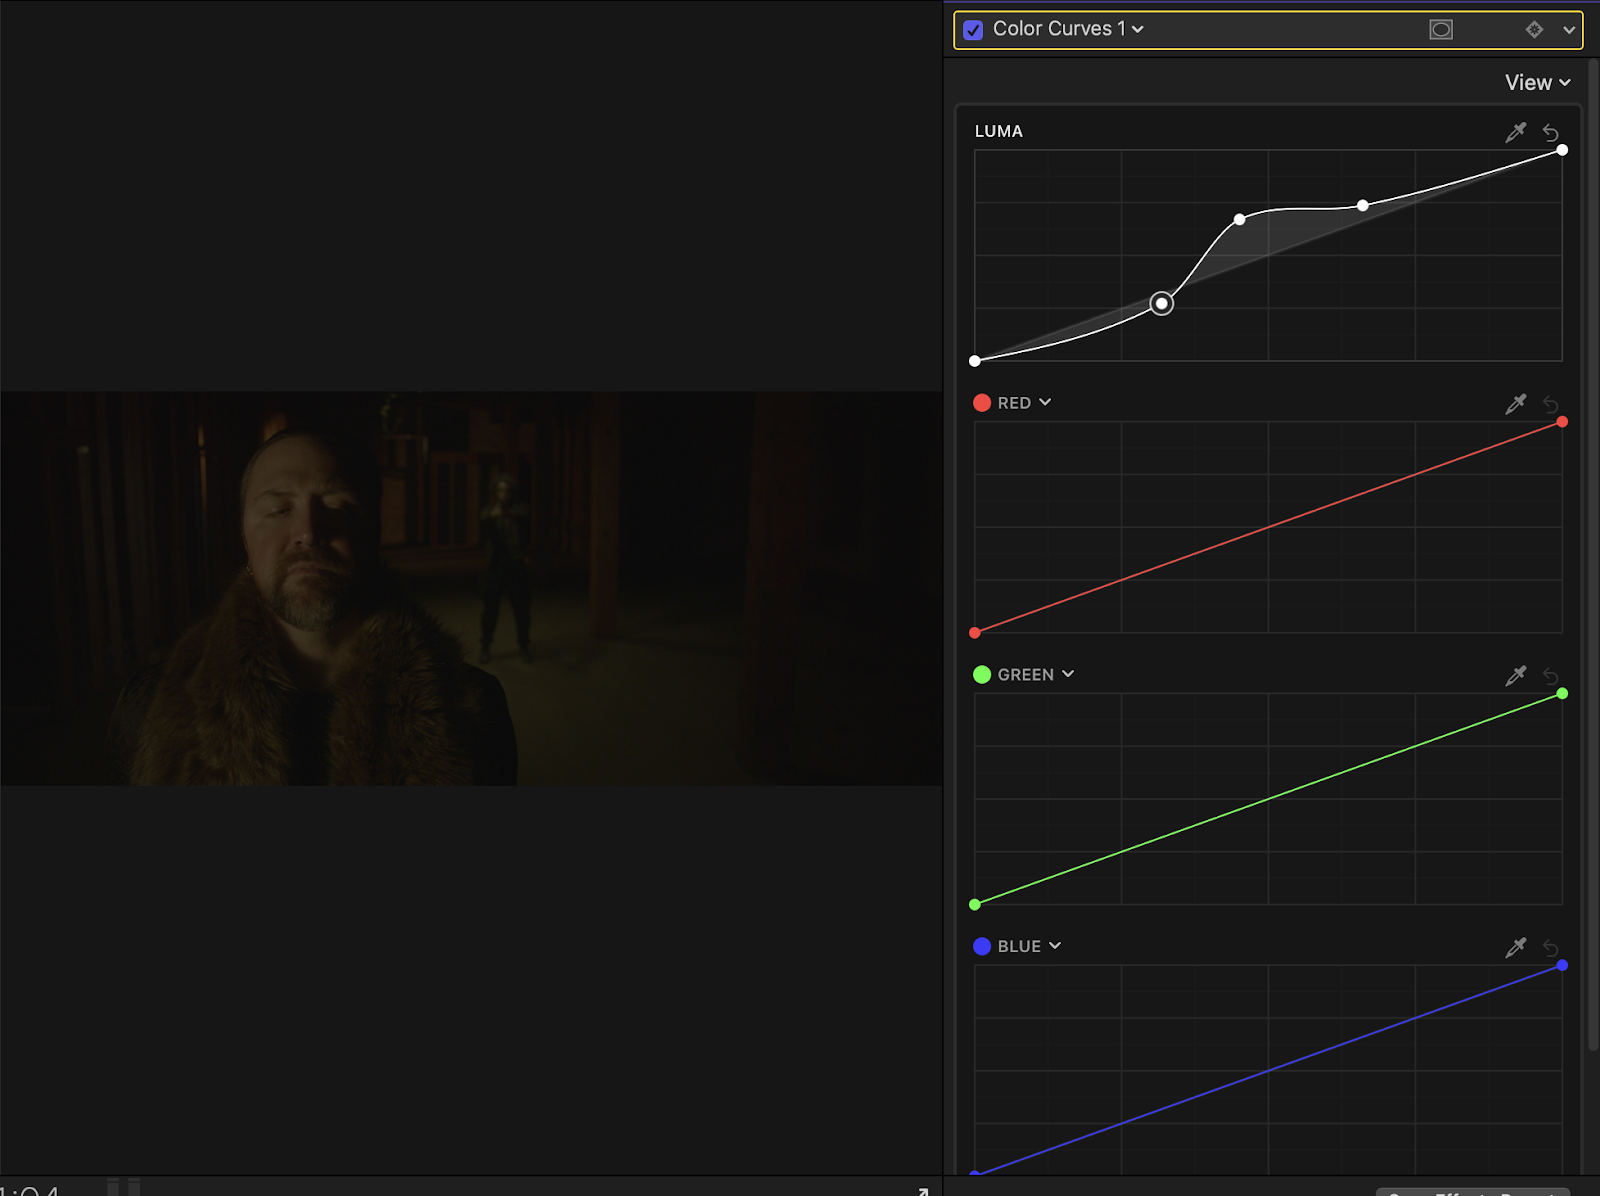
Color Curves
Curves give you much more control over a lot of the features covered under Wheels and Board. For example, the RGB Curve is used to adjust the contrast of your image. A simple “S curve” will boost the highlights and darken the shadows. You can create a curve by clicking on the line in the middle of the color graph.
A dot will form that you can drag around. Selecting a dot and clicking delete on your keyboard will reset everything back to normal.
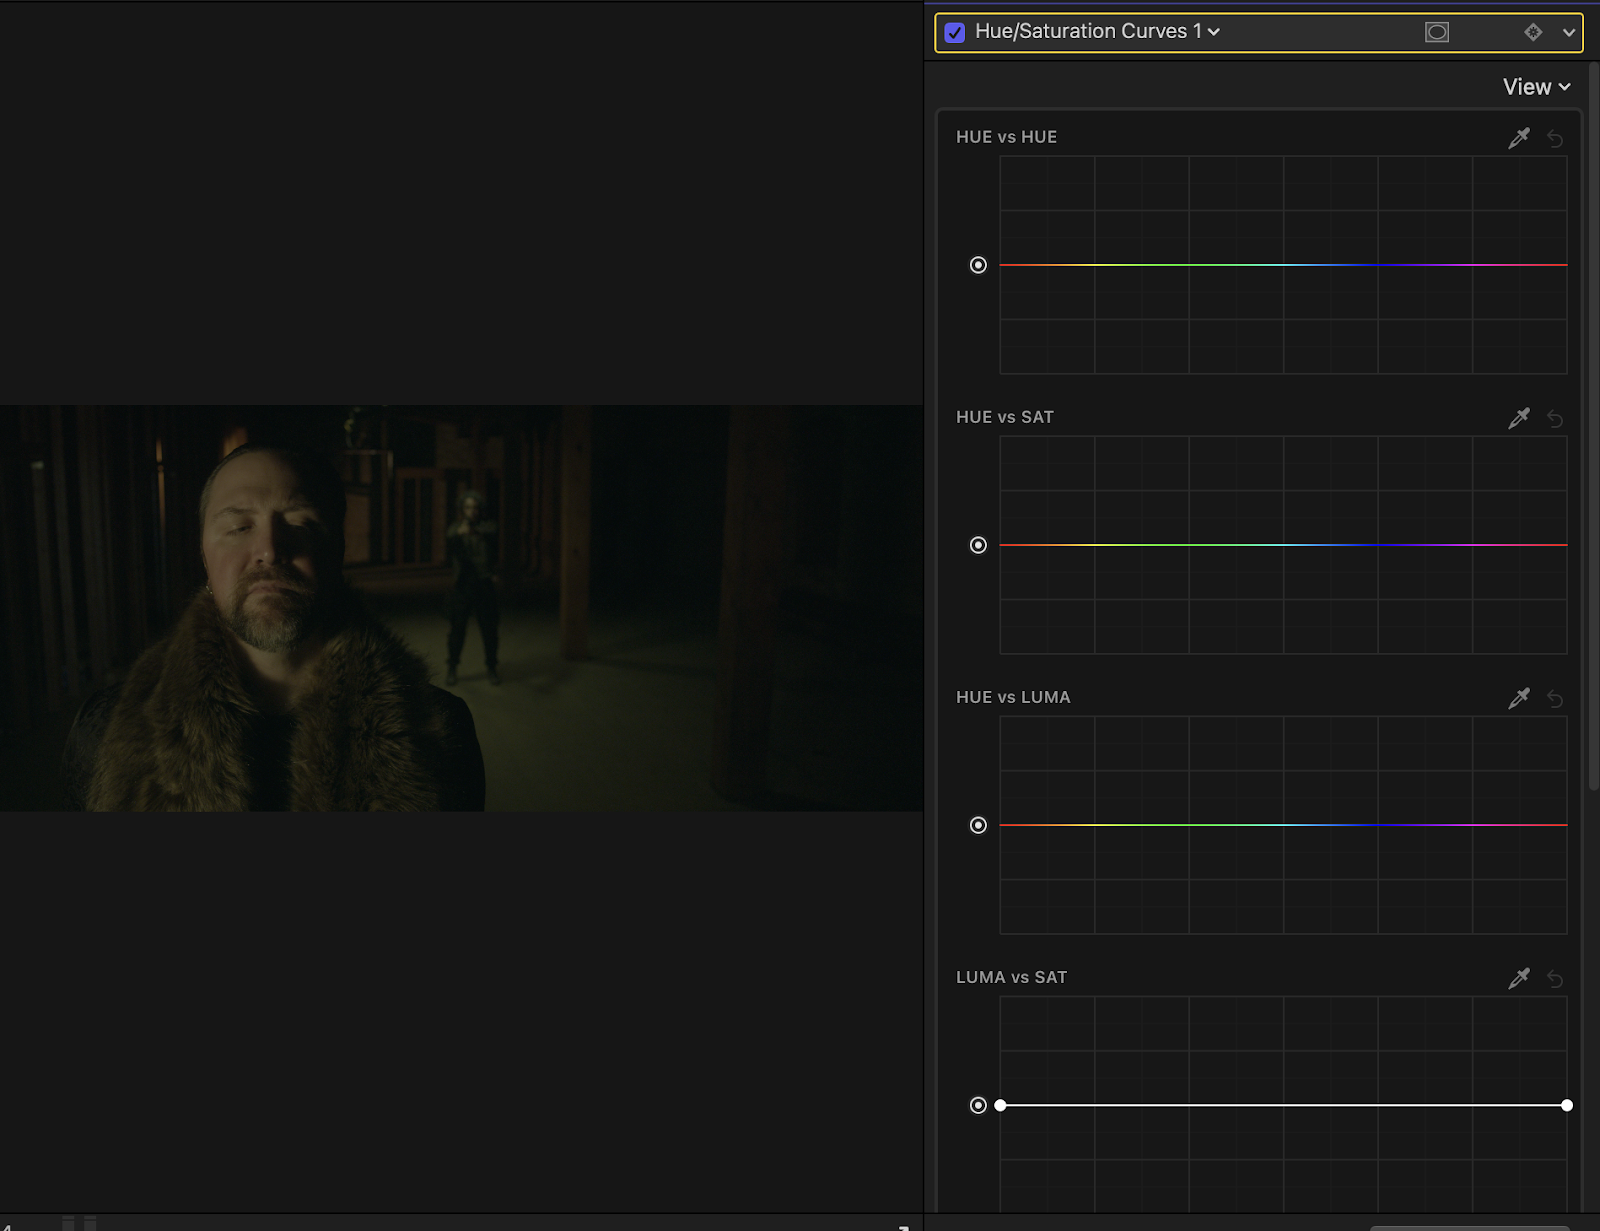
Hue/Saturation Curves
The Hue/Saturation Curves give you control over the saturation and hue of your image by using a graph.
- Hue vs Hue: What this does is allows you to select a certain color and change it to another color. This is super handy for stylistic content (such as music videos or social media clips).
- Hue vs Sat: This isolates a particular color range and allows for it to be more or less intense.
- Hue vs Luma: This will change the brightness of certain areas depending on the range that you choose.
- Luma vs Sat: What this curve does is let you change the brightness of a spot based on the saturation.
- Sat vs Sat: This changes the saturation of certain colors of the image which can be incredibly handy if a background color is too prominent or not prominent enough.
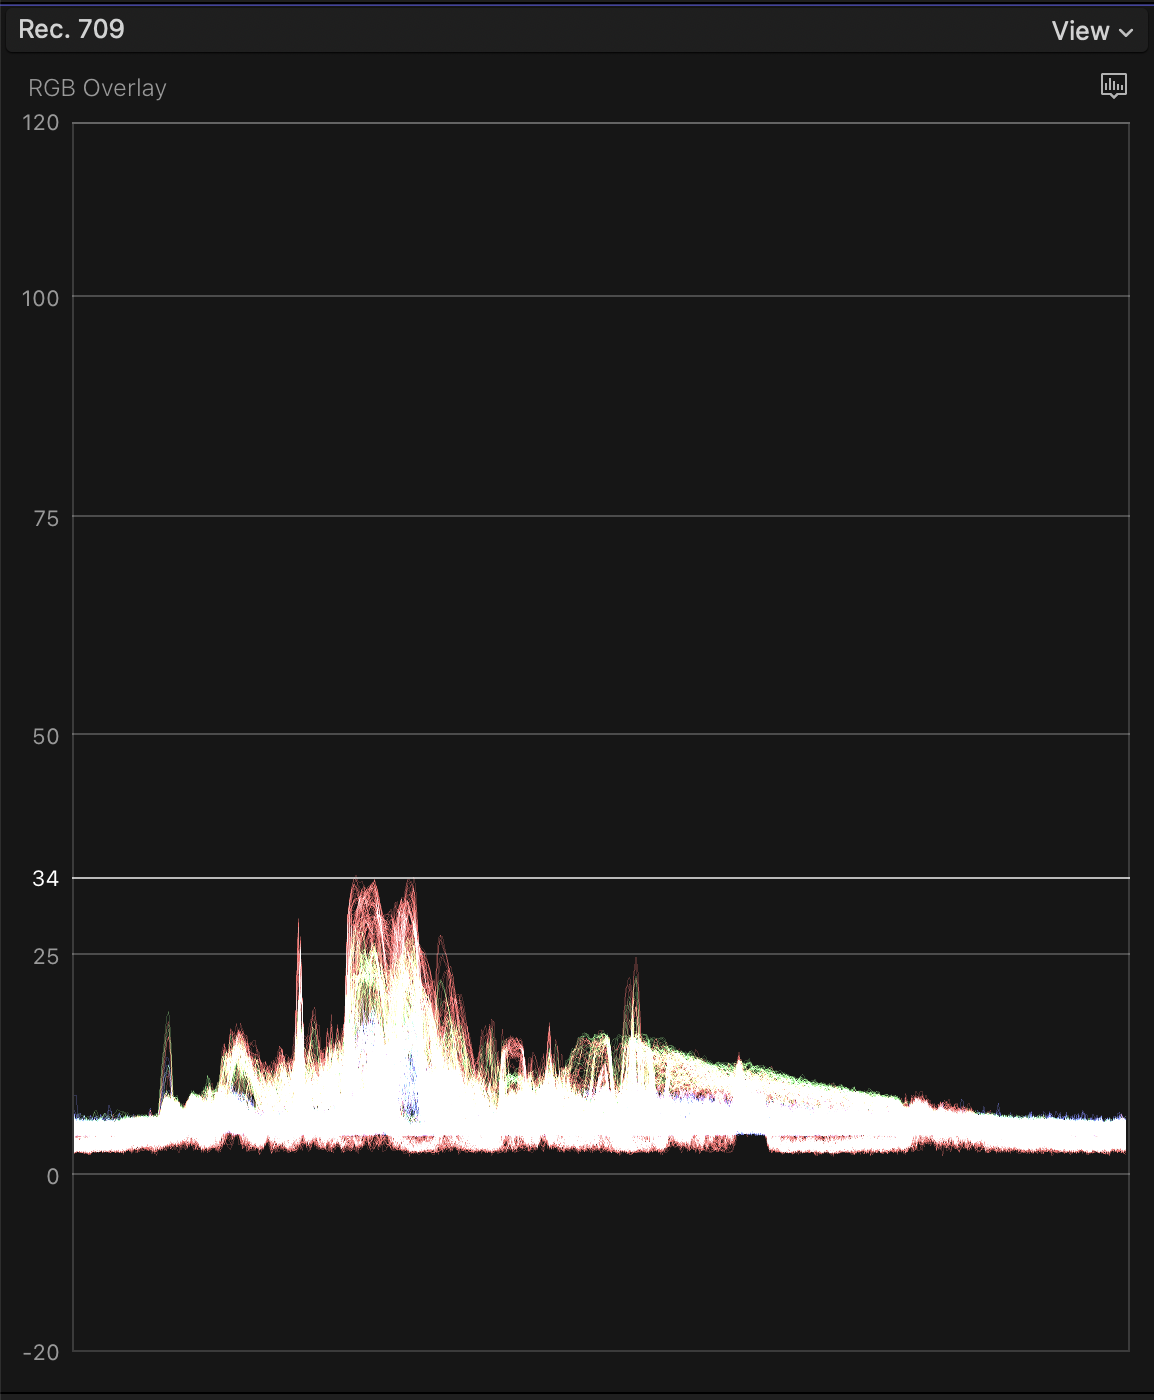
The Scopes Library
The Video Scopes panel is located on the left-hand side of Final Cut in the color workspace and can be used as a reference to see how over or underexposed your image is as well. It can also be accessed by clicking on ⌘7 on the keyboard. There are so many reasons to be using scopes while coloring.
Our eyes can only do so much and are far from accurate when viewing colors. Your monitor also may not be entirely accurate, requiring you to rely on scopes for complete color accuracy. Right-clicking on the Scopes panel will let you display a few different kinds.
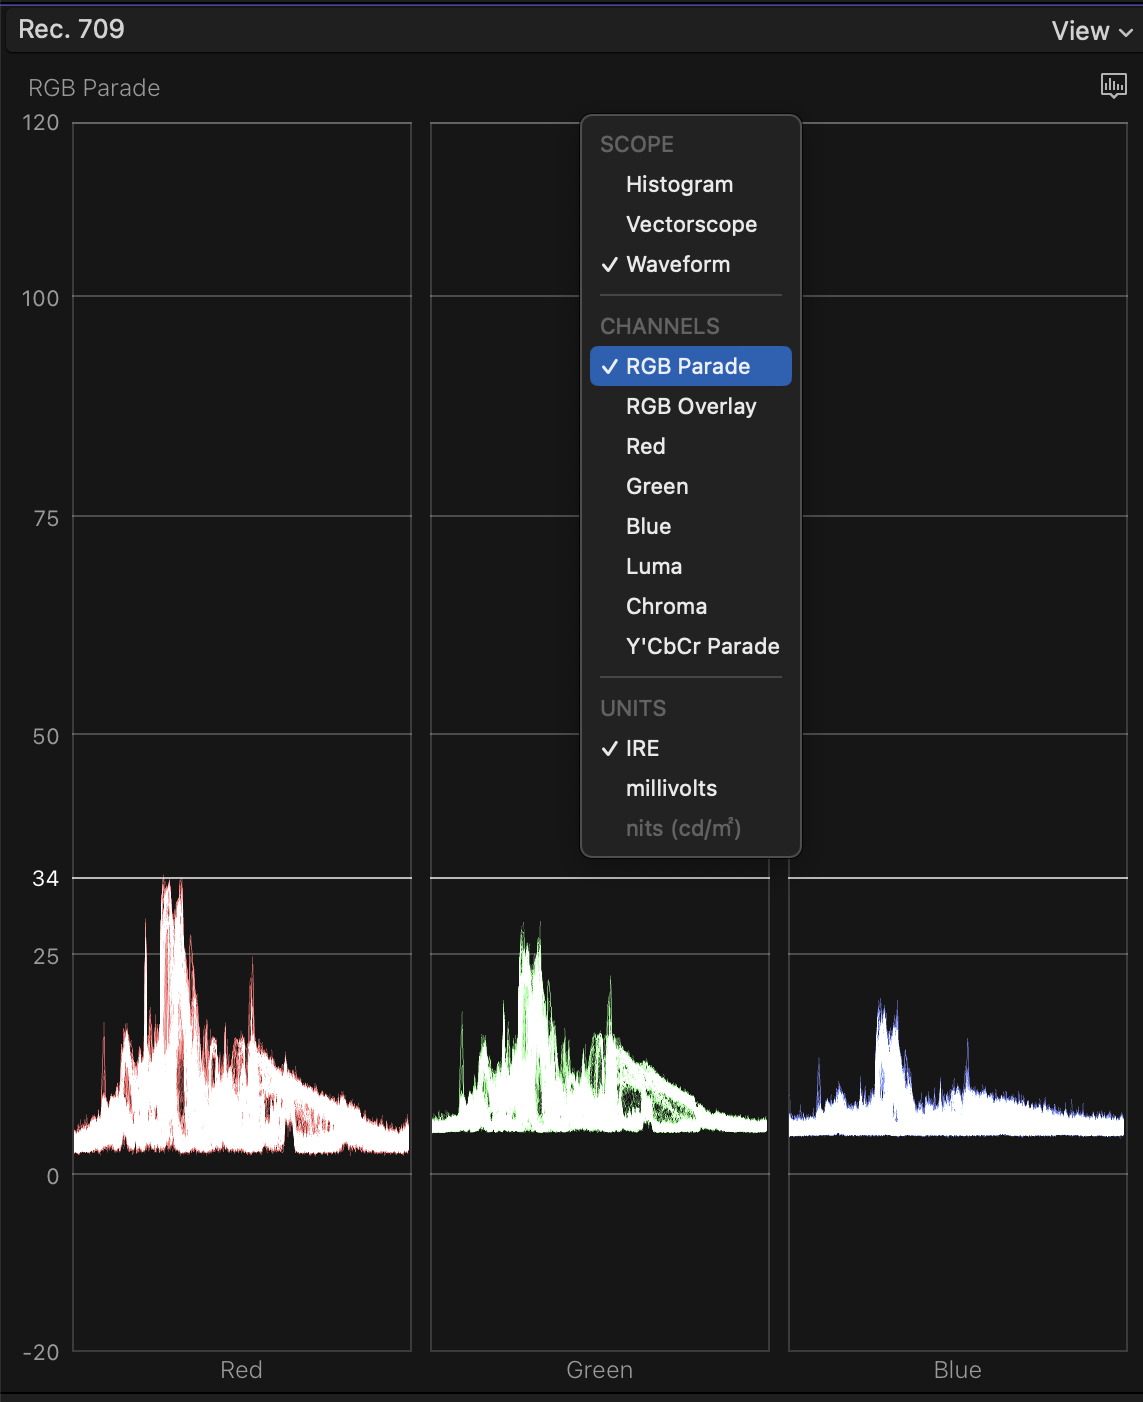
Waveform Monitor
The Waveform scope is the default scope and asses the brightness of your image as well as specific colors using an IRE scale that ranges from 0-100.
Waveform Parade
The parade splits your image up into RGB values. What the parade does is measure the saturation of each of these colors in your image.
Vectorscope
A vectorscope is incredibly handy for measuring the degree of hue and saturation in an image. The further the markings are from the center, the more saturated your image and colors are. There’s also a line indicating where your skin tones should be. Skin tones can often shift green or blue depending on your camera, so it’s good to have this indicator to make changes in post-production.

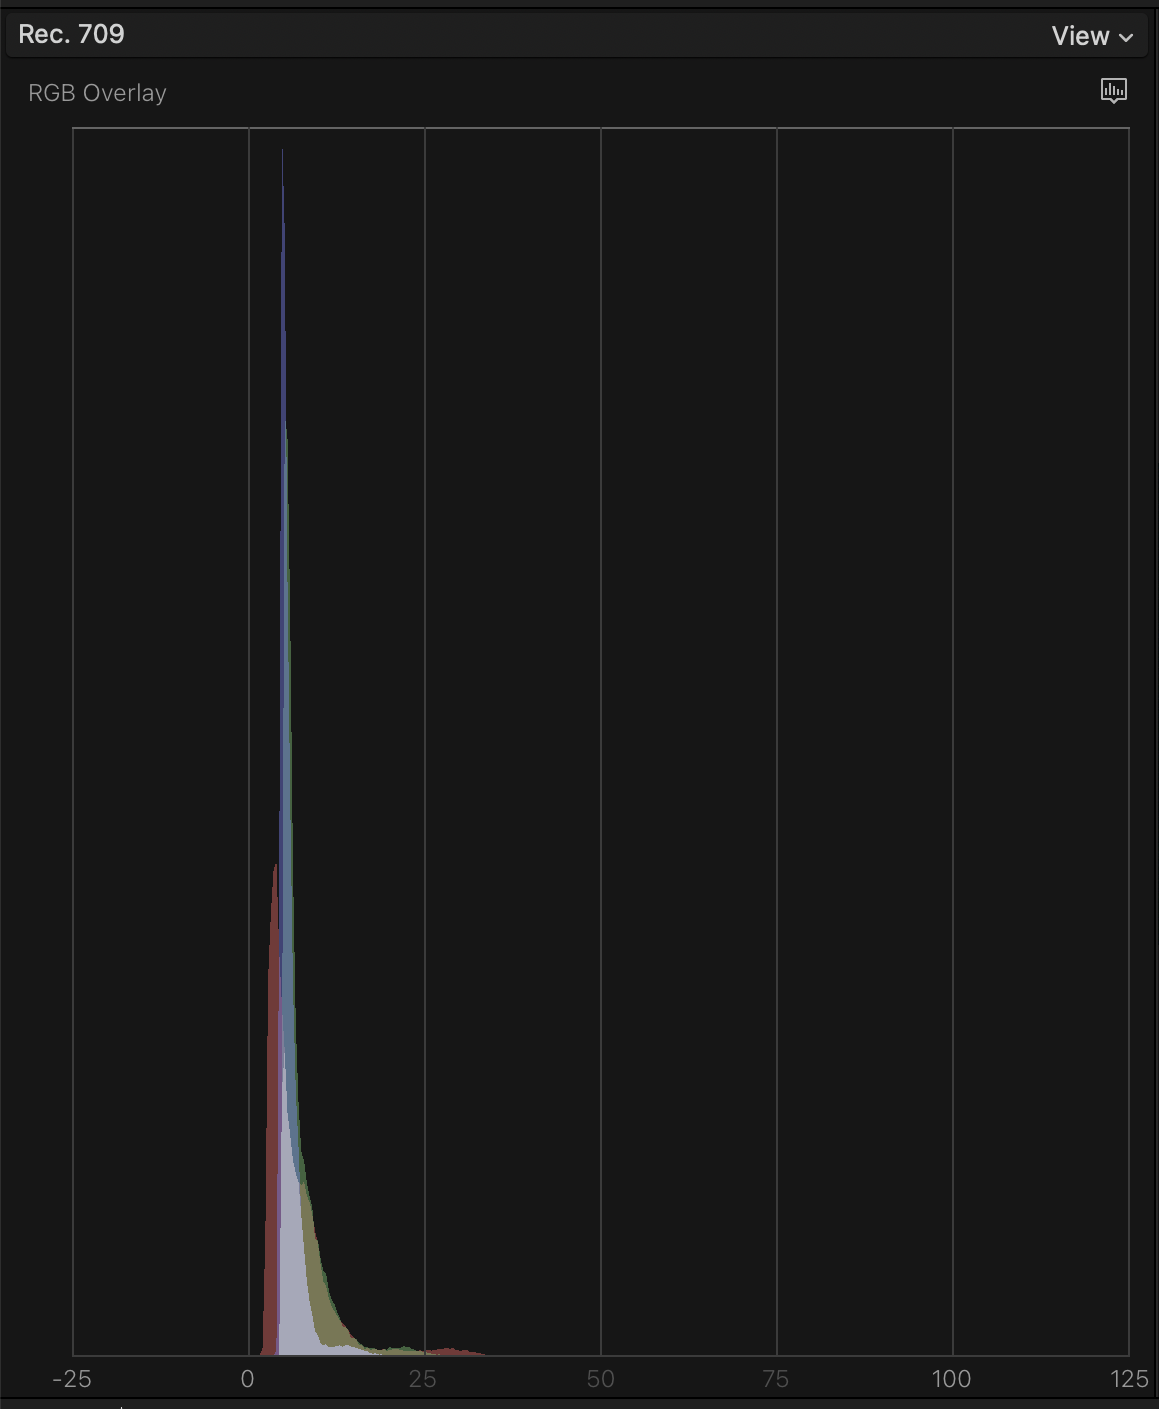
Histogram
A histogram is a graph that measures the brightness of an image by representing the frequency of each tone as a value on a bar chart. Your histogram running off towards either hand indicates that either your highlights or shadows are being clipped. A histogram is most important when filming and is a great tool to have while on set.
Helpful color grading presets
While Final Cut Pro doesn’t have the most robust color grading options on the market, there are a slew of great video color grading presets you can utilize to make your videos more cinematic. Why use color grading presets?
Well, presets can be handy for a wide range of reasons. They can be used as LUTS for filmmakers and content creators to easily obtain a certain look across all of their video clips. There are plenty of Hollywood productions you can mimic the look of through the use of color grading presets.
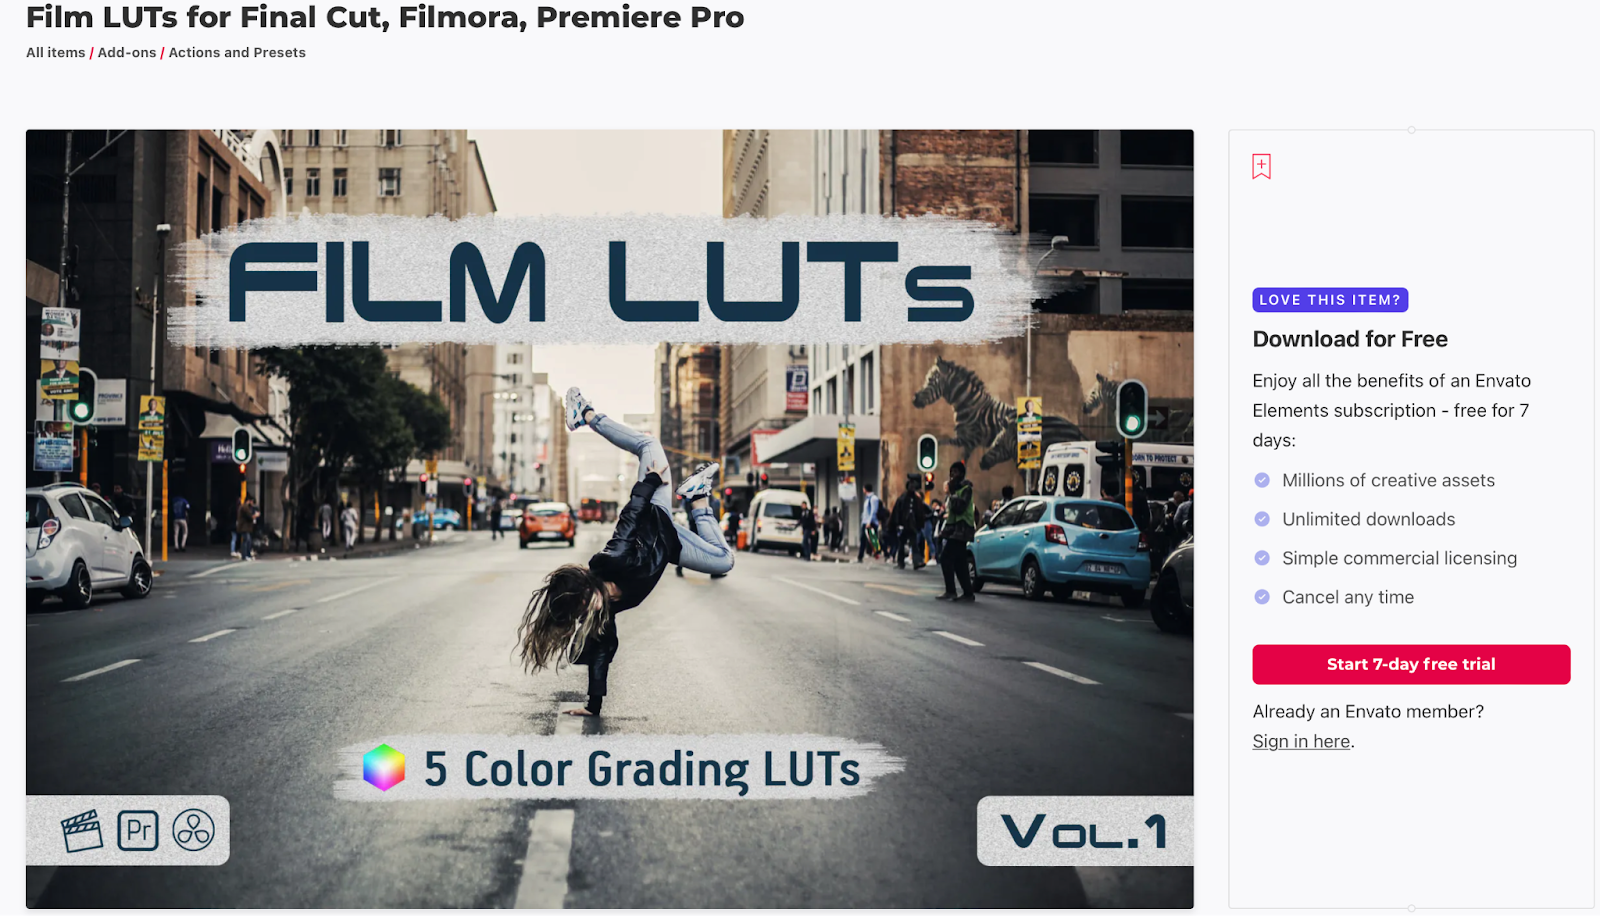
1. Film LUTs for Final Cut, Filmora, Premiere Pro
This LUT pack gives a “cinematic, contrasty and punchy look” that’ll make your video content pop and look incredibly intense. This pack contains 5 .cube files (LUTs) and a PDF File with Simple Instructions.
2. Color Finale 2
Color Finale 2 is one of the best color extensions for Final Cut Pro for those who want DaVinci Resolve functionality inside of fcpx. It’s “the fastest color grading software for Final Cut Pro”, providing advanced color wheels. It also has “a simple interface, efficient workflow, real-time processing, and semi-automated functionality that make color grading on Color Finale 2 incredibly fast”.

3. CinemaGrade
CinemaGrade advertises itself as “the easiest most powerful way for filmmakers to set their films apart without struggling with complicated grading buttons & functions and get the cinematic look”. CinemaGrade is one of the best ways to reduce the “muddy” look you sometimes get while trying to color your video. The grading process can often be very confusing and complex which is something CinemaGrade tries to mitigate.
4. Lutify Me
Lutify Me is wonderful for those who plan on utilizing a ton of LUTS in their content creation process. Lutify Me lets you create your own LUTS as well as use templates. This extension organizes everything and makes LUTS simple and easy to use.
5. Red Giant Universe
Red Giant Universe doesn’t just have a slew of amazing LUTS and color-grading tools, it also gives users access to plenty of incredible effects and overlays.

Conclusion
Final Cut Pro is one of the best video editing tools for amateurs and professionals alike. Its easy-to-use and snappy interface makes it great for those starting out, while its lightning-fast export times are wonderful for content creators who have content they need to get out on a tight deadline. It’s no wonder that Final Cut has been a mainstay editing app in the industry for over twenty years.
Too fast doesn’t exist in the editing world though, and editors are always looking for ways to speed up their process. More of the mundane and tedious things such as subtitles can be gotten out of the way with 3rd party extensions and templates.
With Simon Says you can swiftly add captions to your videos in Final Cut Pro without having to rely on the platform’s slow, manual built-in functions.